
The much-awaited Apple Pay Cash has been finally made available for iOS devices running iOS 11.2 or later. Apple Pay Cash which is also known as “Peer-to-Peer” money transfer lets you send and receive money via iMessage. To get started, you need to first of all setup Apple Pay cash on your iPhone.
With Apple’s P2P money transfer, you can send as much as $3,000 at once. If you use a debit card which has been registered in your Apple Wallet, you will not be charged a cent for the transaction.
How to Use Apple Pay Cash on iPhone
Things You Need To Know Before Using Apple Pay Cash
- The transaction is free if you use Apple Pay Cash with a debit card.
- However, if you use a credit card for a transaction, you will be charged a standard 3% credit card on the transaction of the amount you sent.
- At certain points during the transaction using Apple Pay Cash, you will be required to verify your identity. This is required for you to use the full functionality of Apple Pay Cash.
- If the amount you want to send in the transaction is up to $500, you will be asked to verify your identity.
- You can send up to $3,000 in one transaction.
- Apple Pay Cash is currently available only in the United States.
How to Set Up Apple Pay Cash on iPhone
To set up Apple Pay Cash on your iPhone, you need to, first of all, enable 2-factor authentication for Apple ID. Also, you need to have registered a debit or credit card in your Apple Wallet. This feature works only on iPhone 6 and later and it needs to be running iOS 11.2 or later. To use it on an Apple Watch, the watch needs to be running watchOS 4.2 or later. When that is set, follow the steps below to set up Apple Pay Cash on your iPhone.
- First of all, open the Settings app on your iPhone.
- Next up, tap on the “Wallet & Apple Pay” option and then toggle the swtich beside Apple Pay Cash to turn it on.
- Now, tap on “Apple Pay Cash card.”
- Tap on Continue and then agree to the terms and conditions. Your Apple Pay Cash card will be created.
- Finally, you need to connect your Apple Pay Cash card with your bank’s debit card (the debit/credit card you use with Apple Wallet). To do so, you need to scan your debit card with your iPhone’s camera.
That’s it, you have successfully enabled Apple Pay Cash on your iPhone. Next up you need to send or receive Apple Pay Cash using iMessage.
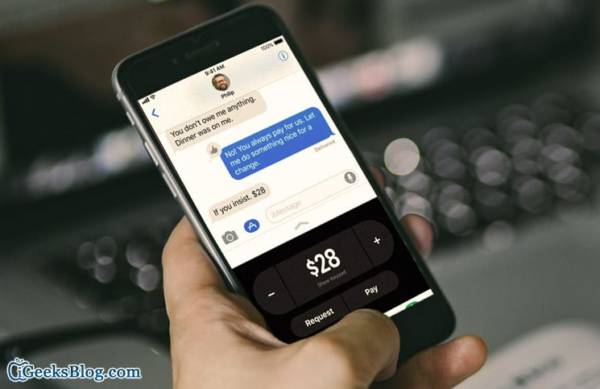
How to Send/Receive Apple Pay Cash Using iMessage
Once you are done setting up Apple Pay Cash on your iPhone, the next thing is to send and receive money using Apple Pay Cash. Proceed to this guide to learn how to send and receive money using Apple Pay Cash.
How to Transfer Apple Pay Cash to Your Bank Account
Apple lets you transfer up to $3,000 in one transaction and up to $20,000 within a seven-day period from Apple Pay Cash to your bank account. You can only transfer money from Apple Pay Cash to a bank account in the United States. Proceed to this post to learn more.
That’s it.Apple Pay Cash has made it much easier to transfer money. So whenever you are out of cash, you can easily request a few bucks from a friend on iMessage. So what do you think about Apple Pay Cash? Share your feedback in the comment section below.
