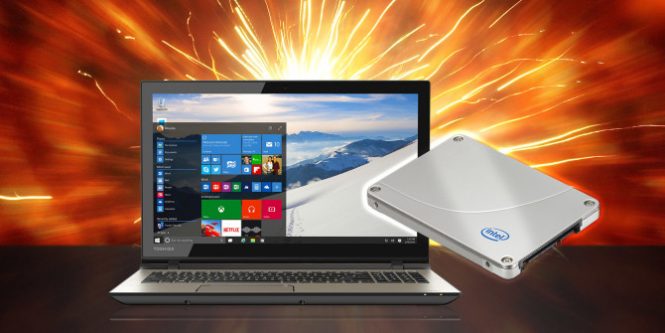
You are trying to renew your computer by installing a solid-state drive (SSD) but after installing it, you don’t want to reinstall it all over again, here’s how to transfer your data to your new hard drive. First of all, what is an SSD?
If you are still using a traditional rotating hard drive on your computer, it means that you do not yet know solid-state drives or more commonly called SSDs, what the differences and advantages of both are. Replacing a solid-state drive (SSD) is one of the best updates that can be made in terms of computer acceleration, but in reality Memory vs. SSD. RAM- which improves your PC’s performance?
Your computer will start faster, the programs will start instantly and the loading of the games will not take much time. If desired, you can reinstall the Windows installation from scratch, and start over with a new, perfectly clean system. But while it seems simpler, it is actually a nuisance. If you follow these instructions to the letter, your computer should be up and running in no time, with all your data.
You need some things before you start…
1. Prepare an SSD
Obviously, to switch to an SSD, you’ll have to… well, buy an SSD. Make sure you buy one big enough to hold all your data- if you have a 500 GB hard drive, you have to buy an SSD of equal size. In this tutorial, you will find some tips and advice for buying a Solid State Drive (SSD).
2. Then we need a USB to SATA dock
During this process, you will need both your SSD and your old hard drive connected to your computer at the same time. If you are using a laptop with only one hard drive slot, it means that you will need an external adapter, dock or enclosure capable of connecting your blank SSD to your computer via USB. (Once again, desktop users may not need it if they have space for two units inside their PC- you can install it internally along with the old hard disk.) In this tutorial, you will find some tips on how to install an SSD.
3. The software to clone the hard drive, EaseUS Todo Backup for Windows
There are many tools for cloning a disk, but when cloning a hard disk to SSD, I recommend EaseUS Todo Backup. Download the free version, enter your e-mail address and subscribe to the newsletter to get the download link, it’s worth it, you can unsubscribe later. During the installation, don’t worry about setting the default backup folder- we won’t use that function. This is all you need.
4. Back up your data (and free up space if necessary)
Before starting with the drives and formatting the partitions, it is absolutely necessary to back up the data first. A simple wrong click can result in the deletion of everything, so do not continue until you have backed up all the data.
If you are upgrading to a smaller SSD than your current hard drive, we recommend that you pay special attention. In this case, you will have to delete some files and free up space on your hard disk before cloning it. Otherwise, your data will not be cloned. In that case, I suggest you make sure you back up your data to an external hard drive before continuing, unless you need it, you can permanently delete it all. Once your data is secure, continue with the next step.
5. Connect and initialize your SSD
Connect your SSD to the SATA-USB adapter, then connect it to the computer. If it’s a brand new drive, you probably won’t see the drive appear in Windows Explorer, but don’t worry; it just needs to be initialized first.
- Open the Start menu and type “partitions” in the search box.
- Click on the “Create and format hard disk partitions” option to open Disk Management.
- You will be prompted to initialize the unit using the GPT or MBR partition table. I will use MBR for my SSD since I have an older motherboard in this PC that has no UEFI, so I can’t boot from GPT disks. If you have a newer PC, you may be able to use GPT, but if in doubt, use MBR.
- If you are not required to initialize the drive and it is not displayed in Disk Management, recheck that it is properly connected to the computer and that the enclosure or dock is turned on (if necessary).
- Once the drive is initialized, you should see the drive as unallocated space in the lower pane of Disk Management. You won’t see it in Windows Explorer yet, but that’s fine since EaseUS will be able to see it.
- Close Disk Management and go to the next step.
6. Clone your hard drive
- Open EaseUS Todo Backup, you will be greeted with an empty window.
- Click on the “Clone” icon in the left sidebar – it’s the one with two squares at the bottom – and select the hard drive with the C- drive as the source. Be sure to check the box for the entire hard drive, not only for the C- partition itself, as you will also need to clone the “Reserved to the system” partition.
- Click Next.
- On the next page, you will choose the destination disk. In this case, this is your SSD.
- Once again, select the entire disk by checking the box next to “Hard disk” and make sure you select the SSD, as any units selected in this step will be deleted. Fortunately, our SSD is an empty, unallocated space, so we don’t have to worry about deleting something important.
7. Align your partitions
Before continuing, click on the “Advanced Options” button and select the “Optimize SSD” button. This is important since it will align the partitions to make sure you get maximum speed from your SSD. Click OK, then click Next. EaseUS will ask you to confirm your choice and will show you a preview of how much space will be used on your SSD. Click Proceed to start the process.
8. Wait… and wait, and wait
This may take a few hours, especially if your hard disk and SSD are quite large. So go watch some Netflix and come back in a bit. When finished, click on the “Finish” button. You should see your new SSD in Windows Explorer, complete with all your data.
9. Install your SSD
Then turn off the computer. It’s time to permanently install that SSD on your computer. If you have a laptop with only one hard drive slot, you will need to remove the old hard drive and replace it with your SSD. This is a little different on every laptop, but you can get a general idea of the process with our guide here. If you have a desktop PC with more than one hard drive slot, you can leave your old hard drive as an additional storage space and install your SSD by its side.
10. Restart from your new disc
Once you have finished installing the SSD, you will need to tell your computer to boot from it. (This may not be necessary on laptops with one drive, but if problems occur during startup, it may be useful on some PCs.) Turn on your computer and access its BIOS / UEFI configuration, it’s slightly different on each PC, but usually, it says something like “Press DELETE to access the configuration” on the startup screen, so we advise you to press the corresponding button at startup.
Once there, look for BIOS boot options. These will be in a different location depending on the computer, but once found, we recommend selecting the option to change the startup sequence. Select your SSD from the list as the first boot drive, then return to the main BIOS menu to exit, saving your settings.
The computer will reboot and, if all went well, it should reboot faster than ever. Open Windows Explorer and check to confirm that your SSD is, in fact, the C- drive. If it’s all right, you’re ready, your computer should be snappy without having to reinstall anything.
