Changing the DNS on your iPhone or iPad can be done quite quickly. Most times, the WiFi network which you choose on your iOS device automatically assigns the DNS, and it does this based on router configuration. Sometimes, however, you may need to do this manually.
We’ll talk about why this is so later. To learn how to change the DNS setting on your iOS device, read on. Note that this is a beginner post and it is aimed at iOS users who have little or no knowledge hitherto about DNS or are new to iPhones and iPads. If you already know, this, you can skip past this.
How to Change DNS on your iPhone or iPad
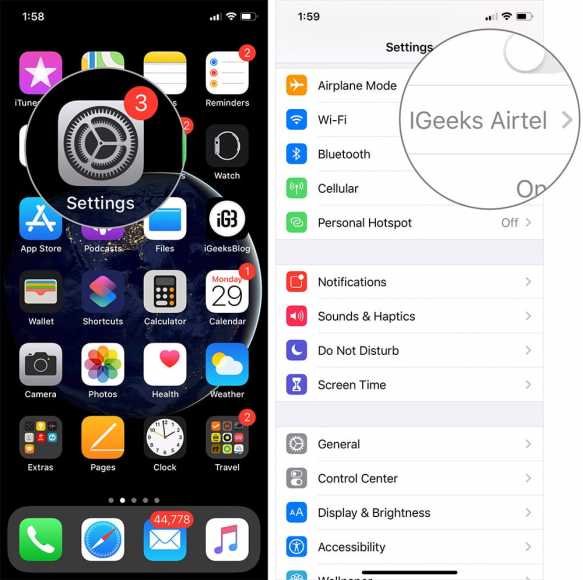
- First off, go to the Settings app on your iPhone or iPad.
- Next up, tap on the Wi-Fi option and then select a Wi-Fi network.
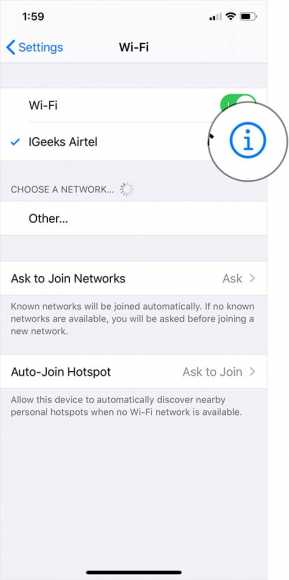
- Now, tap on the blue “i” icon.
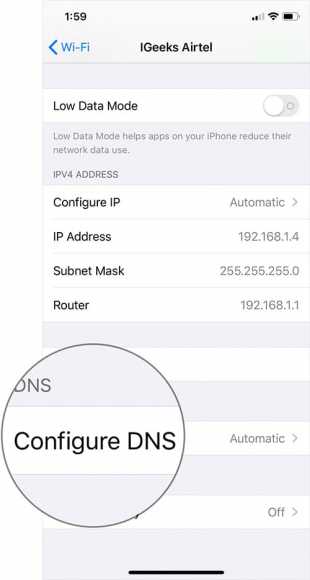
- Below the label DNS, select Configure DNS.
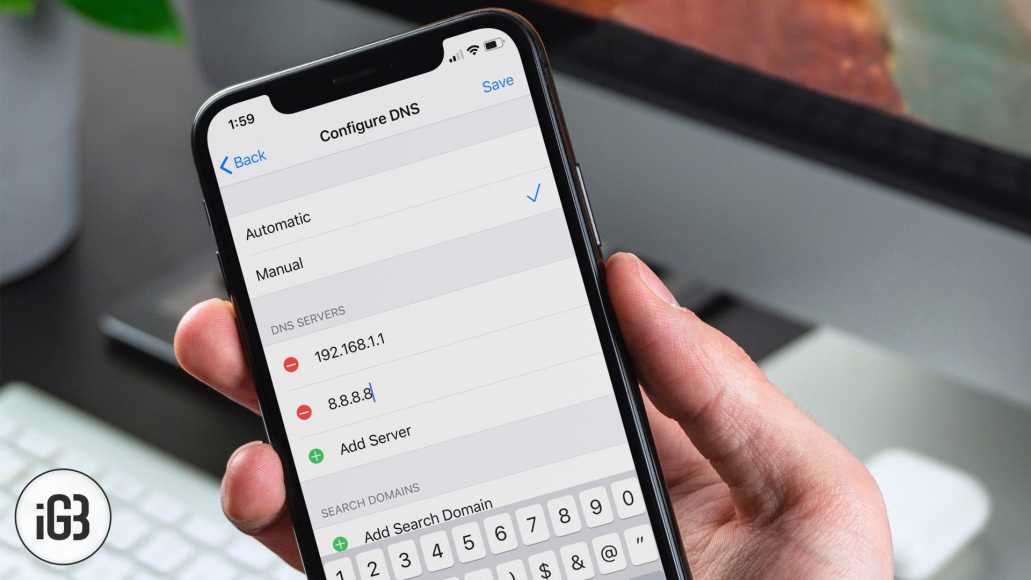
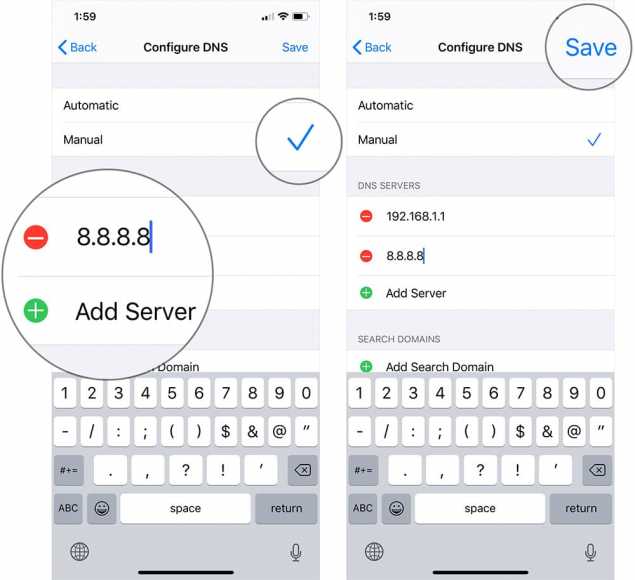
- Next, select Manual and then tap on Add Server.
- Type in the DNS addresses. You can scroll down the screen for free DNS servers.
- When you are done, tap on Save.
- After doing this, you might want to turn off WiFi and then turn it back on to see if the setting has taken effect. Once you have done this, go to Safari and then try loading web pages to see if they load correctly.
Free DNS Servers
The DNS I usually use is either Google DNS or OpenDNS. However, there are tonnes of DNS service providers out there from which you can choose from. Below is a list from which you can choose.
Google- 8.8.8.8, 8.8.4.4
OpenDNS- 208.67.222.222, 208.67.220.220
Enter them into the DNS field.
DNS Changes Sometimes Fix Wi-Fi Issues on iPhone
There are WI-Fi issues you may face, which are DNS-specific. When faced with such, changing the DNS helps. Of course, this doesn’t solve the problem all of the time. However, when it does, there is a change you will face Wi-Fi issues on all the connected devices that share the same DNS setting.
In most cases, the DNS servers are set by default. When the DNS you have set has issues, you will face issues with your Wi-Fi connectivity as well. You can easily fix this by changing your DNS.
Troubleshooting a DNS Cache Problem on iPhone and iPad
Sometimes (very rarely), you may find that after setting a DNS, it doesn’t take effect right away. I have heard people fix this by flushing DNS.
To do this, simply place your iOS device in Airplane mode. Wait a few minutes and then turn it off.
That’s all!
