This article explains how to install a heat sink on a CPU with the pin-grid array processor design used by most manufacturers.
How to install a CPU and heat sink
If you are building your own PC, you need to know how to install a CPU on the motherboard. You also need to attach a heatsink fan on top of the processor to keep it cool.
The motherboards only support brands and types of processors, so read all the documentation of the motherboard and the processor before proceeding. Also, refer to the motherboard, processor, and cooling unit documentation.
You need to know the processor slot locations, heat sink mounting clips, and CPU fan header.
These instructions assume that you are installing the CPU on the motherboard before installing the motherboard into the computer case.
The steps for replacing an existing processor are the same, but you must first remove the original CPU by reversing the installation instructions.
- Locate the processor socket on the motherboard and open the processor slot by lifting the lever on the side to the open position.
- Locate the keyed part of the processor indicated by a diagonal corner of the pin layout. Align the processor so this angle matches between the processor and the socket.
- With the processor aligned by the lever, make sure the pins line up with the socket and gently lower the CPU so that all pins are in the correct holes.
- Lock the CPU in place by lowering the lever on the side of the processor slot until it is in the locked position.
- If your processor or cooling solution comes with a blanking plate, align it on the processor as indicated in the product documentation.
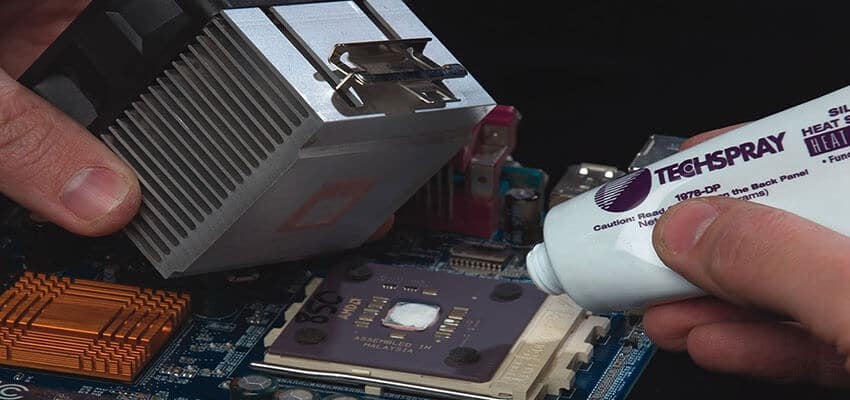
- Apply a thermal pad or several drops of thermal paste the size of a grain of rice to the exposed part of the processor. If you use paste, make sure it is spread in a thin, even layer across the part of the processor that will be in contact with the heat sink.
- It is best to roll out the dough evenly by covering your finger with a clean plastic bag. This prevents contamination of the pulp.
- Align the heat sink or cooling solution on top of the processor so that the clamps line up with the mounting points around the processor.
- Secure the heatsink in place using the correct mounting technique required by the solution. This can be done by lifting a tab on a mounting clip or screwing the heatsink to the board. Refer to the heatsink documentation to ensure proper installation.
- Be careful at this stage as a lot of pressure will be exerted. One slip of a screwdriver can cause a lot of damage to the motherboard.
- Locate the power cable for the cooling solution fan and the CPU fan header on the motherboard.
- Connect the power connector for the cooling unit to the fan header on the board. It should be encrypted, but make sure it’s secure.
When all the remaining parts required for operation are installed, the motherboard BIOS must detect or receive information about the type of processor installed on the card. Refer to the documentation that came with your computer or motherboard on how to configure the BIOS for the CPU model you just finished mounting.
