Since the Apple Mac switched from PowerPC to Intel, it became just like any other regular PC. What this means is that another operating system can be installed on it. Sure all Macs come with MacOS by default, but Windows can easily be installed on the Mac alongside the default macOS using the Boot Camp feature which now comes built-in with Apple Mac.

With Boot Camp, both operating systems can be installed in a dual booting configuration setup. This means that both operating systems will run on the system separately.
However, only one can be used at a time, but you still get the best of the computer in both anyway.
Should I Use Boot Camp To Install Windows on my Mac?
Before you go ahead with installing Windows on your Mac, you should be sure you want to use Boot Camp to install Windows on your Mac. Using Boot Camp has a few downsides which you should consider first.
Using Boot Camp to install Windows on your Mac requires you to split you Mac drive space into two (2); one for Windows and the other for macOS. Doing this will consume some space on your drive. Since Mac drives are quite expensive, you should be sure to reconsider. Also, whenever you want to switch from one operating system to the other, you would need to reboot your PC then switch. The main advantage of using Boot Camp to install Windows is that it will help you run the Windows directly on your Mac Hardware and as such, using Windows will be much faster than a virtual machine.
If your reason for installing Windows on your Mac is because you want to run a few Windows apps on your Mac, you should try using a virtual machine like Parallels (there’s a free trial), VMware Fusion or VirtualBox. As long as the apps you need to run does not require many resources, using a virtual machine would be a much better option. You’ll even find out that you won’t need to use Boot Camp most of the time and using a virtual machine is a much better option. However, if the Windows app you want to run on your Mac is a game, then Boot Camp might be the better option.
What Version of Windows Can I Run on My Mac?
The version of Windows which can be installed on your Mac depends solely on the model of your Mac. On most recent models of the Mac, only Windows 10 can be installed while on older models, older versions of Windows can be installed too. Below is a quick outline, along with links to the official list by Apple of the supported models on Macs.
- Windows 10 can be installed on most Macs made in the year 2012 and later.
- Windows 8.1 can be installed on most Macs made between the years 2010 and 2016.
- Windows 7 can be installed only on Macs made not later than 2014. To install Windows Vista or XP, you will need an older version of Mac.
Note that Macs can only run 64-bit, non-Enterprise versions of Windows.
Before you can install Windows on your Mac, you’ll first need an ISO file of the installer. Windows installation media can be downloaded for free if you have a product key already.
Anyway, you do not necessarily need to have a product key to run Windows 10. If you want to install Windows 7, you will need a USB drive of at least 16 GB memory capacity for the drivers and installer.
How To Install Windows on Your Mac
Okay, let us move on to the main deal. Just in case of accidents, I would advise that you back up your files. I’m pretty sure nothing will go wrong, but just so you are on a safe side because anytime you are partitioning things, there is always a chance.
We will be using the Boot Camp Assistant app which comes with your Mac by default. To open it, press the Command + Space buttons together, enter Boot Camp into the box and push the Enter key.
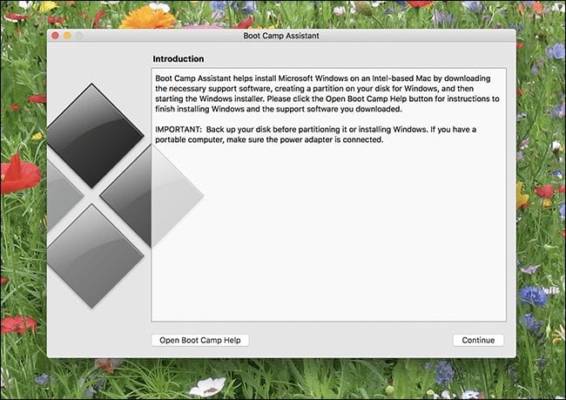
The Boot Camp Assistant will show you what you need to know about the partitioning, downloading drivers and help you start the installer. Next, the Assistant will ask you which ISO file You would like to use and how much space you want to allocate to your Windows partition.
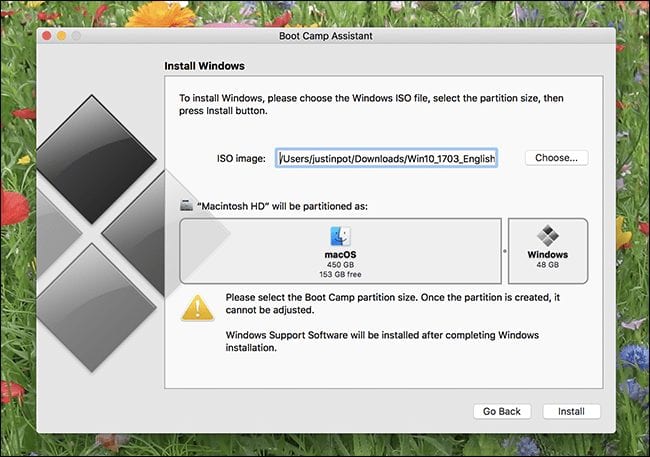
The size you pick for your Windows partition should depend on how much space you want to have on your Windows system and how much you want to be left for your MacOS system. Make sure you pick carefully because you will not be able to use Boot Camp to resize the partitions. Instead, you will have to get a third party tool to do that.
The process, however, is entirely different if the OS you are trying to install is Windows. Boot Camp will first walk you through setting up your installer USB disk before you will choose the partitions.
After you have done all that, click Install and Boot Camp will start downloading Windows support software which is the drivers.
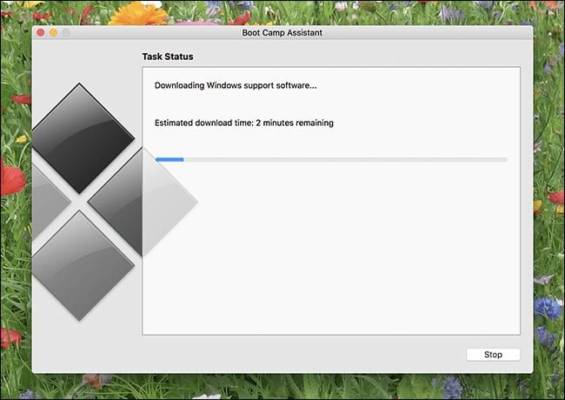
The installer will also perform the partitioning process along with copying the installer to the Windows partition. It will also place the drivers to make them run after the installation process. You can also do other things on your Mac while the installation process is going on. The Mac, however, will slow down during the partitioning phase.
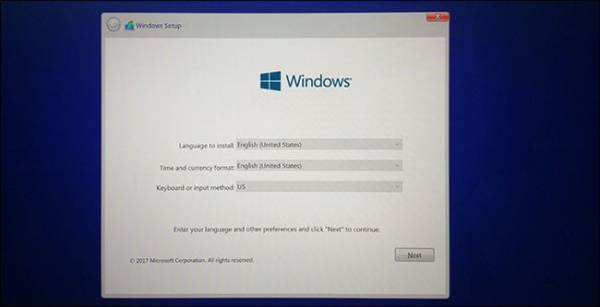
After that is done, your Mac will reboot, and the standard Windows installer will come up.
In case you are asked to, install only the partition labelled BOOTCAMP and not any other partition at all, else, you might lose all data on your Mac. And this is where I repeat that it is important you back up your files before starting just in case of mistakes. The installation process will be completed by Windows.
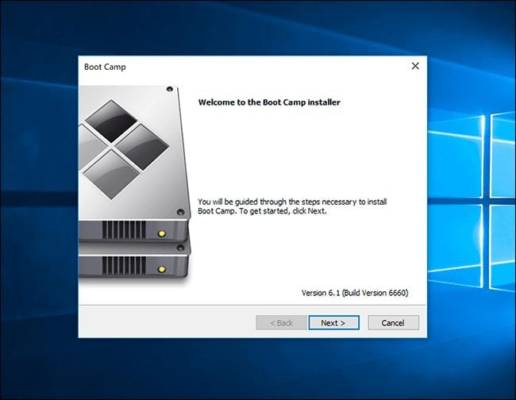
Remember to skip all operations requiring you to connect to the internet because you will not be able to do that due to the state of your drivers. After the installation is complete, you can go on with completing them.
Proceed with the installer, and it will set up your drivers and boom! We are all done!
How To Boot into Windows on Your Mac
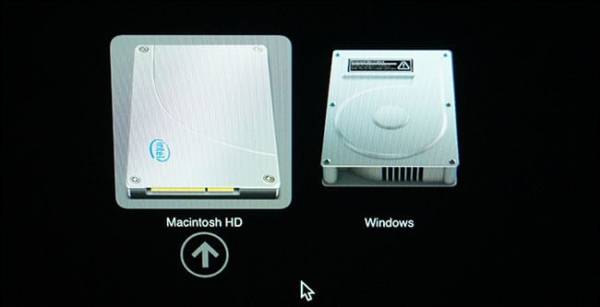
Whenever your turn on your Mac, it will still boot into macOS. To boot your Mac into Windows, you will first need to turn off your Mac. Next, turn it back on by holding the Power button and the Option key. Your Mac will ask you which drive you would like to boot from.
If, however, you want your Mac to boot into Windows by default, you need to go to recovery mode, or you can also use the Boot Camp Control Panel in Windows. It will appear in your system tray after you have installed Windows. You will have to click the up arrow before you can see it.
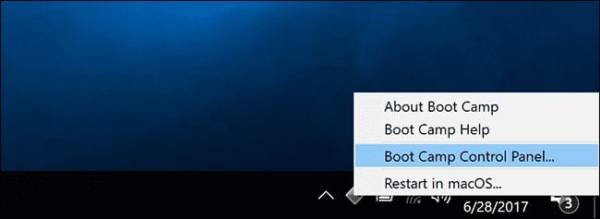
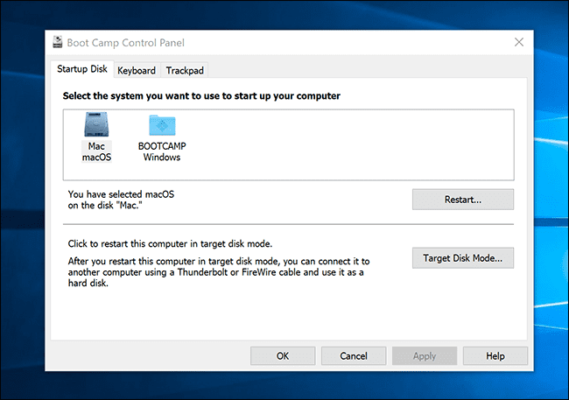
With this control panel, you can pick the default operating system your Mac boots into and also tweak some of the keyboard and trackpad settings.
While operating in Windows, the command key on your Mac becomes the Windows key while the Option key functions as the Alt key. If your Mac has a touch bar, a complete set of buttons will be displayed like the Extended Control Strip in macOS.

If you want the function keys (F!, F2, F3, etc.) to be displayed on the touch bar, hold the Fn key.
How To Remove Windows from your Mac
If you want to get rid of Windows on your Mac and get back your partitioned space, reboot your Mac back into macOS. Open the Boot Camp Assistant. You will see the Restore Disc to a Single Volume option, click on it.
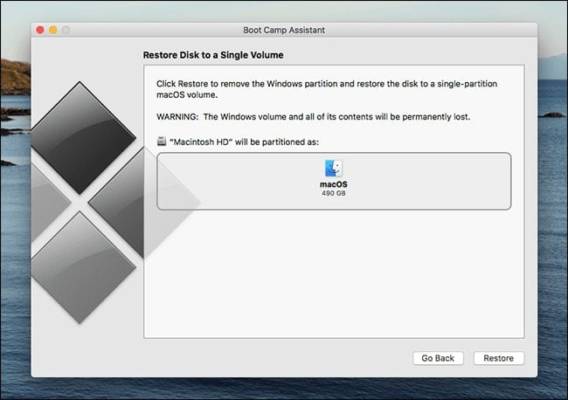
Boot Camp Assistant will automatically remove Windows and expand the macOS partition to the whole space.
Note that removing Windows will delete all files saved on the Windows partition, so make sure you back up files which you still want to keep.
Hope you found this tutorials helpful. Have a nice day!
