Of all the recent trends in technology and gadgets, none of them has exploded in popularity like smart speakers. It seems that everyone is focused on selling a smart consumer speaker, able to play music, search for information, report news and weather and even buy for you. Smart speakers use the mesh network and AI personal assistant technology to power your home with a speaker that is always on and always listening.
For many, smart speakers are their first entry into the “Internet of Things”, which uses wireless networks to connect physical objects together to create a network of devices and objects that can be used to control all aspects of the surrounding area. Many of these smart home devices can control the objects around us.
Of course, the problem with these smart speakers is that every company seems to focus on creating their own platform. The Amazon Alexa speaker, Amazon Echo, kicked off at the beginning, but since then, Google’s Home speaker, Lenovo’s Alexa-based Smart Assistant speaker and even Apple’s HomePod have filled the market with devices that don’t seem to interact well with each other.
As a consumer, it can be a difficult choice on which device to choose, especially now that Apple has entered the market with a Siri-based option. The HomePod costs almost twice as much as an Amazon Echo, and although HomePod is equipped with improved speakers on its Amazon device, for some consumers it makes no sense to stick to Apple products when Amazon Echo is available for purchase right now.
If you have purchased the Echo and Alexa ecosystem, but mainly use iTunes or Apple Music to host your library of songs and playlists, you are not unlucky. It doesn’t matter, we have some different options to let you listen to your library whenever you want.
So, regardless of whether you’ve created a library of iTunes purchases and CD racks over the decade and a half since the release of the iPod or that you’ve streamed your music using Apple’s streaming service, these are the best ways to play your Apple-based music library through Amazon Echo.
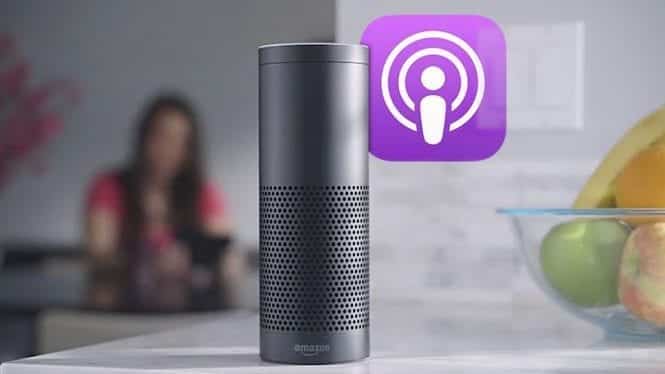
LISTEN TO APPLE MUSIC
Although iTunes is Apple’s long-standing music service for your computer and their online store, we’ll actually start by discussing Apple’s latest streaming service and Spotify’s competition, Apple Music. For $ 9.99 a month, Apple Music lets you access 50 million streaming songs a month, along with offline playback, exclusive content like the Beats 1 radio program and, of course, access to your entire library of iTunes purchases.
For many, Apple Music is very simple- it synchronizes directly with iPhone, iPad, Apple Watch and even Android devices using the Apple Music application downloaded from the Play Store.
There is a simple reason to start with Apple Music first- starting from December 2018, your Echo speakers will work natively with Apple Music, as long as you activate it first in the settings of your Alexa application.
The ability to play directly with Apple Music means that, for many users, the guide may end after summarizing how to connect Apple Music to your Alexa device. Although it is a paid service, it should be obvious that using Apple Music with your Alexa device is by far the simplest route, allowing you to play both streaming music and your iTunes cloud locker.
There are some limitations, but for anyone with Apple Music, this is the way to go. Here’s how to do it.
Grab your mobile device and open the Alexa application on your phone. The Alexa app is almost always necessary to make changes to the Echo speaker and changing the main music service is no exception. Click the menu icon in the upper left corner of the display to open the scrolling menu on the screen, then select Settings from the list of available options.
This list of options allows you to select different preferences for your Alexa devices and preferences, including your main music service. Select “Music” from the settings list and you will be able to view your currently connected music services, as well as the option to connect a new service.
Select “Connect new service” from the list and you will get access to the possibility to modify your main music service from Alexa. At the top of this list is the option to add Apple Music. Select this and press the “Enable to use” option, then log in with Apple’s login information. This will allow you to automatically play your music with Amazon Echo.
There are no doubt reasons not to use Apple Music with your Amazon Echo speaker. Although the streaming functionality of your Apple Music account on your Alexa device was added in December 2018 (only a week before this article was updated), it is worth noting that the feature only works in the US at the time of writing.
So whether you’re close to the United States in Canada or Mexico, or you’re halfway around the world living in Australia, you’ll be able to stream your Apple Music library only if you’re in the United States. Our hope is that Apple Music and Amazon will work together to offer their service
REPRODUCTION THROUGH BLUETOOTH
We’ll talk more about the difficulties encountered by cloud playback and the synchronization of your iTunes library with your Alexa devices below, but first we must point out that, in 2024, the easiest way to use your iTunes library (and, by extension, your iPhone or Android phone with Apple Music installed) with Alexa relying on the classic wireless standard that people love to hate- Bluetooth.
Yes, while Amazon Echo is mainly used as a smart speaker, designed to answer your questions and requests, Echo does the double duty with more traditional units thanks to the Bluetooth speaker function, able to communicate and reproduce audio from almost all modern devices. Here’s how to pair your devices with Amazon Echo.
On your iOS or Android device, access your phone’s settings. For iOS, the Settings menu is located on the home screen; for Android, you can access the Settings menu via the app drawer on the device or by accessing the link located at the top of the notification bar. Within your settings, we recommend that you look for the Bluetooth menu.
On iOS, it is located at the top of the settings menu, in the device connection area. On Android, it is also located at the top, in the “Wireless and networks” section. The exact appearance of the settings menu may vary depending on the Android version on the phone, as well as the software skin that the phone manufacturer applies to the software, but overall it should be at the top of the display.
In the Bluetooth on the phone, make sure that Bluetooth is enabled on the device. Once active, you should automatically see your Eco available for association. Generally, the name will depend on the variety of Echo you have (a traditional Echo, or Dot or Tap).
As with any Bluetooth device, tap the selection to pair the devices. Alexa will emit an audio signal to alert you that your device has been paired and the Bluetooth icon on the phone will change to indicate that you have been connected to a new device.
After that, you can use the phone to play music directly from your mobile device on Echo, even if you won’t be able to activate Alexa to play specific songs. However, you can use your voice for basic playback commands, including pauses, next, previous and playback.
And of course, any Bluetooth enabled device also has Echo support, so if you prefer to connect your PC or Mac to Echo, Echo Dot or Echo Tap to play multimedia files, all you need to do is associate your device via Bluetooth on Windows 10 or macOS.
USE OF SONOS ONE SPEAKER
We will admit that few users will want to run out and buy another speaker, in addition to the Amazon Echo product they already have. But if you’re one of those users who simply need to have your iTunes library controllable via Amazon Echo, using Sonos is the way to do it.
For those unfamiliar with the famous loudspeaker company, Sonos helped pioneer the smart speaker market by creating a series of speakers connected to the Web for playback from a smartphone or computer and for multi-listening. room on a mesh network.
Last year, Sonos finally presented its new product- Sonos One, an intelligent speaker that has six integrated microphones, along with Alexa support ready for use, while maintaining the sound quality and Sonos features that the company is so well known for producing.
Sonos One is, in essence, a much better version of Amazon Echo, with excellent sound quality, support for a multitude of services and even the Google Assistant support promised for this year. Unfortunately, it’s also $ 200, a price increase of $ 100 compared to the second-generation echo, which could make it a starter for people who already own, have just bought or have been equipped with their Echos and want to use it with their iTunes library. If you are in the market to buy an Amazon Echo, of course, and you mainly want to play music using your iTunes library, Sonos One is the best purchase. We quickly describe the three reasons why:
- First and foremost, Sonos One has full Alexa support (once Alexa has been added to the device), but it also syncs with the Sonos mobile app. This means you can download the Sonos app on your iOS or Android device, connect Apple Music to your Sonos account, and you’re ready to start playing. You will need to start playback within Sonos itself, but once the music is played, you can use Alexa for playback controls (just like Bluetooth) and, as a bonus, to identify the currently playing song.
- Secondly, the sound quality has improved on Sonos One compared to Echo. If you are looking to use your smart speaker as a way to listen to music regularly and mainly, you can choose one to use as the main speaker, which will give you better audio quality and improved features on Echo.
- Finally, Sonos One has support for Apple’s Airplay 2, offering users Alexa’s support with Airplay, bringing your Amazon technology and your Apple Music library closer than ever.
To reiterate, buying a brand new intelligent $ 200 loudspeaker to replace Amazon Echo or Echo Dot is not meant to be considered an option for everyone to choose to buy; rather, it should be the ideal way for users to get an Alexa-enabled Echo-like device that supports Apple Music and iTunes in one complete package. Sonos One is not an option that everyone will like, but if you can get one, we highly recommend it.
PLAYING OF LOCAL MUSIC THROUGH THE CLOUD
This was our ideal way to reproduce your iTunes library, apart from Apple Music subscribers. Anyone with a huge, curated iTunes library could only pay $ 24.99 a year to upload their songs to Amazon’s cloud servers.
It allowed you to take advantage of the space provided by Amazon and made it easy for you to ask Alexa to play your favorite songs and artists. Unfortunately, at the end of 2017, Amazon announced that it would discontinue the Amazon Cloud Locker service.
New users were accepted until January 15, 2018, but anyone who signs up for Amazon Music at the moment will not be able to upload their music to the service. Also, anyone who did the music loaded on Amazon’s cloud service had access to their library stopped after January 2019, leaving the Amazon locker for cloud songs completely closed.
The closing of the Amazon Cloud Locker music section leaves Amazon Echo in a frustrating place, especially for those with wide varieties of local music. If you’re streaming from a paid service like Apple Music, it’s easy to predict that your library might not fit well with Amazon products, especially because they carry their own music streaming service, while also providing support for Spotify.
Local music users, unfortunately, seem unlucky or would be, if it weren’t for one of our favorite cloud platforms with an Alexa ability that simplifies the reproduction of your music through Alexa.
Plex is known to be one of the preferred platforms for all those who want to create a library of locally created media to be streamed anywhere and everywhere. It’s not a perfect platform or a perfect match with Alexa, but you’ll be surprised at the way Plex is able to replicate the old Amazon cloud service that we had previously recommended for iTunes users.
Before we start describing how to set up Plex for music storage, there are a few things you should know about Plex’s limits and capabilities to properly deliver a cloud service for your local library:
- Plex is not a native Amazon music player (which is now limited to streaming only), so you may have to handle slower connection times.
- To play music from a Plex server, you will need to use the “ask Plex” command, as in “Alexa, ask Plex…” or “Alexa, say Plex…”
- Similarly, Plex cannot be set as a default music service.
- You will need to have a computer capable of running 24/7 in order to configure your media server or be able to withstand not connecting to the network when the computer is off or in hibernation mode.
- You can listen to your music on one Echo device at a time.
Assuming you are able to deal with these assorted limitations, Plex is a great service for your music and you won’t have to pay a penny for Plex to use it. To get started, register a Plex account on the Plex website here, then download the Plex Media Server application on your computer.
Ideally, a secondary computer that allows you to keep the server running in the background is the best solution. You can buy cheap PCs from eBay for about $ 100 to $ 150 dollars that have large hard drives and make it easy to stay quietly in the background without having to leave your normal PC running in the background permanently.
Alternatively, you can simply use your normal everyday computer, even if you remember that if it’s a laptop, it will go offline when you close the lid or put it to sleep. If your computer is offline, so will your multimedia service.
With the chosen PC, the downloaded server and the configuration of your account, follow the installation procedure in Plex to complete the server configuration. We recommend that you choose a folder to upload the contents to and that everything in that folder is automatically loaded.
If you are using the computer where your iTunes library is stored, selecting your iTunes library is the smartest way to proceed here. After selecting the folder where the media files are stored, be sure to update Plex.
To test your cloud server and make sure everything works and works properly, download the mobile app on your phone or check your server in your PC’s browser to see if everything has been synchronized. Remember that uploading is not possible here- Plex will play directly from any PC selected as a media server.
Now that Plex is set up, you’ll need to pair it with your Alexa to work properly. First, immerse yourself in your Plex settings and make sure Remote Access is enabled on your server (by default, it should be).
Then, using the Alexa web or mobile app, find and install the Alexa skill for Plex on your Amazon Echo and log in using your Plex account. Authorize your PC, then go to Echo. State to Alexa the following- “Alexa, ask Plex to change my server”. Since you have just set up your first server and therefore only have one server selected on your account, Amazon and Plex will automatically select your media server.
There is a final (and optional) step to complete the configuration of Plex with Echo. If you use Echo for voice commands with Alexa but have the main speaker positioned elsewhere for better playback, you can automatically enable media playback via Plex on that speaker by asking Alexa- “Alexa, ask Plex to change my player”.
Alexa lists the available players that were previously configured with your account and you can choose which one you want to use for playback. If you do not set a default reader to Echo, the Echo speaker will be used as the main listening device.
Plex’s voice commands are easy to use and have a complete list available for users from here. If you’re looking for some basic tips, here’s what we recommend using to synchronize voice commands here. Remember to use “Ask Plex” before each command.
- Play music by (artist)
- Play the song (song name)
- Random play of the playlist (name of the playlist)
- Play the album (album name)
- Play some music
Once the music is played, you can use the basic controls “Next”, “Previous” and playback as you wish, all without having to say “Ask Plex”. See the full list of Plex-based Alexa commands, including non-music commands, here, and check out the complete Plex Alexa support page here for more information on how to make the two products work as hard as possible.
Plex is not a perfect replacement for Amazon’s cloud locker service, but it is a good choice for anyone looking to set up a basic media server for their iTunes library to replace the now-defunct Amazon service. Keep in mind that Plex won’t be as fast and responsive as using Amazon Music or Spotify with Alexa’s ability configuration.
Amazon’s Echo speaker was the first big smart speaker on the market with an important voice control system and, despite the competition from both the Google Home speaker and the upcoming Apple HomePod, Amazon managed to maintain a strong point supportive for its public.
With a little effort to configure your Plex server, Echo and your iTunes library can coexist peacefully, even if it means keeping your main computer running in the background to command Alexa to play specific songs and artists.
And even if you’re not willing to configure Plex as a streaming server for your local library using Echo as a Bluetooth speaker, you can still control voice commands to skip songs.
Echo may no longer be the only one on the market, but with its support for a large cloud-based streaming system, in addition to allowing Spotify to access Alexa, it is still one of the most advanced devices on sale today. And with the addition of your iTunes library, it consolidates its position as one of our favorite smart speakers to date.
