Android users have slowly benefited from the non-hidden and customization that their smartphone offers.
For a while, it has aided its users to have access to a variety of things like automation, custom ROMs and loads of other options. However, the only way to ever take full advantage of the features is to make use of apk files and third-party “cracks.” Stock Android is far from being Android without all the attractive additional features it offers you.
The more enhanced custom ROMs are generally made by Android developers and loyal devotees when there is time on their hands. This means zero time for an effective testing phase between development and deployment, which can be the cause of several bugs and problems when all is done. This is where the Xposed Framework will step in.
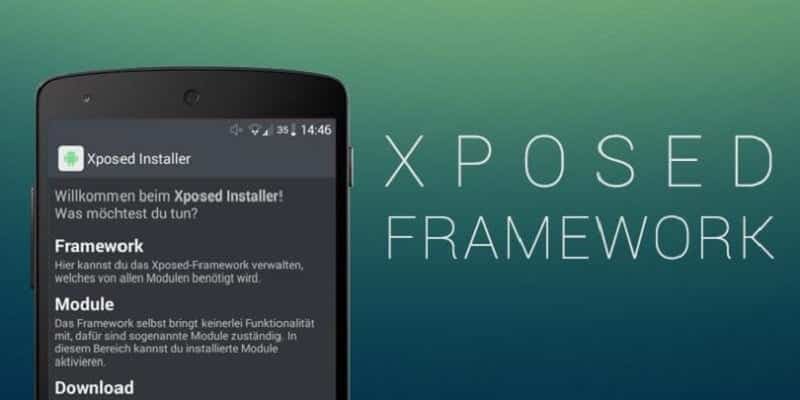
Exposed Framework
This is a framework for your rooted Android phone. Although it does not do much as a stand-alone, it makes customizing and modding of your phone without needing to flash it through custom recovery. You will no longer have to come up with a blanket, system-wide modification with lots of changes to be able to make use of a few mods. Instead, you can select straight which mods you want and have them installed. More customization does not stop with changing the appearance of your Android device, but Xposed will also boost its performance and tweak system level functionality.
All you have to do is install an application called Xposed Installer. With this, you can make use of it to locate and install other apps/mods. Adhering to the following steps should work wonders regardless of your Android phone’s make or model.
Before installation, You’ll have to do a few things like:
- Totally backing your Android device. Problems are to be expected during the installation process or as you use Xposed. Your phone can even be rendered unusable so have it backed up
- Cross-check the version of Android you’re presently running. You’ll have to be aware of this information in order to locate the link to the authentic download. You can usually locate this information in the “About phone” or “About device” section of your Android phone’s Settings. You might also notice it hidden under “More” in your settings, just make sure you grab the information.
- For the ones that run Android 4.03 to 4.4, to have Xposed installed, you will have to root your device. You should also be running a custom recovery and making use of compatible hardware. To get that done, the KingoRoot app has to be installed. Click One Tap Root and be patient with it to wrap up before rebooting your device. It can be fussy about needs and requirements so if it fails to work the first time, try again. As soon as you have your device rooted, installation of Xposed Installer is possible.

Installation Of Xposed Framework
To start installation:
- Those running Android 5.0 or higher, from your phone you can grab the latest apk file using this link. The download link will be seen at the bottom of the page just under the “Attached Files” section. Alternatively, you can go to Xposed Download Page and choose your preferred version. The previously offered version is an experimental one. To see more stable releases, click the Show folder.
- You can install the application through sideloading by activating the option to install apps that cannot be found in Google Play. Go to Settings, then Security, and then check the option that says “Unknown Sources.” When you are done, go ahead and download the version you picked in step 1.
- You might see a popup displaying that “this type of file can harm your device if you install it.” Ignore it and forge ahead with the installation by confirming you want to download and install the file.
- Click install to confirm when you are asked if you need to install the app. Open the Xposed Installer app as soon as it has finished installing and head to the “Framework” section. You can locate it in the menu at the top-left of your screen. Click on Install/Update to start the installation.
- You might notice a warning prompt asking you to “Be careful!” Shun it and click on OK. If things were to go south, not to worry, the backup you made before starting this process would aid you to get your phone working again and avoid a “boot loop.”
- Allow access to KingoRoot for root permissions and click OK when you are prompted to reboot.
Congratulations, you have installed Xposed Framework on your Android phone. If there is a need for you to do away with it in the nearest future, you can just get rid of it by removing the same way you remove other apps. But right now, you have installed it. So what next? Install Modules, definitely.
Modules
Xposed Framework is not just a framework, but modules make it function in ways you will not expect. These modules are simply .apk files you can download from the net and can easily be installed like any sideloaded app. They let you customize the appearance and functionality of the Xposed Framework and are seen as the most vital step of the entire process.
Installing Modules
There are several sources from which you can locate modules for installation. If you’d fancy knowledge about modules, you can head to the Xposed repository and do some findings. For a full list of modules to select from, do some research.
But, in some instances, the aptest way to locate the modules you need can be accessed in the framework installer. To locate a module:
- Launch the Xposed Installer app and head to the “Downloads” section and make use of the search option or browse from a list of presently available modules. Click the “Versions” tab. The latest ones will always be seen at the top.
- As soon as you locate a module, take your time to go through the description because several modules need you to run the stock version of Android. This is very key, so be very attentive to it. When you are done reading, and you are certain your mobile device is supported, you can click the Download button.
- The download and installation process should be as seamless as your regular Android app. The next screen after clicking Download will display what the app will have permission to do on your phone. You will have to confirm the installation with the Install button. The page might be long so not every installation can be viewed at once. You will have to use one or more next buttons to reach the end. Keep clicking them till you can view the Install button. If the Install button is not visible, you will have to reboot and try to attempt again from the start.
- When the module is installed, and adequate permissions have been granted, to move on to the customization settings you will have to open the module app. You can click Open to launch the new module, or Done to get back to the “Versions” tab.
- Immediately installation is finished, you might get a module inactivity notification. Click on the notification, and you’ll be taken to a new page with a complete list of all your computer’s downloaded modules. You can disable and enable all the modules you presently have on your phone.
Module Activation/Deactivation
As soon as the module is on your system, you must enable it before you can actually make use of it:
- Go to the “Modules” section from the main screen of the Xposed Installer app.
- To enable the module, tick the box you see on the right of it. A check mark will show in the box if the module has been activated. To disable them, make sure the box is unticked.
As soon as you are finished with the activation process, reboot your mobile device for the changes to take effect.
