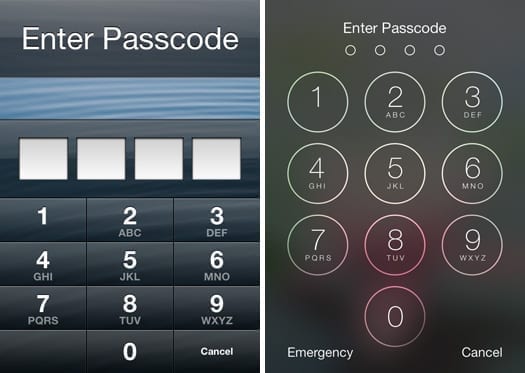
Facial recognition scanners and fingerprints (on older iPhones) are incredibly useful. Take a look at your phone or touch the sensor and it will unlock. However, you may be required to use the passcode to enable Touch ID or facial recognition. Often, this happens when you want to access email notifications or messages from the iPhone lock screen.
In theory, this two-step authentication should work like a clock. Touch the four-digit code and voila- you’ll immediately get the notification or message you want to read. And if it were not so? Are you permanently locked out of your phone? Read on to find the answer to these questions.
FIRST LINE OF DEFENSE
At the risk of stating the obvious, but are you sure you entered the correct passcode? Of course, you can write it blindfolded, even if there are accidents and typos. When you’re in a hurry, your finger could slip and lose the figure.
To prevent this from happening, press the side button and try unlocking the phone again. If you want to access the notification from the lock screen, it’s best to leave it alone for now and try to unlock the device. Hopefully, facial recognition or fingerprint scanner still works, so you’ll be able to get access.
In fact, it would be better to try these unlocking methods and avoid typing the invalid passcode a few times. Otherwise, the iPhone may require you to enter the code to enable the face ID/fingerprint scanner every time you try to unlock the device.
CHANGE OR DISABLE PASSCODE
I hope you unlocked the iPhone using a Face or Touch ID. In that case, it would be better to browse through the Settings and disable or change the passcode.
Start Settings and scroll down to Face ID and passcode (Touch ID and passcode on older iPhones). This is where things get difficult. The following window requires the entry of the valid passcode to access the menu. Type the code carefully and hopefully, you will enter the menu.
Once inside, select “Disable passcode” or “Change passcode”. If you choose “Disable passcode”, a pop-up window will appear to confirm the decision and you must provide your Apple ID password to make the change effective. To change the passcode, type the old one, then the new one and retype the new passcode to confirm it.
THE MESSAGE “IPHONE IS DISABLED”
The worst-case scenario is that you enter the wrong passcode too many times and your iPhone is temporarily disabled. This usually lasts between one and five minutes, so you can try your luck again. However, if you enter an invalid access code six times in a row, your iPhone may block you in the menus much longer.
Curiosity: some users have reported that their device showed the following message- “The iPhone is disabled, try again in 23 million minutes”. To avoid calculation problems, they are around 44 years old.
The message “iPhone disabled” is a good indicator to restore the phone from a backup. Obviously, you must first have the backup files. And this is one of the reasons why you shouldn’t ignore all those messages “Your iPhone doesn’t back up for X days”.
In short, here are the methods to restore your iPhone.
ITUNES
Connect your iPhone to the computer you use for synchronization. iTunes should immediately detect the device and start automatically. Click on the small iPhone icon in the iTunes bar and select Restore iPhone.
So just follow the on-screen wizard and the phone will soon be restored. However, this may not always be so simple. If you haven’t connected your iPhone to your computer for a while, a pop-up window will ask you to select “Trust This Computer”. In this case, you will need the passcode to connect to iTunes. There are two tricks to get around this problem.
RECOVERY PROCEDURES
The exact steps to enter recovery mode depend on the model of your iPhone. On iPhone 8 and later, turn off the phone and hold down the side button when you connect the phone to a computer. Continue to hold until you see the “Connect to iTunes” screen on your phone (a cable and the iTunes icon appears on your phone).
At this point, a pop-up window should appear in iTunes. Click Restore and your iPhone will restart after the restore is complete.
DFU MODE
The DFU mode is like an extended version of the recovery mode and the method is quite similar. Connect your iPhone to a computer, start iTunes manually and turn off the iPhone. Once turned off, hold down the Side and Volume down buttons (on newer iPhones) simultaneously. After 10 seconds, release the side button, but continue to hold Volume.
When the screen goes black, the iPhone is in DFU mode and iTunes should recognize it. Now you can proceed with the restoration of the device.
IMPORTANT NOTES
If you turn iPhone off and on again, it won’t solve the problem with the passcode. Remember that you are required to provide the passcode after reboot. When your iPhone is disabled for more than 5 minutes, a restore from backup is the only way to regain control of the phone.
FOUR ZEROS?
You may come across third-party apps that offer passcode removal or allow you to change your password without restoring your phone. But you should refrain from using these apps on your phone because you may risk sharing more information than you would like.
That being said, one of the methods described in this article has certainly helped you regain control of the phone. So what was it? Do you know another way to regain access to your iPhone after having entered the wrong passcode too many times? Share your experiences and suggestions in the comments section below.
