Do you have a printer that is your favorite to get those documents in hard copy? If you have such, you definitely should make it your default so that all the apps on your computer use it to print documents by default. In this guide, we will show you how to set the default printer on your Windows 10 or Windows 11 PC.
How to Set The Default Printer on Your Windows PC
How to Set the Default Printer on Your Windows 10 PC
If you want to make a printer the default on your Windows 10 PC, simply follow the steps below. Before you proceed, however, you should make sure that you have used this printer to print documents on your PC before. Also, make sure the printer is connected to your PC. Once you have this in place, you can proceed with the guide below.
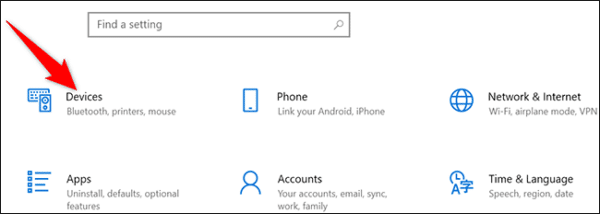
- First off, open the Settings app on your Windows 10 PC. You can do this either by clicking the gear icon in the Start menu or by pressing the Windows + I keys on your keyboard.

Device Settings Windows 10 - Once in the Settings app, select the “Devices” tab from this list of options on the screen.
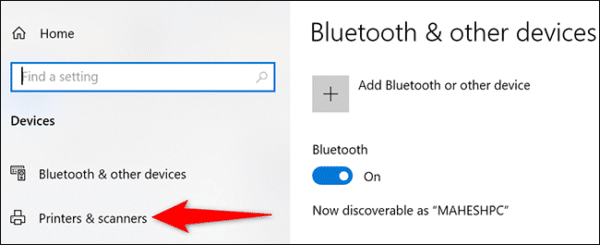
- On the page that comes up next, select the “Printers & Scanners” option on the left side of the screen.

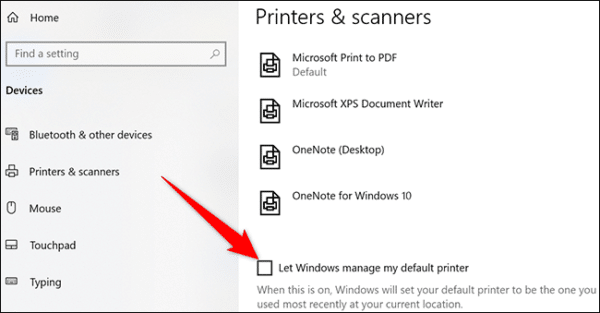
Printers Scanners Windows 10 - Scroll down the next page until you get to the bottom. Once there, click the checkbox next to the “Let Windows Manage My Default Printer” option to disable it. If you do not disable this option, you will not be able to set or change the default printer on your computer. If you find that the option has already been disabled, you do not need to do anything.

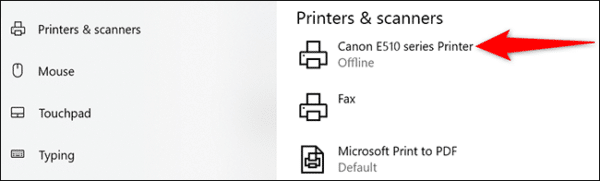
Disable Default Printer Windows 10 - Now, click the printer you would like to set as your default under the “Printers & Scanners” section.

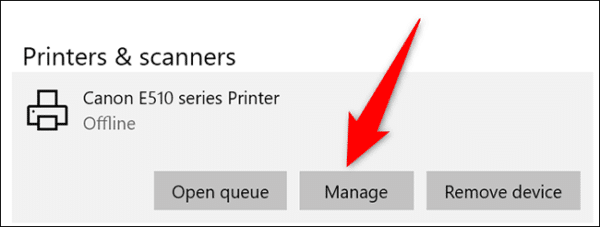
Select Printer Windows 10 - You should notice a menu open up on the screen. Select the “Manage” option from the expanded menu.

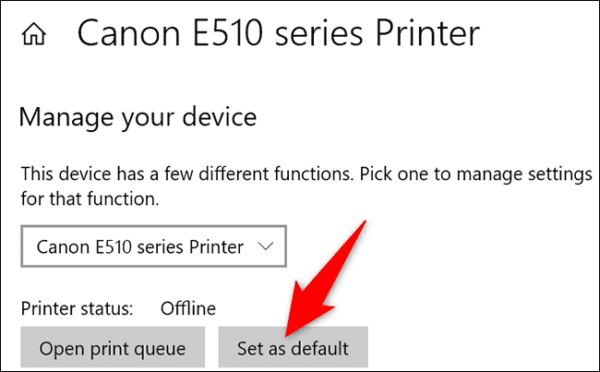
Manage Printer Windows 10 - Now, you should see the printer’s page open up on the screen. From here, proceed to select the “Set as Default” button.

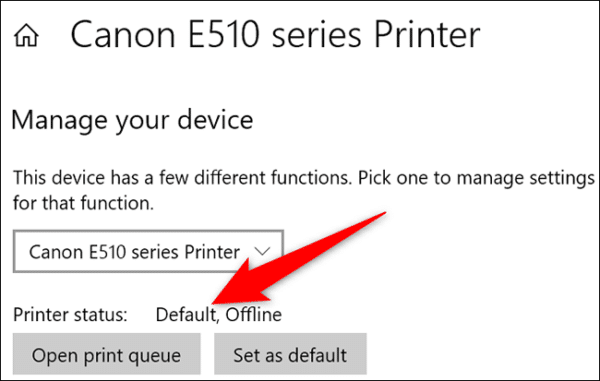
Set Default Printer Windows 10 - Now, look for the “Default” message right beside the “Printer Status” option. The default message indicates that the printer you selected is now the default printer on your Windows computer.

Default Printer Set Windows 10
And that’s pretty much it for how to set the default printer on a Windows 10 PC. Now, whenever an app needs to print a document on your Windows 10 PC, it will automatically use the printer you set as the default.
How to Set the Default Printer on Windows 11
Setting the default printer on a Windows 11 PC, just like on a Windows 10 PC, involves using the Settings app and can be done in just a few steps. You need to make sure that you have used this printer to print documents before on your Windows 11 PC. It would also be advisable that you have the printer plugged into your PC before you proceed. Once you have this in place, you can proceed with the guide below.
- So, first off, go to the Settings app on your Windows 11 PC. You can do this by pressing the Windows + I key on your keyboard.
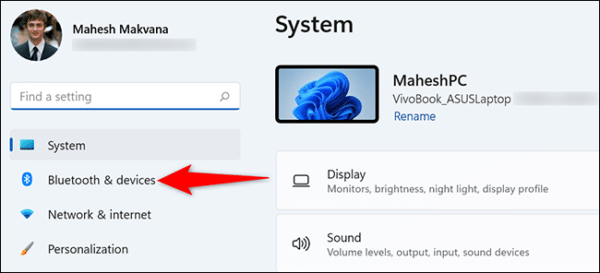
- Once in the Settings app, select the “Bluetooth & Devices” option on the left sidebar of the Settings window.

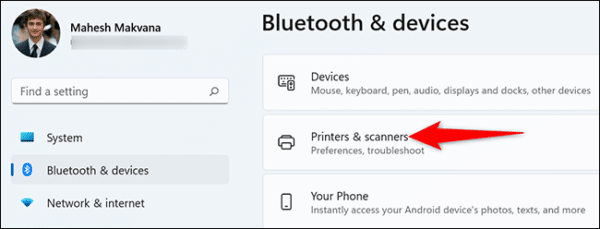
Device Settings Windows 11 - Once the “Bluetooth and Devices” page comes up, select the “Printers & scanners” option on the pane on the right side of the screen. This will bring up a list of your installed printers.

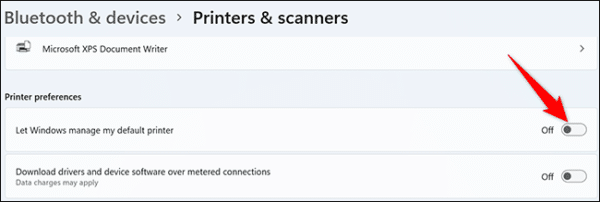
Printers Scanners Windows 11 - Scroll down the screen until you get to the “Printer Preferences” section. Once there, click the check box next to the “Let Windows Manage My Default Printer” option to disable it. If you find the feature already disabled, you do not have to do anything.

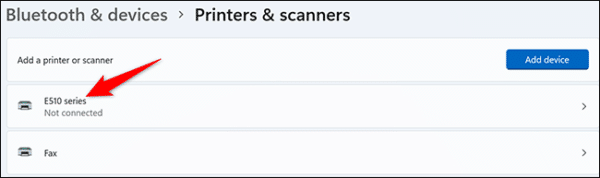
Disable Default Printer Windows 11 - Once you have disabled the “Let Windows Manage My Default Printer” option, scroll up the page and then click the printer you would like to set as the default.

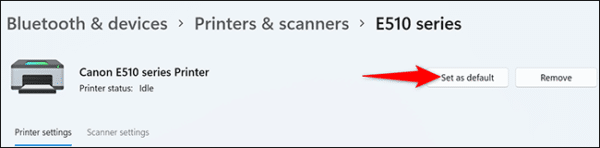
Select Printer Windows 11 - On the page that comes up next, select the “Set as Default” button. You can find the option at the top of the window.

Set Default Printer Windows 11
And that is pretty much it. Your Windows 11 PC will now recognize the selected printer as the default.
From now on, all the apps you have installed on your Windows 11 or Windows 10 PC will use the printer you selected as the default to print all your files. And that saves you the stress of having to set the default each time!
If you have any further questions or face any issues while following the guide, make sure to let us know via the comments below.
