
AirPlay is just amazing when it comes to streaming content from your iPad, iPhone, from your Mac to Apple TV or even compatible speakers. Apart from just enabling you stram audio and video content, AirPlay also enables you to mirror your device’s entire screen. AirPlay can also be used on your Apple Watch devices running watchOS 4 or other later watchOS versions. With it, you can beam audio to compatible speakers.
However, unlike your iPhone, iPad or Mac, Apple Watch only lets you play audio. So next time you are playing one of your favourite songs from your Apple Watch, you can beam it on your stereo speaker and enjoy your jam better.
Unlike your Mac or iOS device, Apple Watch allows to AirPlay only audio. So, the next time you are playing a big hit on your smartwatch beam it on a high stereo speaker to enliven your music time!
How to AirPlay Audio from Apple Watch
How to Use AirPlay from Music app on Apple Watch
Note – Before you proceed with this guide, make sure you have already set up AirPlay on your speaker. You can use your user manual to set things up and get started. When you are done, follow the steps below to use AirPlay from the Music app on your Apple Watch.
- First of all, turn on your Apple Watch.
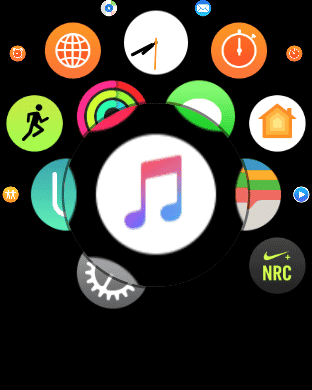
- Next, open the Music app.

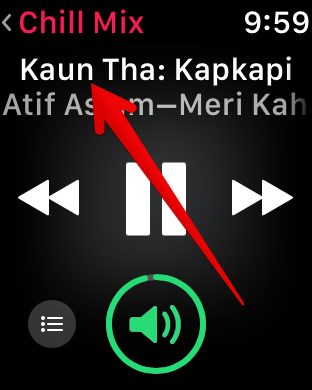
- Now, go to the particular song you wish to play and then press the Apple Watch screen very gently.
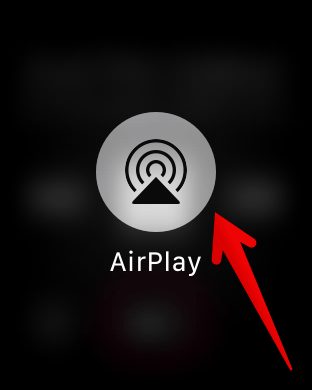
- Next, tap on the “AirPlay” icon.
- Now, pick the device which you want to beam the song to.

As easy as that! You can now play your song on compatible speakers.
How to use AirPlay from the watch face in watchOS4
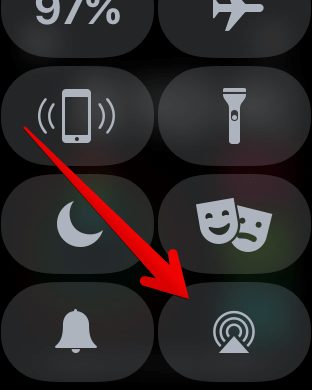
- First off, open the Control Centre on your Apple Watch. To do this, simply swipe up from the bottom of the face of your Apple Watch.
- Next, tap on the “AirPlay” button.
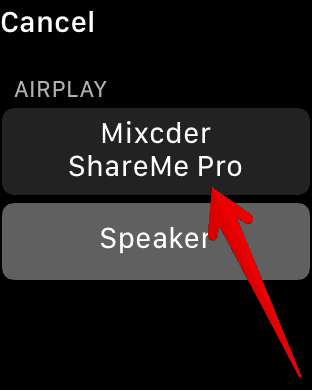
- Now, you need to select the device or speaker which you want to beam the audio to.
That is all. Easy isn’t it. AirPlay is a very nice tool for streaming audio wirelesly. What do you guys think about it?
If you got stuck while following the guide below, or you got confused, be sure to leave a comment and we will be there to help. Thank you.
