Have you ever been in a situation where your Windows 10 OS suddenly begins to act funny? Let me give you an instance, I shut down my laptop computer, and on turning it on again, it gets stuck at the startup screen – that point where you see a circle of dots infinitely rotating – and it refuses to go beyond this point. There are several reasons for this malfunction, such as the presence of malware on your computer preventing startup, or a recently installed software or driver. One way around this problem is to create a system restore point, and Windows 10 had made it easier to do that enabling you to revert your PC to a time when it worked correctly.
What is a system restore point in Windows?
A system restores point is a recovery feature in Windows that allows the user to take the PC back to a previous point in time when the PC worked correctly when there is a system problem such as the system malfunction I described above. Windows OS regularly creates a new system restore points before any changes are made to your PC e.g. just before installing a new software; the user can also create a system restore points.
To create a system restore point in Windows 10, follow these steps:
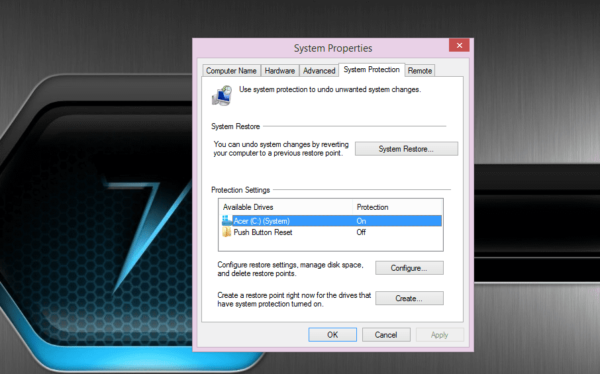
- In the System Properties window that comes up, click on the System Protection tab.
- From the Start menu, search for Create a restore point and then press the Enter button on your keyboard.

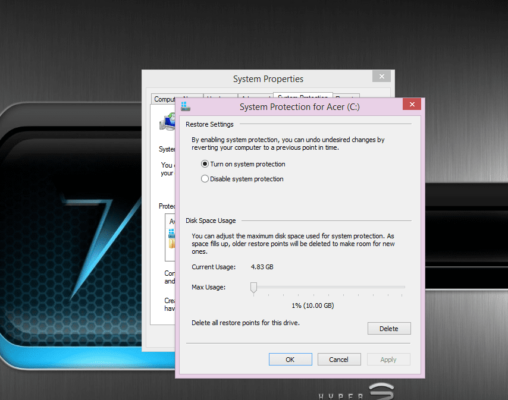
- Check in the Protection Settings pane to see whether the setting is currently on or off, if it is off select the PC hard drive, and then click on the Configure button.

Turning the restore point setting On - Select the Turn on System Protection option in the window that pops up, click Apply, and then click on OK.
If the setting is turned on do these:
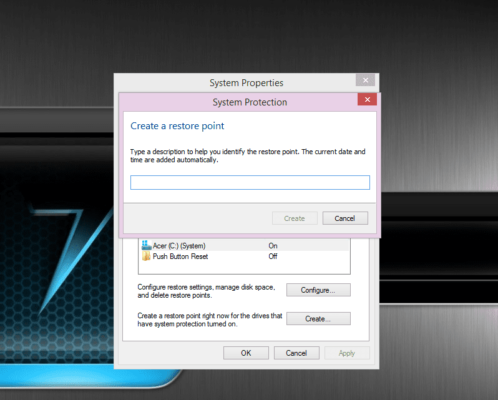
- Click on the Create button, then enter a description for the system restore point you want to

Creating a new restore point - Click OK when done
CONCLUSION
That’s it. So, whenever you are stuck at the Startup screen like I was, try following the steps above and you’ll be happy you did. Ciao.


