If you would like to know which program uses the most data on Windows 10, then stay with me as I teach you how to do just that.
Data usage is a very important thing to track both on phones and PC. Android and iOS have had this feature for a while now, and I’ll say it is a great feature. It helps you keep track of your data Usage, knowing when to use up your data bundle before expiration or slow down on the usage if need be. It also shows you the apps that take up the most data so you can maybe reduce the way you use such apps or find out why they take so much data if you rarely use said app.
The same thing was replicated here on Windows 10. Before now, most Windows users had to download a separate program/software for this Which continuously runs in the background. Draining the battery and clogging the CPU. However, Windows simplified this by adding in the Settings Menu. I think this feature was first seen on Windows 8 and 8.1 and seems not be going anywhere anytime time soon as it is still in the current Windows 10. So if you would like to know which program uses the most data on Windows 10, then follow the steps below.
How To Know Which Program Use The Most Data On Windows 10
To know which program uses the most Data on Windows 10 or see the list of program(s) that use your data on Windows 10 is pretty easy. Thankfully, you do not need a third-party party software/app for this.
- First, Access the Settings Menu by Clicking on the Start Button (Windows Logo at the bottom left corner of the screen) and then Select Settings.
-
This is where you will see all the available Settings. Locate and click on Network and Internet option.
-
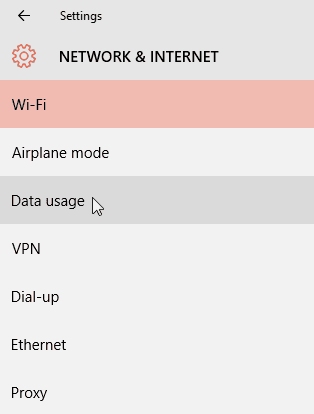
In the left column is where you will find subcategories like WiFi, Mobile Hotspot, Airplane Mode, Data Usage, etc. Click on Data Usage.
- This will highlight Data Usage on the Left column and bring out its details in the right column. First, you’ll have the Data Overview Which the total data usage over the last 30days. Then you have which connections provided said data; Cellular, WiFi or Ethernet along with their respective data amount in front of each.
Below that, you’ll see the “View Usage Details.” Click on it.
Now Select the type of Connection you use (Cellular, WiFi or Ethernet) to reveal which programs/software that used your data from that Connection, starting with the highest down to the lowest.
That is it. If you see a program, you don’t recognize taking a huge chunk of your data. Then you might want to make sure it isn’t a spyware or Malware sending out Confidential details from your PC to an unknown destination. If you need an antivirus to scan your PC Malware or viruses, you can check out our list of the top 5 very best antivirus software for your PC.
Conclusion
That’s pretty much how you can know which program uses the most data on Windows 10. If you aren’t on the Windows 10 yet then you can easily Install the Windows 10 on your PC. No data to update? No problem, we’ve gat you covered with how you can update to Windows 10 offline.


