With the release of Apple’s self-proclaimed “most advanced mobile operating system” that was ever built – iOS 10, came a host of never-before-imagined features. This tutorial would focus on how you can use your iOS 10 device as a magnifying glass. To use your iOS 10 magnifier, follow these steps:
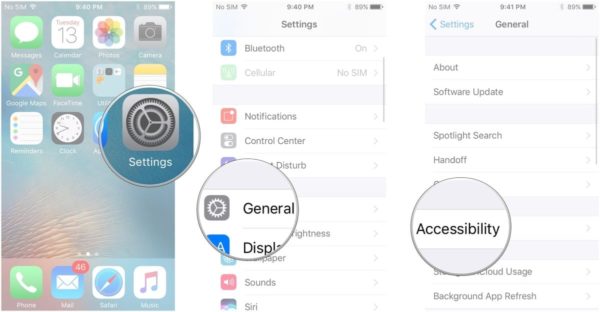
- From the home screen tap on the Settings app
- Under Settings, tap on General
- Under the General settings click on Accessibility

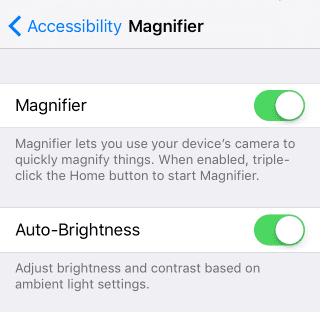
- Click on Magnifier under Accessibility.
- Toggle the switch beside the Magnifier On. Do the same for the Auto-Brightness feature

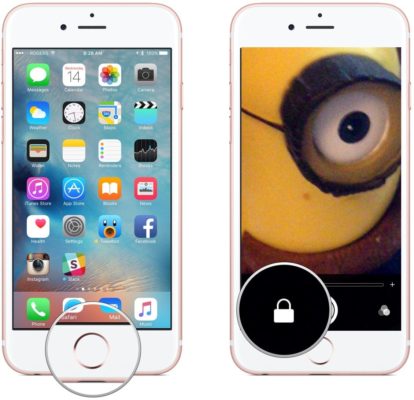
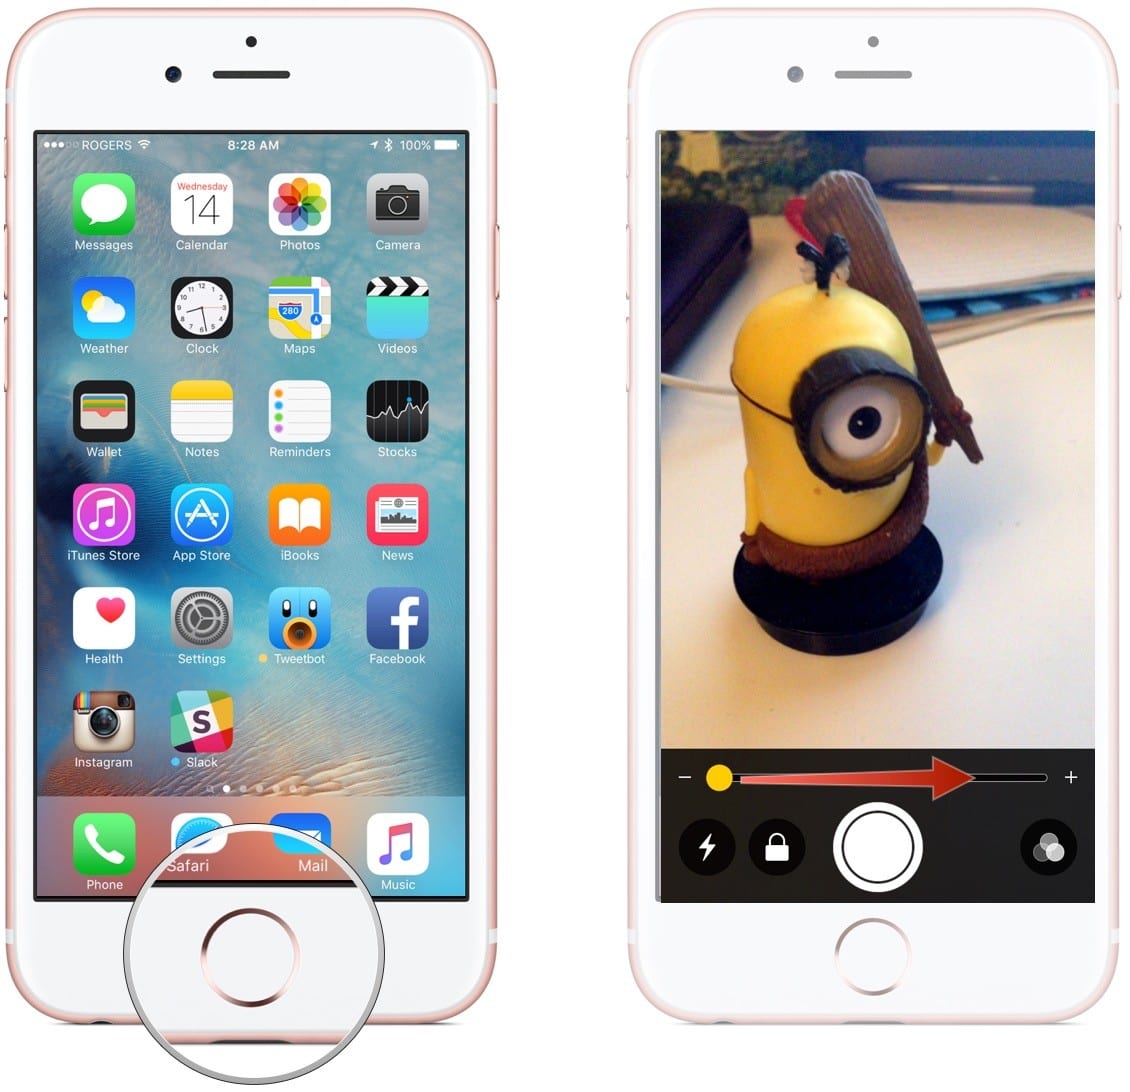
- Triple press the Home button to launch the Magnifier
- Tap and hold the slider to adjust the Magnifier. To zoom in, slide towards the left and to zoom out, to the left.
- Tap on the Focus Lock button to lock the focus (it is represented by a small padlock icon at the bottom left corner of the screen).

- Tap on the lightning bolt icon to turn on the flashlight if you are in a low-light area or during nighttime.
You can also adjust the brightness of the filters manually by clicking on the filter button – an icon with 3 circles – and then adjusting the brightness in the screen that appears. You capture and magnify a still image using the Freeze Frame feature. To take a Freeze Frame of whatever you wish to magnify, take the following steps:
- Activate the Magnifier by triple-pressing the Home button
- Tap on the Freeze frame button at the bottom center of the screen. The button looks like the camera button in your Camera app.

- Tap and hold the slider to adjust the zoom just as before
- To exit the Freeze Frame mode, tap the Freeze Frame button again; this takes you back to the normal Magnifier.
Note that when in the Freeze Frame mode, the still images are not saved like when using the Camera app.
Conclusion
In situations, when you need to zoom into a material like a book or a tiny object, the Magnifier could be useful then. That’s all for now; leave your comments below in the Comments box to let me know what you think about this feature. Merci

