In today’s tutorial, we shall be looking at how you can create a bootable clone of your hard disk drive (HDD) in Windows 10. But just before we dive in let’s take a look at some of the reasons why you may consider cloning your drive.
Reasons why you may want to clone your drive?
You might think that by just copying/dragging and pasting /dropping Windows files from your in-built hard drive to an external drive is all you need to get a bootable drive. But you are wrong, because when you do that, you only create unbootable system files on the new drive. Your best bet is to create a bootable clone of that drive using any of the free cloning tools available for Windows.
Below are some of the circumstances that you may need to clone your drive:
- When you want to create a bootable hard drive.
- When backing up the contents of the old drive.
- When you want to upgrade your hard drive from one to one with a higher memory capacity.
- When upgrading from a Hard Disk Drive (HDD) to a Solid State Drive (SSD)
How To Create A Bootable Clone Of Drive In Windows 10
In this tutorial I’ll be showing you how you can easily clone your hard drive in Windows 10 using a free software called AOMEI Backupper Standard. This software is a free backup tool used in cloning your hard disk. It is available in 32-bit and 64-bit versions for Windows 10.
The tool can be used to clone existing data in a hard disk onto another disk as well as clone deleted files using “sector-by-sector” cloning option.
Steps on how to use AOMEI Backupper Standard
To clone your drive using AOMEI Backupper Standard, follow the steps below:
- Step 1 – Download and install AOMEI Backupper Standard
- Step 2 – Run the application on your Windows PC
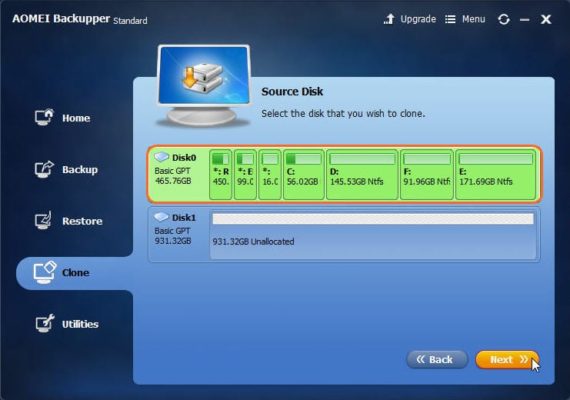
- Step 3 – Click on “Clone” from the menu list on the left side of the app interface

- Step 4 – Select the source drive you wish to clone and click “Next”

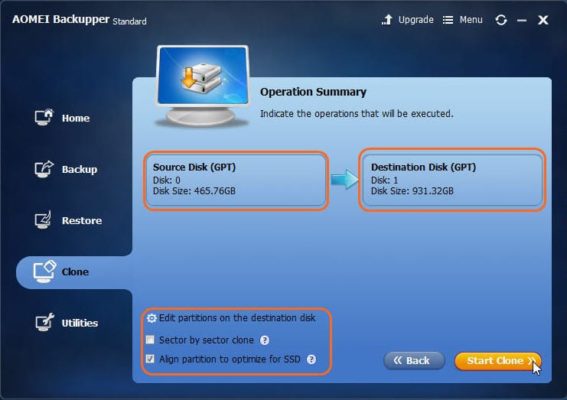
- Step 5 – Select the target drive you want to move the cloned contents into and click “Next”

- Step 6 – Click the Start Clone button on the bottom right corner to start cloning
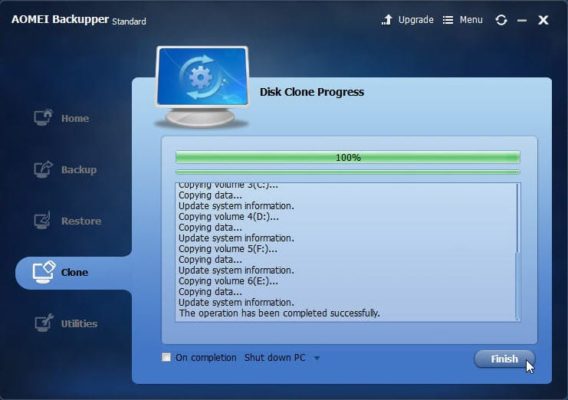
When done cloning click on the “Finish” button

Your bootable drive is now ready to use.
You can resize the partitions on the target disk to use the full disk capacity when cloning a small drive to a large one by selecting the “Edit the Partitions on Destination disk” option.
I hope this tutorial was easy to follow. Drop your comments below to let me know what you think.
Ciao.

