
There are a bunch of features on Microsoft Office which are enabled by default. One of them is “pick up where you left off.” While this feature is seen as useful to some people, some others don’t. If you are one of them, you can easily disable this feature.
Just as the name implies, “pick up where you left off” opens a document exactly the way it was when you last closed it. Let’s say you were on page 32 of your Word document when you closed it, the next time you launch it, you will be taken to the same page with your insertion point exactly where you left off.
There isn’t a straightforward method to disable this feature within Office Suite, thought. To do this, you need to do so in the Registry.
Standard Warning- Registry Editor is a very powerful tool Misusing it can result in your system being unstable or even inoperable. his is a simple hack and as long as you follow the steps correctly, you are safe. Also, make sure to back up your Registry (and your computer!) before you proceed with this.
First off, press the Windows Key + R to launch the “Run” window.

Next up, enter Regedt32.exe into the box and click OK.
Now, your Registry Editor Utility should open. Navigate to the following path:
HKEY_CURRENT_USER\Software\Microsoft\Office\16.0\Word\Reading Locations
Please note that “16.0” in the file path might be different on your computer as it varies depending on which version of Office is on your computer. If you have Office 2013 on your PC, you should look for “15.0.”
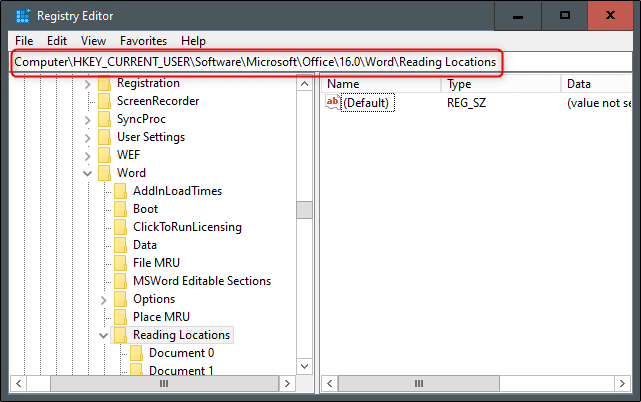
Here, you should see the “pick up where you left off” key. Now, if you delete the key, its effect will only be temporary. The key is generated automatically. As such, the next time your computer is rebooted, it will appear again.
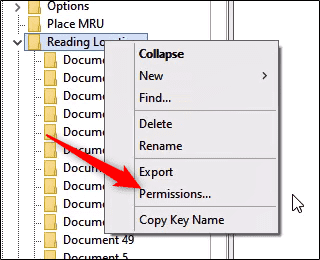
Right-click “Reading Locations” and then click “Permissions” from the drop-down menu to disable it.
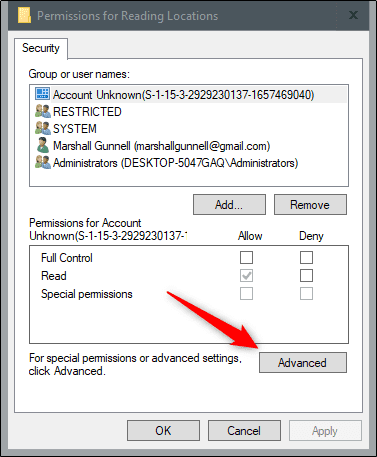
You should see the “Permissions for Reading Locations” menu.
Click the Advanced button.
Now, the “Advanced Security Settings for Reading Locations” dialog will appear on your screen.
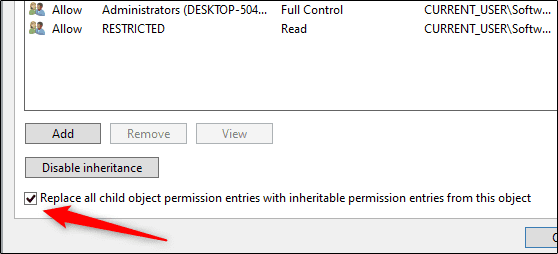
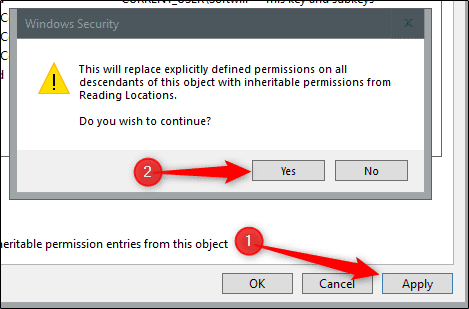
Click Apply.
Now, you should see a security message. Read it and then click Yes to continue.
Finally, click OK and close the Registry Editor Utility.
To check if the change has taken effect, reboot your computer and open Word again.
