Microsoft recently unveiled Windows 11 to the world which includes some exciting new features. Although the stable version of Windows 11 will be out somewhere in the world towards the end of the fall, the new version is released with a number of prerequisites that must be met for a free upgrade from Windows 10 to Windows 11.
A key requirement for Windows 11 is to have a TPM 2.0 chip installed and Secure Boot enabled. Several Windows users have been stuck on questions like what is TPM 2.0? Do I have a TPM 2.0 chip? Do I need a TPM module for Windows 11? How to install TPM 2.0 on Windows? Well, we answer all your questions.
What is TPM 2.0?
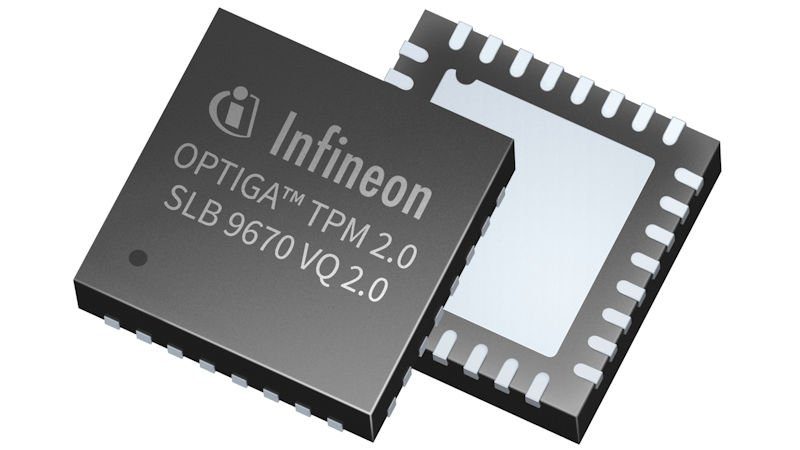
TPM stands for Trusted Platform Module. It is a hardware module that is used for secure boot and system integrity checking. The Windows operating system also uses it for file and disk encryption along with BitLocker.
TPM 2.0 was released in 2024. It is the latest version and an update over TPM 1.2 which was released way back in 2011. Most premium and business grade laptops / PCs released after 2016 have TPM 2.0 installed. If you are unsure of the TPM version, here is an easy way to check the TPM on Windows 10 and Windows 7.
Check/change the status and version of the TPM
To check if you have a TPM module, press Win + R to activate the command prompt and type tpm.msc. Then, hit Enter.
On the TPM management page, you will see the status of your TPM. In my case, the status is “The TPM is ready for use”. You can also see the TPM version below under TPM Manufacturer Information.
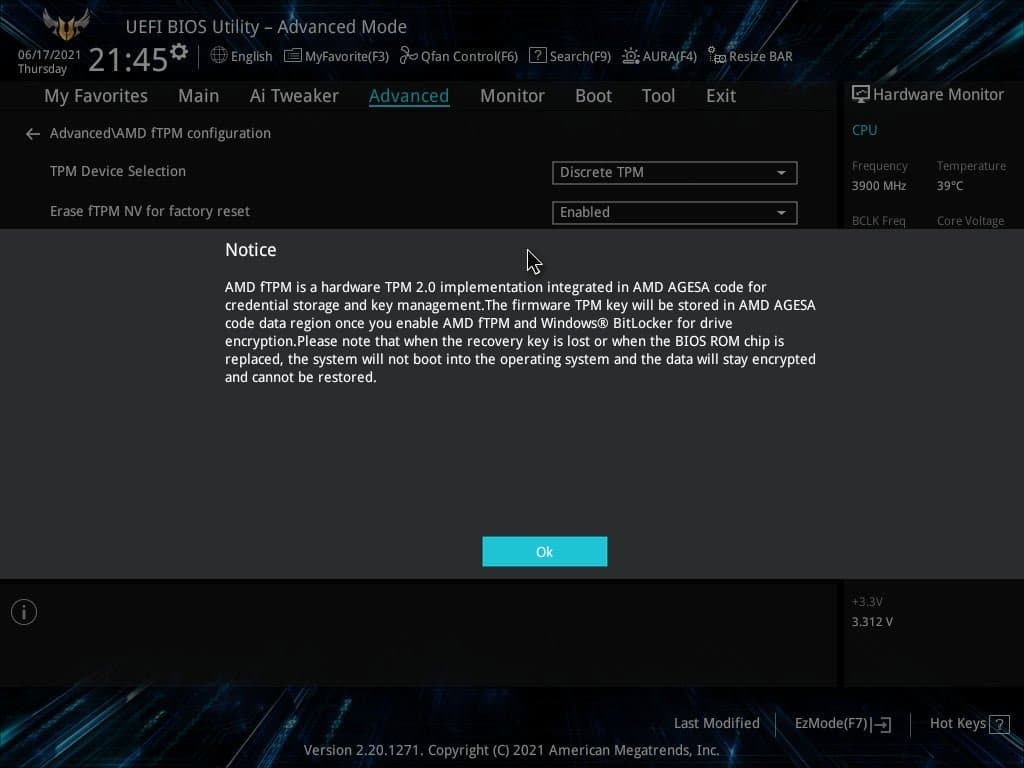
If the status of your TPM module is disabled, you must enable it in the UEFI firmware settings menu. The menu options are different for each laptop depending on the manufacturer. Typically, you can find the TPM option under Security or Advanced Settings. The TPM module is called PTT for Intel processors and fTPM for AMD processors.
Does my motherboard have a TPM header?
Now if your PC doesn’t have a TPM chip, don’t worry. Most motherboards have a TPM header and you can manually install a TPM module.
If you are unsure, you can check the motherboard manufacturer’s website. You just have to google your motherboard model number and check the technical specifications on the manufacturer’s website.
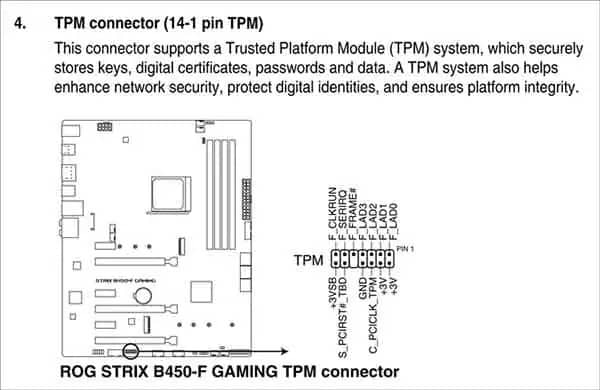
For example, let’s just take the ROG Strix-B450F motherboard. On the Asus website, if you check below the tech specs, you will see the TPM header under the I / O ports. This means that the Asus B450F motherboard has an option to install the TPM module.
If you can’t find the information on the manufacturer’s site, you can also physically inspect your motherboard. It is usually found under the RGB header or at the COM ports. For reference, in the ROG Strix B450F, the TPM header is located next to the COM port.
How to install the TPM 2.0 module
If your PC has a TPM header, you can easily get a TPM 2.0 module for your motherboard. This will make your PC compatible with Windows 11 if you meet other requirements.
However, finding the right TPM 2.0 module is the tricky part. You need to get the exact pin number and pin layout of the motherboard TPM header.
For example, let’s take the aforementioned B450F motherboard again. The manual says it has a 14-1 PIN header with the following PIN layout. So, I have to buy a 14-1 PIN TPM 2.0 module.
You need to make sure that the TPM module you purchase has the same PIN layout as the TPM header. More importantly, it has the same PIN lock. In my case, the TPM module must have a lock PIN in the 5th row. For reference, below is my TPM header layout image.
It is recommended that you purchase a TPM module from the same company as the motherboard manufacturer. Also, due to increased demand, TPM module prices have peaked. It’s also hard to find them on Amazon, BestBuy, or Walmart.
If in doubt, it is best to contact the motherboard manufacturer’s customer support. They will better guide you to the right TPM module
Once you have purchased the TPM module, install it on the motherboard. You need to enable the TPM module from the UEFI firmware menu. Most TPM modules, if compatible, work immediately without any installation. There is a need to restart the operating system though.
Conclusion- Install TPM 2.0 on Windows PC
As noted earlier, most computers should already have TPM 2.0 installed on the motherboard. For many users, it is turned off by default. We shared a link above on how to enable it from the UEFI boot menu.
In case your Windows computer doesn’t have a TPM chip, it’s easy to buy one online. You can install it manually or take your computer to a technician. It shouldn’t take long. You just need a compatible motherboard.
