For most people like me, Google Maps is a must have, as we use it all the time. Well, a little issue is that Google Maps keeps a detailed history of everywhere you have been whether you have used the navigation or not there. In this post, we will be talking about how to view and delete your Google Maps History.
Google Maps saves your travel data into different locations – “Your Timeline” and “Maps History.” Your Timeline is a very detailed look into every location you have been to, even if you didn’t use your Google Maps to get there (of course, your phone tracks you everywhere you go). Maps History records only places you have used the navigation to get to. It is quite confusing why this data is stored in two different locations, so we are going to talk about both of them in this article.
How to Edit or Remove Individual Entries from Your Google Maps Timeline
For this article, we are going to be using Android, but they all work the same on iOS too, so you shouldn’t encounter any issue following the same steps.
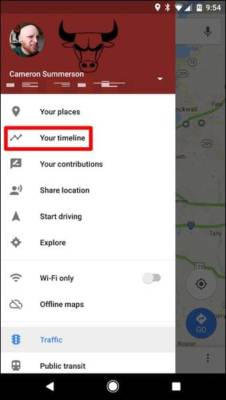
- To check your Google Maps Timeline – the details of places you have been to even where you didn’t navigate to – open Google Maps, slide your finger from left to right or tap on the three lines icon at the top left corner of the screen to open the app menu. Tap on “Your timeline.”

- The default view is a minimap which is at the top, and a quick look at your most recent locations are below. To edit or delete any of the locations displayed, tap on its entry.Here, you can modify the location by tapping the “Edit” button. This will let you change the times associated with the location and change the exact location if it isn’t correct.
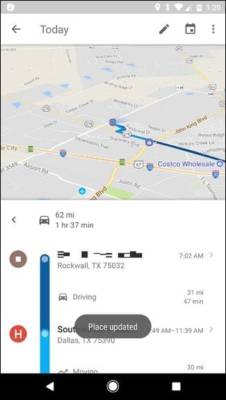

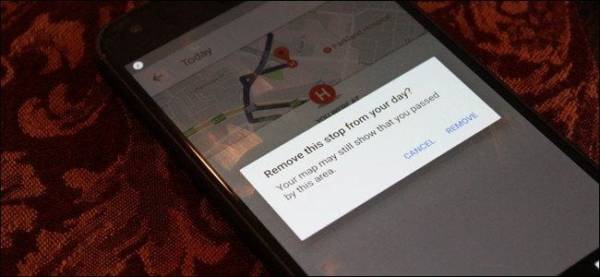
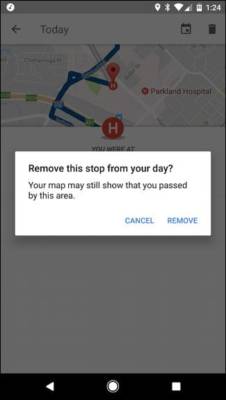
- If you want to delete the entry, just tap the trash can icon at the upper right corner of the screen. If you want to remove the entry completely, you will just need to verify that you want it deleted from your phone by tapping “Remove” on the dialogue that pops up.

How to Stop Google From Tracking Your Location History (and Delete It All)
Deleting entries from Google Maps do not have to be one after the other though. You can also edit how Your Timeline works and delete all the entries at once if you want.
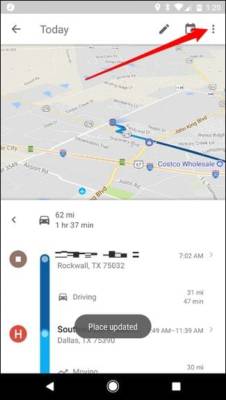
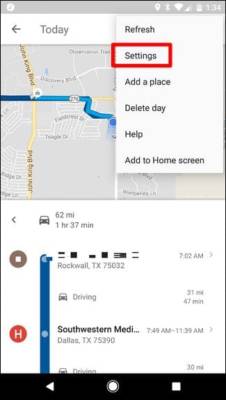
- To do this, go to the timeline screen, then tap the three dots at the top right corner of the screen, then tap “Settings.”
Here, things begin to get a little bit convoluted depending on what exactly you are trying to do. Disabling your timeline is quite difficult. This is because doing so would negatively affect other aspects of navigation. Anyway, if that is what you want to do, scroll down the Timeline settings screen, disable the “location History is on” option.
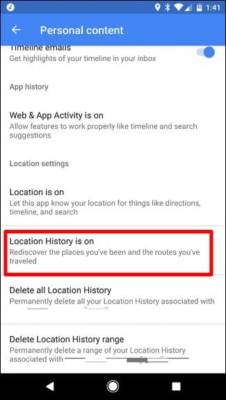
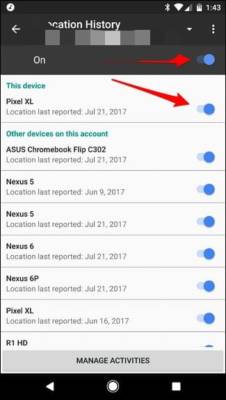
You can choose to disable either for just that device or for your account which will affect other devices synced to that account too – simply press the appropriate slider. The slider above will disable all Location History tracking across all your devices synced with your Google account while the one next to the name of the device will disable it for just that particular device.
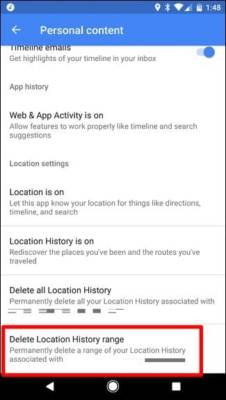
You can delete your location history in bulk. Doing this involves two different methods – Delete All Location History or Delete Location History Range.To see the options, scroll down to the bottom of the Timeline Settings screen.
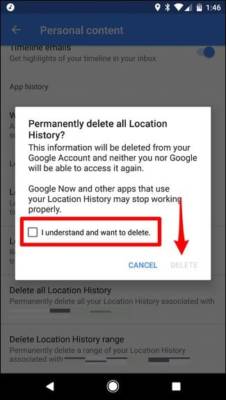
- The first option deletes all Location History. When you tap it, it brings up a warning saying that this cannot be undone and proceeding with this would affect your apps which rely on your location history. If you have no problem with that, tick the box beside “I understand and want to delete” and then tap “Delete” to complete the process.
- However, if what you want to delete is a range, tap the option below the “Delete All Location History” which is the “Delete Location History Range.” Next, enter your start and end dates. Tap “Continue” to proceed.
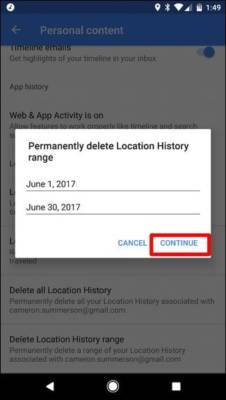
- A warning will come up just like the one that appeared the other time – tick the box and tape “Delete.” And that’s it; its has all been deleted.
How To Delete Maps’ Navigation History
The method involved in deleting Maps’ navigation history is quite complicated. This is because there is no way to delete all in one click or tap. The only thing you can do is to delete them one by one. To do this follow the steps below.
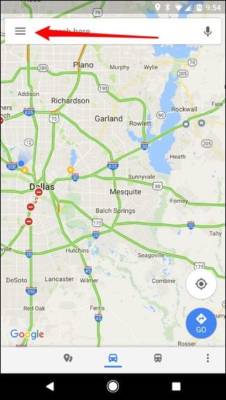
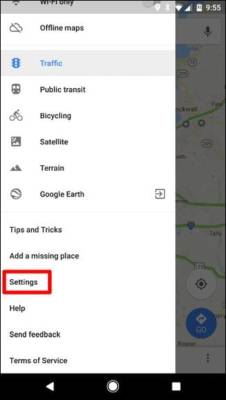
- First, open the Google Maps app on your Next, open the app’s menu by tapping on the three line icon at the top left corner of the screen or slide your finger from left to right on the phone’s screen. Scroll down the menu until you see “Settings” and then tap on it.
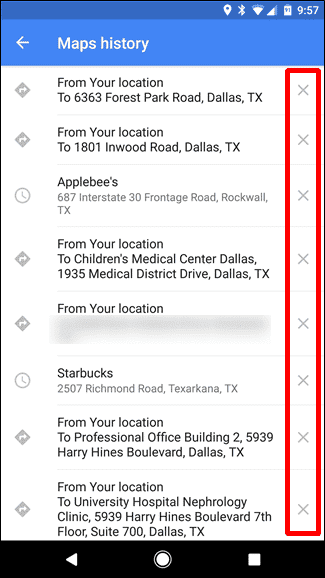
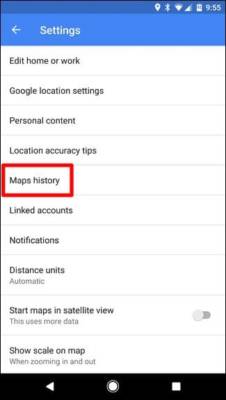
Scroll down the page until you see the Maps History option (it’s about halfway down).
Here, you can see everywhere Google Maps has navigated to on your device. There is no way you can use to delete all this data at once.
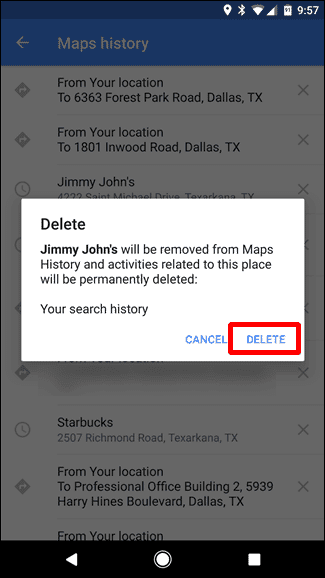
The only thing you can do is to delete them one after the other. To do this, tap the little X on the right side of each entry. A warning will come up telling you that the entry you tapped X for will be removed and deleted from your Maps History. If you are cool with it, tap “Delete” to complete the process.