LifeAfter (China name- 明日 之后)- Is an open-world survival game developed and published by NetEase China under the name Day After Tomorrow, but later changed to a new, survival-type game, with internal As a result, the player will have to survive on his own, face all the dangers, challenge his journey hard after a wave of virus attacks.
In it, you have to find your own resources such as abandoned mineral mines, self-gathering, building houses to avoid wild animals as well as avoiding cold and cold to find food to live on.
- Home: https://www.lifeafter.game/
- Fanpage: https://www.fb.com/LifeAfter.en/
The main content of the Zombie LifeAfter Mobile survival game
This is a zombie survival game. You act as the apocalypse survivor with the sole goal of trying to survive in this terrible new world. When you first start playing, there will be instructions to teach you the basics of survival, including gathering resources, making and avoiding or fighting zombies. According to TechVaz, the game is very similar to ARK- Survival Evolved, but there are no dinosaurs here.
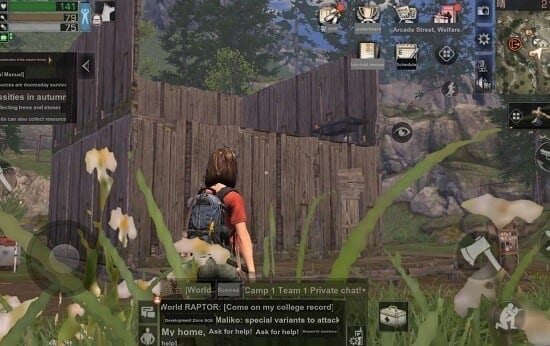
You will have to go Collect resources in the game (images- 1)Basically, there is a lot of work to do in LifeAfter game. Certainly, many of them involve fighting against hungry bodies, but you even do more than avoid them. That’s where the manufacturing system was born. You will create weapons, tools, tapes and create your own defenses.
Your goal is to rebuild humanity, so you’ll need to find shelter, strengthen it and pull survivors together to stay safe, and fight zombies.
The gameplay of this game survives this horror
In terms of gameplay, LifeAfter APK is very similar to Rules of Survival in terms of feeling, probably due to the same developer. It was developed with a very intuitive style, with light, smooth touch controls and various menus that are as streamlined as possible. In fact, menus are very numerous, so this is a strong point of the game.
You will spend most of your time exploring an open world. There are chopped trees, stones to pick up and buildings to pick up different items.
Illness, starvation, infection, harsh environments and mysterious organizations with unknown sources threaten the lives of very few people alive and you are the player who will be one of them.
You will need to enter the ruined world, explore abandoned and dangerous places like mines, universities, tree-lined plateaus, and collect anything and everything that will help you survive longer. than. Players must find resources and collect them, hunt, farm, cook and create medicine and build weapons and gears to protect themselves. The element of a survival game is present everywhere in this game
Thankfully, you can play with other survivors in real time and work together to survive. Also, in fashion like in real movies, you’ll have a pet dog, so you’ll never be alone. Players can also trade, buy, sell and share items together, such as ammunition, materials, and food.
And of course, there are also construction facilities. You can choose a location in the safe zone and build your home base from the ground up. The best thing about it is that you can really live with friends in your base and survive together.
The game relies heavily on multiplayer gameplay and solo play will be very difficult, so players will be slightly forced to find friends and family because some key features can only be accessed through the system. friends and guild.
There are many types of weapons to kill zombies, including ranged and melee weapons, but they all cost a lot to get.
What activities will you do in LifeAfter games?
1. Find your first home
After completing the tutorial when you first entered the game, you will go to area 101 HQ, one of the last bases of the human resistance against the threat of invading mutant virus and find a way. Continue your mission by establishing new colonies of humans on land.
After meeting some VIPs, including the shop owner, as well as the boss of HQ, you will be sent to the development area 101 where you must monitor the construction of your own base.
However, before starting construction, you will have to clear the soil, as well as recycle some tools scattered on the ground. When you find the right area, you can build it on any part of your territory to confirm your ownership and have somewhere to build your house. You can then start building some walls and houses.
It is recommended to quickly build some walls, as well as a door frame and a door, to shield yourself from the mutants that will attack the first night. You can make all these components using the props you find lying on the ground floor.
Moreover, you can also find a set of stairs if you go looking around, you can use to add the second floor to your home from which you can create a convenient location to shoot at the enemy. It’s from above.
2. How to collect resources in LifeAfter
If you want to build big buildings and houses in this game, you will need lots of wood and stone. However, once you have finished clearing your land, you may notice that there are only a few trees, trees and stones left for you to gather. Because of this, the best way to collect more materials is to explore nearby areas next to your home, by following roads away from your area. At these points, you will find lots of trees, shrubs, and stones that you can collect from there.
Remember, to collect materials, you will need both a scythe and an ax, which is used to collect stones and wood, respectively.
3. Transporting materials in LifeAfter
However, even after collecting materials near your home, you will still have trouble when you try to increase your level, expand your home or whenever you want to build the most complex structures. In these cases, you will need to travel to other areas away from home.
Your main mode of transport in this game is to go to another place through a helicopter near your home. When you jump on board, you can choose from several destinations, including 101 HQ.
However, be careful when you go, when you come to these areas, you will encounter many different dangers, wild animals, monsters and even other players can attack you.
Moreover, while most are not hostile, for the most part, it is important that you keep your best pacifist to avoid battles that may make you lose your life.
In these new areas, you will find endless building materials, as well as countless animals that you can hunt for meat. This is the main method to get supplies for you from the beginning, and you will probably return to your home and the forest because of this.
Remember to empty your inventory before entering the forest so you have enough space to bring in as much material as possible. Also, remember that all the organic materials you get from hunting and finding food are infected and you won’t be able to bring them directly to your home.
Accordingly, you must return them to the pilot standing next to the helicopter so that he can handle them and send them to your home via mail.
4. Improve the level of proficiency
As you continue to explore the wild world, pick up materials, create new things and fight against mutants and wild animals, your character will have different types of experiences.
This experience will have three main types- collecting, producing and fighting and, as their name suggests, they are obtained by searching and collecting materials, making tools and objects, and defeating guys. The enemy on the battlefield, respectively.
These proficiency levels are not only important because they unlock new skills and structures, but also because they are necessary to upgrade your facility to a higher level. For example, to upgrade your facility to the second level, you need to reach level 5 in all of your 4 levels.
5. How to kill quickly
Fighting is a fundamental aspect of this game. Although there are some players, some of whom prefer to avoid it and focus more on building bases, most battles are inevitable in LifeAfter games.
For this reason, if you have to fight well, remember to always aim at the head, in which your attacks cause double damage, to defeat monsters easily. The same principle applies when hunting animals; If you shoot them in the head, it’s unlikely they’ll run and escape, helping you lower them faster.
Become a level chef
Even the most fastidious adventurers are hungry, which is unfortunate because the cooking system in LifeAfter is not as simple as in other games.
Before you can cook your food, you will need to find ingredients. Ingredients like meat, mushrooms, and vegetables, among other things, can be obtained from hunting, gathering, and by sowing and harvesting them, respectively.
When you have some ingredients available, you can go to any cooking station and combine them with the recipes that you have now unlocked. If you have the necessary ingredients, you will be able to cook some great dishes.
All survival games have many common elements such as collecting, building and fighting constantly against wild creatures. Fortunately, however, this guide has everything you need to collect supplies, use them to create new items and to survive in nature.
Instructions on how to play basic LifeAfter game
After creating a character or customizing the interface, you will start on new land. There you will find an NPC, named Aleksey. He will guide you with the most basic things.
At the end of the instructional tasks, he will be killed by an infected creature, named Lozarov. In the upper left corner of the screen, you can check the task.
The first task challenges you to find a usable device. All you need to do is move to the glowing circle area. There you will find a life finder. Open it. Move forward and select the bag. Open it.
The second mission is to use gauze to restore stamina and HP. Click on the box of medical kits on your screen -> then choose to use bandages.
Then you will have to talk to a Dutch person. The next task is to collect resources to create a machete. In the wild, you can collect a wealth of resources like ore, stone, wood, food, etc. In the early stages of the game, stone/wood/food is the most useful resource.
You can collect stones/ore from stone. You take wood from the tree. There are two types of weapons you need to collect wood and stone. These two weapons are ax or pickaxe (hoe). To chop down the tree, you need an ax. To get stone/ore from stone, you need a pickaxe. If you don’t have these weapons, you can still collect these resources.
But, in this tutorial, you will know the game offers these tools for free. Just below the minimap, you can switch between weapons. To collect resources, go near the wood or tree or any item -> point to it -> touch the AX icon on your screen. Then the character selects the resource automatically.
After collecting enough resources, talk to the NPC. Then follow the dog to discover how to escape. The dog will guide you to the ladder. This guide then teaches you how to leave the map by helicopter and return home. When you go out, NPC will guide you to a cabin where you will face the infected Zombie and Lazarov.
Helicopter
The zombies and Lazarov will try to kill you. You will have to get out of the cabin and follow Aleksin to find a car to leave. Then you will find a group of people with helicopters. Aleksey will give you a shotgun. But no bullets. Bullet box is located near the helicopter. Go there and replenish bullets.
After that, you will have to build a Barrier. On the same location, there will be an old chest. Open that chest and you’ll find Barricade material. Go to the option “Make> All> Barricade – craft. After being built, open the bag> select Barricade> Gear – and bring Barricade into the circle (behind Aleksey).
Once you’re done, zombies will come. Continue to fight with them until your team is ready to board. Aleksey repaired helicopters. Go to the helicopter. Then Lazarov, the creature, attacks your Helicopter.
1. Guide Survivor character skills
To learn about the character’s abilities, press the home button in the top left corner. When selecting the ability option, you can see the three abilities of your character – Collecting, Fighting, Manufacturing. To increase the corresponding ability, you need to acquire skill points. Obtaining natural resources can increase your ability to collect.
- Hunting zombies and animals can give you battle skills
- Making different items can give you skill points.
You can get skill points as a result of completing bonus missions, or by killing magical creatures. The dollar is the in-game currency and can be earned by completing training or selling items.
2. Instructions for manufacturing weapons (Machete / Knife, Mondragon gun)
To survive in the game, you need to make good weapons. Having a bow is not enough, you need Rifles to explore dangerous territories. You can build different weapons like Machete, melee weapons, and Mondragon rifles.
- Machete – To make machetes, you will need wood, stone, hemp, iron ore, etc. You can get these items from the wild.
- Mondragon Rifles – To manufacture Mondragon Rifles, essential items are wood, cast iron, and bone.
Create a powerful gun to fight, survive better
You will get bones by killing animals in the wild like Retirement / Nai and wolf. Cast iron is made exclusively from iron ore and tree branches. You can take branches from trees, while iron ore is from stone.
3. Guide to fighting
Fighting is an inevitable part of the game. Regardless of your intention, you will eventually encounter mutants and animals. In combat always prioritize the fastest destruction. So attack at the beginning (HeadShots), it will deal double damage and can help you complete your job much easier. Even in hunting, shooting at the head of the beast will destroy it faster.
4. How to Get limestone powder (Lime) and sandstone (Sandstone)
- Visiting Hope 101, Town Hall (town hall)
Enter zone 101, the town hall. In town, you can interact with many merchants in different stores and buy different types of items in exchange for in-game currency.
To visit zone 101, Town Hall and helicopter point. (Click on the minimap in the upper right corner of the game screen> find the red exit icon and select it). When you’re near a helicopter, click the Open button to open -> a small map window will open> at the top left, select Hope 101.
- Visit the Furniture Store in town
When you arrive at zone 101, the town hall (Town Hall), touch the minimap again and find the hammer icon. Visit that location. There you will see furniture stores.
- Talk to the interior store manager
Inside the furniture store, there is a furniture store manager. Interact with him (go near) and choose to talk. Then you have to make choices; Do you have any special items? After that, this manager will show you items that you can buy with new money in the game.
Select Lime> Select quantity and buy. Similarly, choose sandstone (Sandstone)> select quantity> buy.
5. How to upgrade the house, the LifeAfter Mobile manor
To learn to upgrade the manor, make sure you are in the development area. In the upper right corner of the screen, tap the miniature map> touch the (+) (-) icon to zoom in / out. If not, open the mini map> find the red marker -> select it -> use a helicopter. Now, learn how to upgrade your home or home in the LifeAfter game!
-
Find the electric cabinet
In the development area, near your home, there is a switchboard, near the mailbox. Select on it and click “Manager” to Manage. Then you will see many options; information, nurses, events, renovations, and manors (manor). Click on the upgrade page option -> here you can check the material requirements to upgrade and the level of ability requirements.
Once you have enough upgrade materials and capabilities, you will see the upgraded button. Click it to upgrade the manor. In the upper left corner of the screen, click the Home icon> profile> here you can check the current page level.
-
Instructions for upgrading basic level 2 houses
In this section, we will show you how to upgrade the house to level 2. After that, you can upgrade the next level yourself. To upgrade the house/manor to level 2, you need 5 wooden boards, 200 stones, 400 kinds of wood. And, the ability level or ability is 5. Also need to Collect / Gather 5, Fabrication / Crafting; 5, Combat / Combat; 5).
Plywood (Wooden Boards) – You can build with wood plank bench Material facility (bench to manufacturing). You get this free bench in the development area. All you need to do is look a bit around the cabin area> select it.
Once done, you can put it in your home manor. Then select it> then select Workable Tab> Select wood panel. To make wood planks, you need 2 Twig, 120 Wood (1 piece). Twig – Twig is the second resource you get by chopping down trees. Cut the tree in the forest area to get Twig.
Stones (Stones) – You get stone by stone with Pickaxe destroyed. Just go to some wilderness; You can find many rocks there to collect.
Wood (Wood) – Cut the tree to receive it.
Level 5 Abilities – In the upper left corner, tap the homepage icon> Abilities> here you can see the proficiency points needed to level up Abilities points.
- How to increase the level of Abilities quickly
Manufacturing (Crafting) – In order to increase fast manufacturing points, TechVaz recommends making cast iron or gunpowder with the Gear workstation. You get more than 100 proficient points when you make these items. On the other hand, making common items such as utensils and tools will also increase a lot of proficiency points.
In addition, you can earn proficiency points by completing training tasks. At the top of the screen, tap the Training> option to complete these tasks to earn a large number of proficiency points.
Collect and Fight- Leveling up these abilities is quite easy. To collect resources from the map or complete training tasks. For points of proficiency in fighting/ hunting zombies. We recommend that you make machete weapons and armor as soon as possible to get combat points without much injury. If you have followed the guiding tasks, you will have a ranged weapon; bow. And remember to complete the training tasks to earn the battle score.
- # Benefits of upgrading houses
Upgrades unlock new items like new recipes (items, armor, cloth, plastic, etc.), functions such as quick fixes, housemates, etc. The shared house function allows you to share items Products with friends, allowing you to live with a friend in the house. The quick repair function allows you to repair buildings, build broken buildings due to Zombie can break your house. So you have to fix it regularly.
Tips and tricks for the best LifeAfter game
Here are 10 tips and tricks you need to know when you first join this survival game.
1. Outdoor activities and gathering of manufacturing resources
- Once you go outside and are not in immediate danger, take your time to collect all kinds of manufacturing materials. While you are on your way to the locations of the main mission, stop and choose everything you see. When you build an ax, use it to destroy some rocks and collect stone materials.
- Move towards the grass bushes to collect hemp. And make sure you cut the tree with the ax. In it, these 3 materials can create a lot of items that you need to create in the early stages of the game journey. After that, the tutorial will teach you everything you need to know about how to survive on your own.
- • To get a good idea of the materials you will need to make certain items and where you can find them, click the “Make / make” button in the lower left corner of the screen. form. Click on the “Formula Index” option so you can know which items are available for production.
- Simple crafting options are very suitable to quickly produce more necessary weapons and healing items for you all the time. And when your backpack is full, throw some items that you don’t need to increase your backpack area.
2. Should build a house with 1 High Score for sniping
- • Each survivor in this game will need a house. When you build its exterior and interior, your housing level increases. The higher levels will open more construction items for your home than you can put in your home.
- • The higher the level of fabrication allows you to create new items. Your home will be more comfortable. You can always customize many things, in which you can build tons of defensive items that will also help you keep your main house in the best state on a regular basis.
3. Collect skill upgrade points
- • Collect, build and protect yourself will give you points related to new skills in each category. These new skills will permanently upgrade players and increase their survival factor. Click the home button icon in the top left corner of the screen and click “Abilities” to see the main points you have accumulated in each type of skill.
- • Also, if you just go out to explore, you will have a lot of proficiency. In particular, a highly skilled fighting skill should be your main priority. When you unlock a permanent upgrade, you will need more skillful points. It’s quite easy to get a lot of gold coins in this game by completing Training missions.
4. Be wary of changes in bad weather
- • The weather really affects your players in a negative way when it changes seriously. If it is bright and sunny outside, you have nothing to worry about. Whenever it rains, your Survivor can catch a cold quite quickly.
- • Best if you stay indoors if you meet this weather. But if you are short of supplies, there will be some mushrooms to help you, you can get them in the forest. The evenings tend to be colder, which can make your character numb and deplete HP. For this kind of weather change, keep a torch, light a fire nearby to keep it warm.
5. Feed dogs and it will take care of you and support you
- • Dog is your trusted friend, it not only notifies you of any imminent danger, but it also collects different items for you. Whenever it runs to another location, chances are it will run away to receive some gifts.
- Click the dog icon in the left corner of the screen to see the items it manages to use (they can be collected from Pet backpacks). Always feed your dog well and it will ensure loyalty. A loyal dog will often give you useful items.
6. Don’t forget to eat for Survivor!
- • Gathering and eating random foods is always a top priority while you are out exploring. Eating will help control your hunger and make your Survivor much more effective in activities. The status effect of “Fullness” increases your speed of collecting and moving, plus it helps your survivors use less energy while they sprint (run fast).
- • Always ensure the clock indicator of the character’s hungry state is not exhausted to a dangerous level. And pay attention to your stamina. Don’t let your survivors get too tired.
7. Benefits of outdoor cooking
- • Whenever you encounter the Petrol Barrel, you can use it for your outdoor cooking activities. Make sure you collect enough wood before starting to cook a dish – you will need that wood to help burn the wood, as well as being able to cook ..
- • Master your different types of simple recipes at the grill or campfire allowing you to cook them at any Fuel Tank you meet. Cooking any dish will give you an increase in survival. In addition, the dishes will increase your other hunger point (All Hunger).
8. Recover your goods as soon as possible after death!
• Like most survival games, you can collect all the items you have lost after death. You should always prioritize to get back all those goods. Just check the minimap in the right corner of the screen and see the backpack icon. This symbol represents the last place you died and where you can find your backpack full of collected items.
9. Become an active participant in events
• Events are available for players who are looking for a big challenge and give them a huge amount of rewards. These special events will often require the player to fight against the Big Boss and other survivors. Just click the “Daily” tab in the upper right corner of the screen to know about the events that are currently taking place. You should upgrade your Survivor a bit before you try to join your first World Boss or PVP event.
10. Check your training tasks and complete as much as possible
- • Click on the “Training” tab, it will transfer you to a menu full of tasks you need to complete. These training tasks change every day, so try to complete them all in one sitting if you complete it.
- Each completed task means you will receive proficiency, New money, contribution and Training Medal. And don’t forget to upgrade your manufacturing level. The higher levels in that area allow you to unlock new purchase options in “Market” in the Training menu option.
#. Other tips for LifeAfter
Use the bed
When your character’s HP drops, use the bed to restore health. You can get a free bed by exploring the cabin area. Or you can make a bed by benches yourself.
Lying in bed will recover your healthBandages to heal
The most important character index in the game is HP. One way you can increase your character’s HP is by using Bandages. You can create a bandage using hemp.Hemp (Hemp) can be obtained in the wild.
The whole tutorial of advanced Life After Mobile game
1. Quick tips for gold
Earn gold in the LifeAfter game quite easily. There are many ways to earn gold, and trading is one of them. You can sell firearms and rare items in the city or commercial center.
Many players sell rare items, rare guns, armor and earn huge amounts of gold. In today’s lesson, TechVaz will help you learn how to trade in the LifeAfter game; Sell items, handmade guns/armor, and more. Where to start!
Sword of gold in Trade Center and commercial city
If you are in the camp, you can visit the camps that won the bid to become a commercial city. If you are not in the camp, then you can trade in the commercial center. You go to zone 101, go to the point of entry / exit -> open (helicopter) -> business district -> visit any commercial area.
Then you will see many commercial stalls. Visit anyone and choose deals. Go to the sell (sell) tab and select the items you want to sell. You will receive a notification after the item is displayed in a commercial center.
Central Market – You can trade at a commercial center whether you join a camp (Camps) or not.
Just go to Hope 101 via helicopter and enter town hall. Find Central Market -> go inside and then approach a commercial booth. Select transaction -> Sell (sell) – >> select the item you want to sell – >> Choose price and quantity. You will have to pay the booth fee and after the item is sold, you receive gold bars (After tax deduction).
2. How to sell guns or armor in LifeAfter?
LifeAfter- Trade – Selling equipment and items- you can’t sell rare guns and opened guns. And apply for the same armor. What is an equipped, open weapon? When you build a rare device, it will be wrapped.
After requesting a rare gun/equipment from the Gear workstation, it will place itself in your backpack. Click on the backpack -> select a rare gun/equipment -> it will show you the option to open or not. If you open it (click Open to open), and then you will not be able to sell it. So let it stay locked and then you can sell it in the trade market.
Sell Rare Guns or Armor!
In the LifeAfter game, rare pages are displayed with a diamond icon and very nice ribbon wrap. On the other hand, if the item cannot be traded, there will not be any diamond symbols. And, if you’re going to sell, it will tell you (can’t trade this item).
3. Upgrade weapons with Formula / Blueprint?
Using the formula formulas, you can modify, as well as upgrade equipment. If you don’t have one, you can build it at 101 furniture store. Then go near it> choose to use -> modify the formula -> select the weapon or equipment to modify -> select -> modify -> After scanning, you will see two properties of the formula; original and new.
Next, compare the statistics and choose one of the best equipment with more stats. So here’s how you can upgrade the device.
Note when upgrading equipment and rare weapons
If you still get devices that are not rare even after manufacturing with the upgraded formula, make sure you make it with pure upgrade items. Do not use your roommate’s friends or resources and do not buy from the store.
4. Basic Camp Guide – join, create, receive gold!
The Camp of LifeAfter feature allows you to open many other functions and get more benefits. And below is the basic LifeAfter Camp guide, such as creating Camps, participating, leaving Camp.
How to Create Camp
After you land on the development area at the beginning, after completing some of the first missions (In these missions, you receive items from the mailbox), and will have a separate mission on Camp. will be unlocked.
Note– Camp means a private area and is considered a small town that you can create.
In this particular mission, you visit the Camp manager, named Billy, work in the chamber of commerce, and to find it, just enter 101 (town), go to the helicopter point (touch the map mini in the upper right corner of the screen – find the red exit point) -> select Open to open -> select Zone -> 101.
When you arrive at 101 (Town), reopen the minimap and look for (i). It is a commercial office.
There you will see Billy, the manager of the camp. Interact with her and choose to talk. There you have four options;
- I want to know about Camp zones
- I have prepared the 18500 gold ingots, needed to create a Camp. Please give me a form
- And, I want to join a Camp. Do you have any Camp information?
- I have a few things to do in zone 101
If you want to create a Camp, select the 2nd option. Then you will see a form. Here’s how to fill out that form- –
First, remember that you need at least 18,500 gold bars to become mayor or create Camp. And, you pay only 60% of the amount. The game allows you to pay up to 80% of the money. If you choose 70% or 80%, the amount will increase (about 20,000 – 25,000 gold).
Then you have your name Camp.
Add permissions; Free entry, approval required. If you select the free item, other players will join your camp immediately without getting approval from you (mayor). If you choose to approve, you will have to manually approve requests for players (who want to join your town).
How to join Camp
When you choose to join a Camp, the game will show you the list of available Camps. There are two types of Camps you notice; Underdevelopment has been created. Developing – If you have read the instructions above (to create a camp), you will understand.
These are camps, looking for supporters to pay the renewal amount. If you support these camps by paying a small number of gold bars, you will receive direct approval.
The camps have been created – These are established camps. You will have to apply for these camps. You do not receive direct approval (if permitted). And all activities and management are held by the market.
How to quickly join a Camp?
After selecting the second option (join), you will see a list of camps. Click on the filter button -> uncheck the tick next to it to join. Now, you will see the camp. If there’s no camp, wait!
Gold earning tips for LifeAfter
At the top right of the game screen, tap the daily option. It will show you the list of events. Complete these events to earn gold bars. If you are a beginner, TechVaz recommends that you complete the event. It will reward you with 500 gold bars.
After creating and joining!
In LifeAfter, as soon as you create or join the camp, you will be able to move your manor to Camp, Visit the development area (via helicopter) -> In the development zone, find Rachel and the future work -> move house. After that, you will receive a gift from the NPC. In Camp’s town hall, you can go to banks, training, data centers, traders and many other features.
How to leave, get rid of a Camp?
If your camp doesn’t work well, you should leave it and join a camp that works better. Remember that you cannot leave it within 24 hours of joining the camp.
Just go to the town hall (the town hall of the camp, not 101) -> find the town hall -> go to the city hall -> go upstairs -> on the first floor, you’ll see Crazy Huntress. Talk to her -> select Leave to exit. You will need to pay a small fee (gold bars). After that, your manor will be moved to the development area (including all facilities, except plants).
Donate to Camp
In the town hall of Camp -> find the bank -> go in ->; go to the basement (looks like ATM) -> select Use -> select resources -> select Donate to donate.
5. Instructions for creating and receiving keys
You need Master Key in LifeAfter to unlock locked chests in areas like Farstar City, so you can pick up items.
Especially, in Farstar City, you will find many chests locked. To unlock these chests, you need a key. You can make keys with wood, stone and iron ore. But, before it, you need to learn the recipe. Without it, you cannot create a key.
To understand the primary key formula, you will have to reach the level of mastery of leveraging 13. At this level, the key formula is unlocked. You can learn it by spending new skill points and dollars.
Learn the main recipe
In the upper left corner of the game screen, press the home button -> select abilities -> here you can check the proficiency level. Then click crafting ability -> select master key formula -> Then select learn.
How to increase the level of manufacturing to level 13 fast?
One of the best ways to increase the ability is to complete quests. For example; Mission of an autumn forest, Sand mission castle, general training mission. From these tasks, you earn a large amount of proficiency. First, you need to visit these areas (via helicopters).
Helicopters will drop you at one of the houses or shelters. Close to shelter or home, find and check quests, and complete tasks. For training tasks, touch the training mode option at the top of the game screen -> Traning -> here you can see all the tasks. Complete missions to earn proficiency.
Once you have learned the recipe for the key, you can create the key. At the bottom left of the game screen, click the make option -> In the simple fabrication section, in the All tab, search for Key master -> craft. It will consume you (100) wood, (50) stones, (1) Iron ore.
Wood – Chop Tree to receive. Stone – Breaking stones. Iron ore – Breaking rocks (Autumn Forest or Farstar City), through drilling machines.
Where to find chests in Farstar City
One of the missions in this survival game is that you will have to find five chests in Farstar City. TechVaz recommends that you observe the houses.
Or open the minimap -> run to the high school building -> go up the stairs/terrace -> use the ladder -> there will be two chests. You can find more than five chests easily. But, please stay away from the surrounding zombies and enemies.
