
Not knowing how to delete or remove Wi-Fi networks can leave you with a long list of networks you probably do not need on your device especially if your device has connected to many WiFi networks. With this long list of WiFi networks, it becomes increasingly difficult to sort through them and search for the ones that you actually connect to frequently. As such, it is a good habit to remove WiFi networks that you feel you no longer need on your Android or iOS device.
WiFi networks from your devices may include networks your device saved from hotels, restaurants, planes and trains, your home network, or even where you work, and some from places you do not even remember visiting.
This will leave your screen cluttered with useless entries as well as leaving you vulnerable to hackers if these networks have been compromised since the last time that you connected to them. This means that if your mobile phone connects to these networks automatically when you are within range, you may end up getting hacked or have your personal details stolen by hackers.
How to Delete or Remove a WiFi Network on Your Phone
Good for you, the process involved in deleting Wi-Fi networks on your Android or iOS device is a very easy and short one. You can also keep the network on your device if it is one you feel you will still connect to in the future. It will remain saved on your device but it will no longer connect automatically when your device is in range.
We have prepared a guide below to show you how to delete a WiFi network from your Android phone or tablet or iOS device.
Delete a WiFi Network on Your Android Device
Follow the steps listed below to remove WiFi networks from your Android phone or tablet.
- First off, go to the Settings app on your Android phone or tablet.
- Once in the Settings app, tap on the “Network & Internet” option. Now depending on your device, you may instead of the “Network & Internet” option, see a “Connections” option. If you can’t find either of them, look for any similar option.

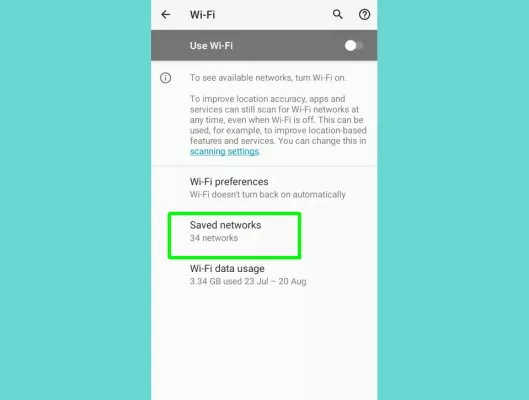
Tap On The Network And Internet Option - Next, tap on the “WiFi” option and then proceed to select “Saved Networks.” If you can’t find the “Saved Networks” option, it may be hidden under the “Advanced” section. This may require you to tap on the three-dot icon in the top right corner of the screen to access the Advanced section.

Tap On The Saved Networks Option - On the screen that comes up next, tap on the “Manage networks” option.
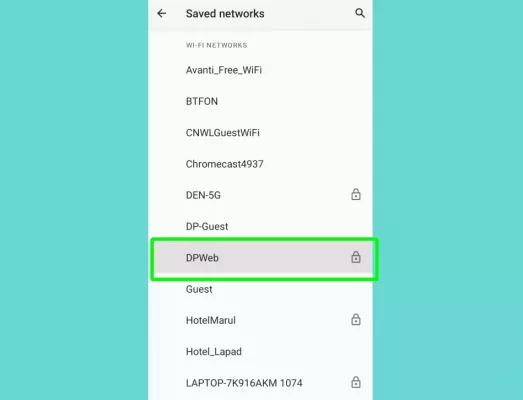
- Now, you should see a list of all the networks that your Android phone or tablet has ever connected to. This may even include networks that you don’t remember connecting to. You can now proceed to tap on any network you wish to remove from your device.

Tap On Any Network You Wish To Delete

If you want to keep a WiFi network on your Android device but do not want it to automatically connect to your device whenever it is in range, you can do this with just a few easy steps.
- First off, go to the “Saved networks” or “Manage networks” screen on your Android device and then tap on the “Advanced” option.

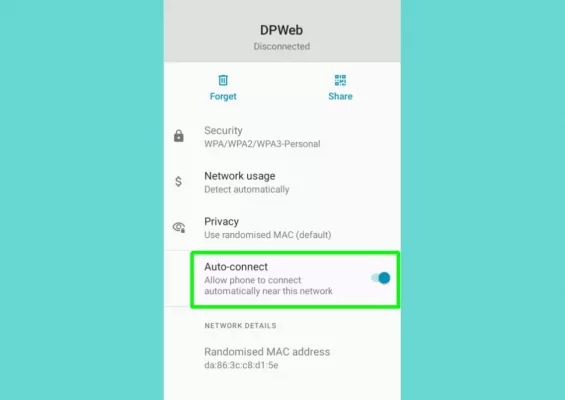
Toggle Off The Switch Next To Auto Connect - On the screen that comes up next, tap on the toggle next to “Auto-connect” to turn it off.
Delete a WiFi Network on Your iPhone or iPad
Follow the steps listed below to remove a WiFi network from your iOS device.
- First off, go to the Settings app on your iPhone or iPad.
- Next up, tap on the “WiFi” option.

Go To The Wifi Network And Tap On The I Icon - On the screen that comes up next, a list of all the networks that your iOS device has saved will be displayed.
- Now, scroll to any network you wish to delete and tap on the information “i” icon next to the network.
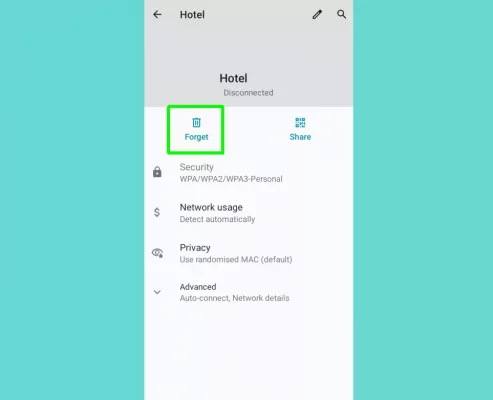
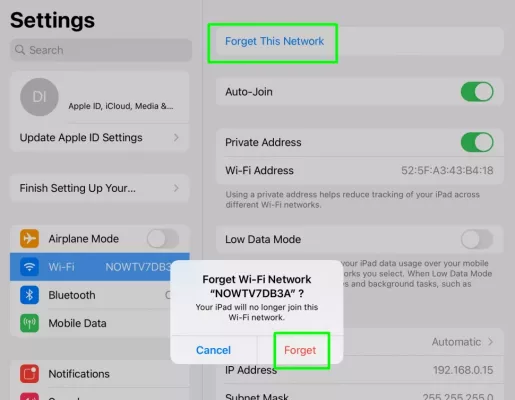
- You should now see an option that says “Forget This Network”. Tap on the option to remove the network from your iOS device and tap on the “Forget” button to confirm your choice. Once you do this, the WiFi network will be removed from your device.

Tap On Forget This Network And Then Tap On Forget To Confirm
If you want to keep a WiFi network on your iPhone or iPad but do not want it to automatically connect to your device whenever it is in range, you can do this with just a few easy steps.
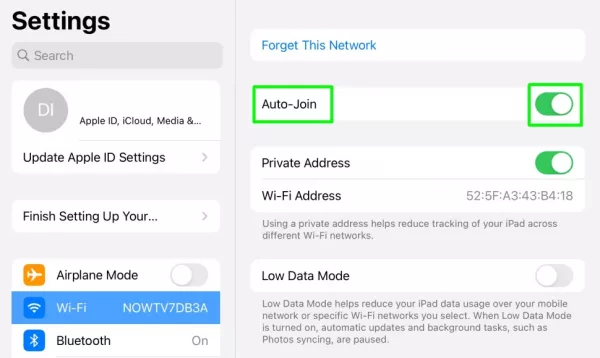
- Go to the WiFi screen under the Settings app and tap on the information “i” icon next to the network you want to prevent your device from auto-connecting to.

Toggle Off The Switch Next To Auto Join - On the screen that appears next, tap on the switch next to “Auto-Join” to turn it off.
So, with these few and easy steps, you can easily remove WiFi networks from your Android or iOS device.
And that is pretty much it! If you have any further questions, do feel free to leave them in the comments below and we will get back to you as soon as possible.
