One essential function Windows users need to know is the System Restore function. This comes in very handy in cases when your PC begins to crash, display error messages, or refuses to boot at all.
The System Restore feature was first introduced on Windows Me in 2000 and it works by creating “restore points.” These restore points allow you to revert a PC when it starts misbehaving — including its system files and settings as well as installed programs — to a previous point when the computer was working just fine.
With System Restore, you used to be able to create restore points automatically, once every seven days. On Windows 10, however, restore points are only created when a significant event occurs on your PC. Significant events include updates, program and driver installations, or a change in system settings. You can also create restore points manually.
Despite how important this feature seems to be, Windows has it hidden away in the System Properties section of the Control Panel. Even more strange is the fact that the feature is not enabled by default. Instead, it is part of a broader “System Protection” feature that is difficult to locate.
In this guide, we will show you how you can enable System Restore on your Windows 10 PC, as well as how to manually create a restore point and use it to revert your Windows PC to a previously working state.
How to Use System Restore on Your Windows 10 PC
Just as I said earlier, the System Restore feature is disabled by default on Windows 10. So, first off, we will be showing you how to turn in on.
- First off, click the search box on your Windows 10 PC and type in “system restore”. From the list of results that come up, select the “Create a restore point” option.

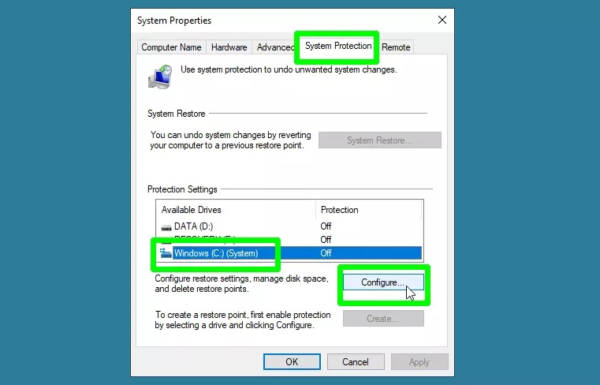
select the create a restore point option - Now, you should see the System Properties dialog box on the screen.
- Proceed to select your main system drive under the “Protection Settings” section. The drive is usually labeled “C:”.
- Next up, click the Configure button.

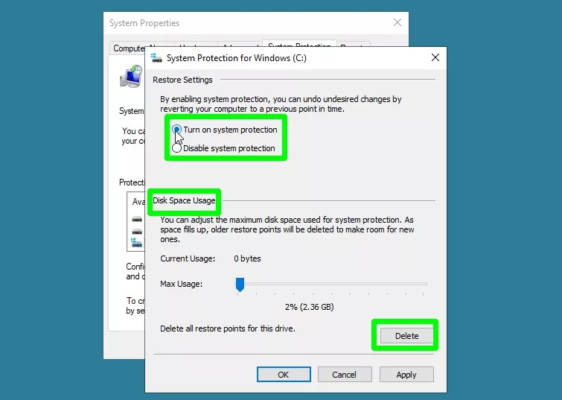
select configure - Now, go to Restore Settings and click the “Turn on system protection” option. If you want, you can also adjust the space on your drive allocated to the restore point. You do not need to worry about this anyway as Windows 10 handles disk space usage automatically.
- You can also find the Delete option in the same box which allows you to get rid of old restore points on your computer.

Click the delete button - When you are done, click “Apply” and then click “OK.” The System Protection box will be closed.

Now, whenever a significant change is made to your PC, a restore point will be created.
How to use System Restore in Windows 10 – Create a restore point
Although restore points are automatically created in Windows 10, there are times you may want to create a restore point manually, probably before making a major change to your system. To do this, follow the steps below.
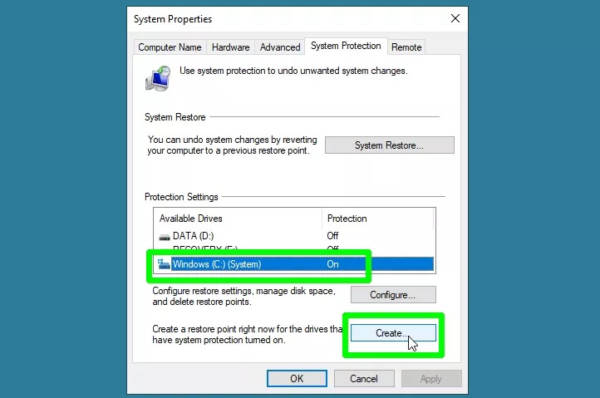
- First, repeat step 1 from the previous section to launch the System Protection dialog box. Click on your drive and then select the “Create” button.

Click the create button - Type in a name to describe the restore point so you can easily identify it later on. The date and time will be automatically added to it. Once you are done, click the “Create” button.
A restore point will be created on your PC. Now, depending on how much data it needs to save, the process may take a while. When it is done, a message will be displayed on the screen indicating that the restore point has been successfully created.
How to use System Restore in Windows 10- Restore your system
In a case where your PC begins to misbehave, for instance, if it keeps crashing, you can restore your Windows PC to a previous state to fix the issue. Here’s how to do it.
- First off, go to the System Properties box just like in the previous guide and click the “System Restore” button on the System Protection tab. If you can’t click the button (because it is grayed out), then it means that you do not have any restore points available.
- Once the System Restore window comes up, click the “Next” button to proceed.
- Now, click the restore point you want your PC to revert to.
- You should also click the “Scan for affected programs” option to find out which programs and drivers will be lost because they were installed after the last restore point was created.
- Proceed by clicking the “Next” button.
- Go through the details of the restore point to confirm all is in place and then select the “Finish” button to proceed. Once you do this, your system will be returned to the good working state it was when the restore point was created.

Click the Finish button
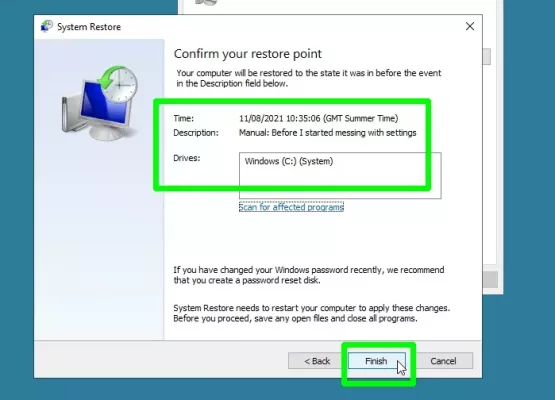
You should keep in mind that for the restore process to complete, your PC will need to restart. As such, make sure that you have saved any files or documents you may have open.
Also, once the process begins, it may not be interrupted. It also takes a long time for the System Restore process to complete.
How to Use the System Restore Feature When Your Windows 10 PC Won’t Boot
If you are caught in a dilemma where your PC is failing to boot properly, thereby disallowing you from running System Restore, you can run the System Restore Tool from Windows 10’s “Advanced startup options.” Follow the steps below to access System Restore using this method.
- First off, start or restart your Windows PC.
- While it is booting, press the F11 key. You can also alternatively hold down the Shift key.
- Now, you should see a blue screen asking you to select an option. Choose the “Troubleshoot” option.
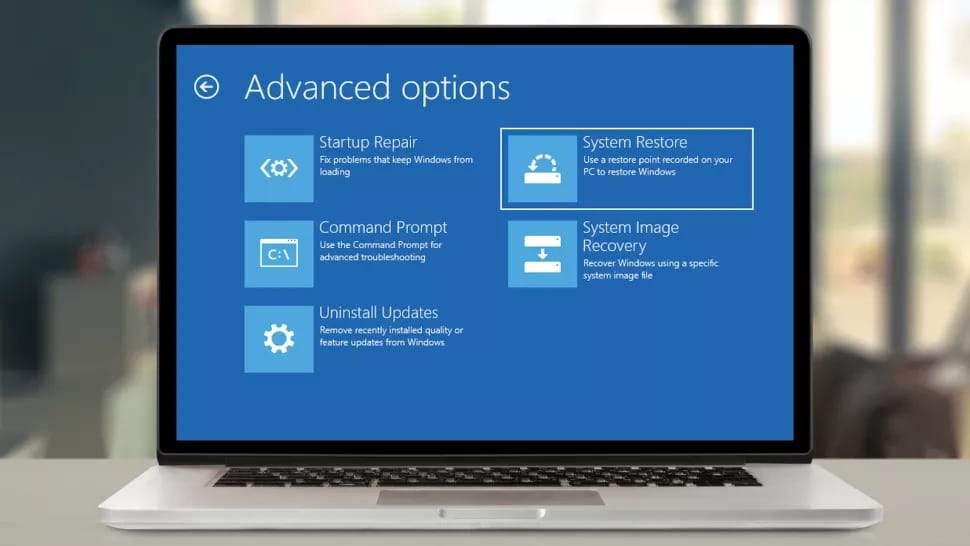
- Now, you should see the “Advanced options” screen. If you don’s see it, then look for the “Advanced options” button and click on it.
- Next, click the System Restore option.
- Select your Windows account, type in your password and select “Continue.”
- Now, you should see the System Restore wizard on the screen. From here, you can restore your PC.
That’s all!
