
The new IOS 11 has finally been launched and the operating system comes with a bunch of new and exciting features. One of these features is FaceTime Live Photos. With this feature, you can now capture and save live photos of your friend on your iPhone or iPad running on iOS 11 during your FaceTime conversations. So, the next time you are having a FaceTime conversation with your friend make sure you capture a live photo of their priceless smile.
Before you can use FaceTime Live photos, your friend whom you are having a conversation with also needs to be using an iOS device which is running on iOS 11. Also, when you take a live photo of your friend, Facetime sends him/her a notification about it.
How To Capture Live Photos from FaceTime Call on iPhone or iPad.
How To Enable FaceTime Live Videos on iPhone or iPad running on iOS 11
- Turn on your iPhone or iPad running on iOS 11.

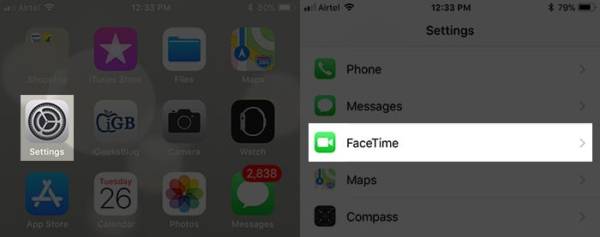
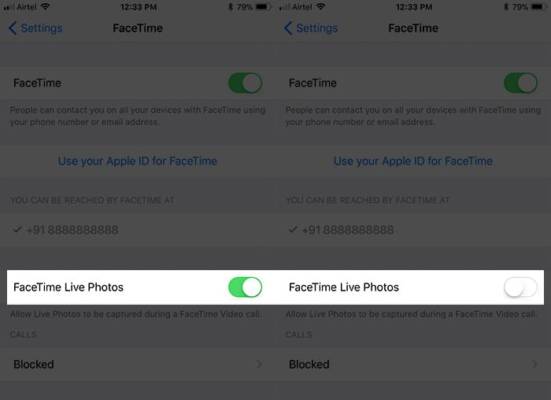
- On the home screen, go to the Settings app and tap on it.
- Next, scroll down the Settings page till you get to FaceTime. Tap on it.
- Turn on the switch which is next to the “FaceTime Live Video” option, if it hasn’t been enabled already.


How To Take Live Photos in FaceTime on iPhone or iPad Running on iOS 11
You need to make sure that your friend whom you want to FaceTime has already turned on the front camera of his iPhone or iPad so that you can capture the live photo of his/her face during the conversation.
- Make a FaceTime call from your iPhone or iPad running on iOS 11.
- You will see a shutter button at the bottom left corner of your screen. Tap on it at any time to take a live photo during your FaceTime conversation.

You should, however, note that if your friend’s iPhone is not running on the latest version of iOS (iOS 11), the app will return a warning message to you telling you that both parties need to be running on the latest version of the iOS operating system.
So that is it. You have successfully taken a live photo of your FaceTime call. Your friend will now receive a notification saying that you have taken a live photo of the conversation.

How To Access FaceTime Live Photos on iPhone or iPad running on iOS 11
All photos which were captured from your FaceTime call are automatically saved to the Photos app on your iPhone or iPad. Hence, you can easily check them. To access your FaceTime Live photos, follow the steps below.
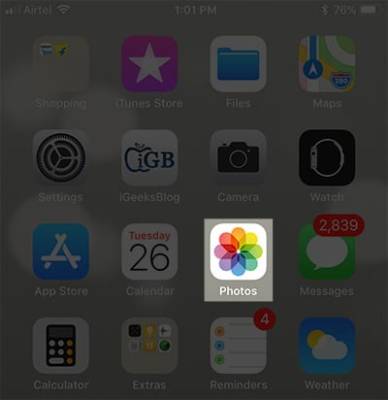
- Open the Photos app on your iOS device.

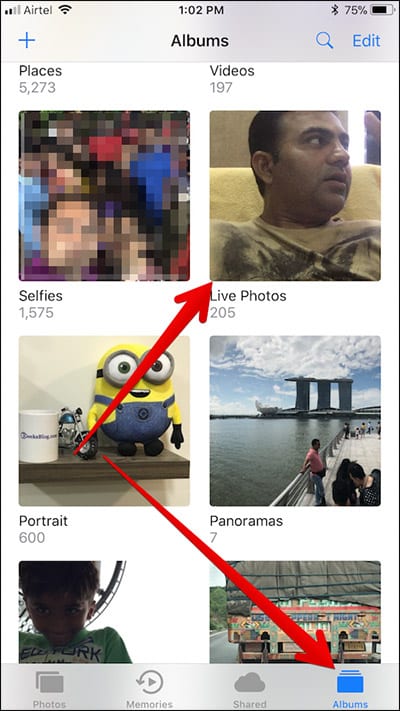
- Tap on the “Albums” at the bottom of your screen.
- A new album will be added to your iOS Photos albums list called “Live Photos”. In the album, all you live captures from FaceTime calls are saved.
- Check out the live photos you captured in the Live Photos album.
Also, you can check your latest live captures by going to the Photos tab > Today.
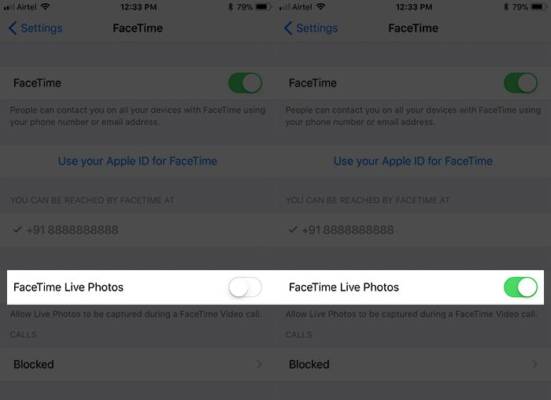
How To Disable Live Photos in FaceTime on iOS 11
If you do not want anyone to save a photo of you during any FaceTime conversation, you can stop them from doing so by disabling live photos in FaceTime.If you disable the feature, people will not be able to take live captures of you during your FaceTime calls. You will be able to take live captures of others, however, if they have the feature enabled from their end.
- On the home screen of your iPhone or iPad, go to the Settings app and tap on it.
- Next, scroll down the Settings page till you get to FaceTime. Tap on it.
- Toggle the switch next to FaceTime Live Photos to disable the feature.
That’s all, So what do you guys think about the new FaceTime feature? Make sure you leave a comment. Thank you!
