The appropriate way to stay on top of emails is to address them as they roll in. As you already know, on your Android device, Gmail notifications give you 2 options, “Archive” and “Reply.” If you want to know about the “Mark as Read” option, we expatiate below.
Even if “Archive” and “Reply” are very vital, marking an email as read is also very important because there will be days when you cannot respond to an email immediately and will prefer to save it in your Inbox for later. This saves you a lot of time, so it makes a lot of sense. See How Do I Add “Mark As Read” To My Gmail Notifications On Android:
How Can I Add “Mark As Read” To My Gmail Notifications On Android?
Even if Gmail does let you decide if you need the 2nd option to be “Archive” or “Delete,” this is where the personalization ends. If you wish to add “Read,” a paid application named “AutoNotification” can help. The app simply intercepts Gmail notifications, replicates them, and adds “Read.”
However, the app will not work if you do not allow it to read your emails. Therefore, you must be open to this privacy breach if you want the application to help you. To start, just:
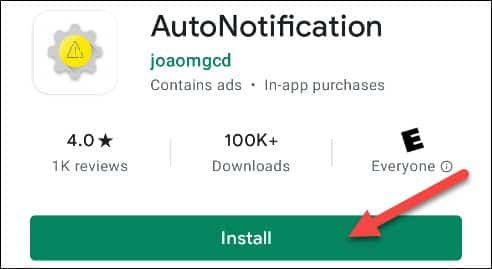
- Download AutoNotification from the Play Store on your Android device or tab.
You Might Also Want To Read: How To Change Gmail Themes
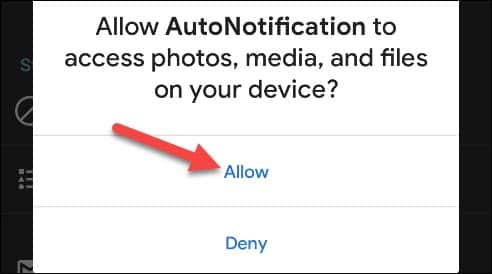
- When you first launch the application, it must be granted permission to access the pictures, media, and files on your phone, after that, click “Allow.”
- An introduction breaking down what the application can do will be visible. Tap “Back” to close this message.
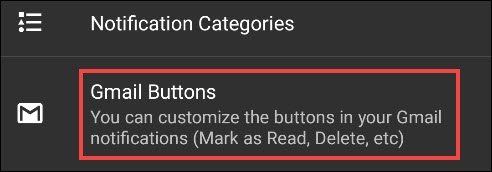
- When that is done, click “Gmail Buttons.”
- Click “Add Account” to connect your Google account to AutoNotification.
- A warning will then be visible letting you know the notification intercept service is not running. The application detects Gmail notifications this way, therefore you should click “OK” to activate it.
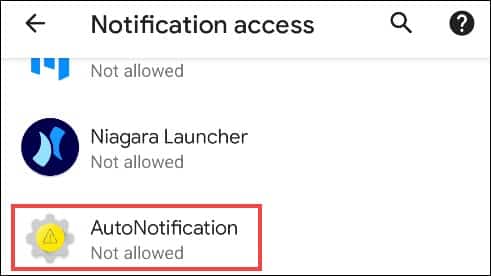
- You will then be redirected to Android’s “Notification Access” settings, click “AutoNotification.”
- Make sure “Allow Notification Access” is toggled on.
- If you are fine with what the application will be able to access, click “Allow” in the confirmation pop-up message.
- Click the back arrows at the top left until you can access “Gmail Buttons.” in the AutoNotification application. Click “Add Account” once more.
- A different warning would be visible, letting you know that the feature will not work with emails that come with labels. Click “OK” to continue.
- This is where we discuss cost. You can click “Start Trial” for a free 7-day trial to confirm if you fancy the app, or you can pay a one-time fee of 99 cents to unlock it for life.
- After starting the trial or unlocking the feature, you will be prompted to agree to the privacy policy. Click “Read Policy,” and then click “Agree” anytime you are ready.
- Lastly, “Choose an Account” will be seen. Choose the Google account you wish to add “Read” to.
- Click “Allow” to grant AutoNotification permission to “View Your Email Messages and Settings” and “View and Modify But Not Delete Your Email.” This is how the application replicates your Gmail notifications.
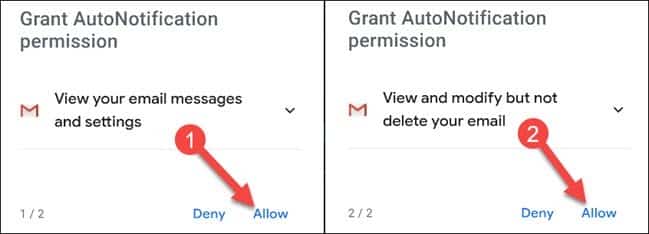
- Click “Allow” in the pop-up message to confirm.You will then receive specific Google Security Alerts about AutoNotification having access to your Google account, there is nothing to be bothered about, just routine stuff.
- “Read” will now be available in your Gmail notifications.
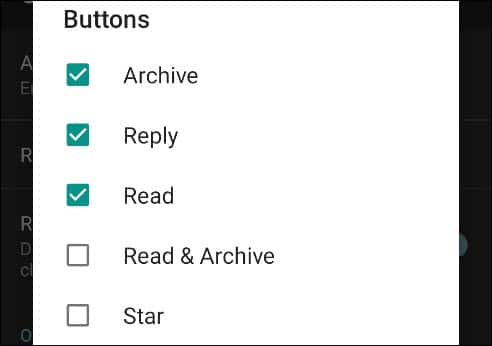
- Be aware that “Read” is not the only button that can be added. To view more options, go back to “Gmail Buttons” in the AutoNotification app, and then click “Buttons.”
- Choose the checkbox close to any option you wish to add to your Gmail notifications.
You Might Also Want To Read: How To Use Gmail Without A Phone Number
That is that.

