One great way you can use to add some more context to a photo or give proper credits to the owner of the photo is to add captions to the image. In this guide, we will show you how to add captions to an image in Microsoft PowerPoint.
How to Add Captions to An Image in Microsoft PowerPoint
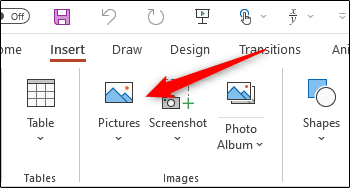
- First off, launch Microsoft PowerPoint on your computer and insert the image you would like to add a caption to. You can do this by going to the Insert tab and then clicking “Pictures” in the “Images” group.
Pictures Option In Insert Group - From the drop screen that comes up on the screen, select where the picture you would like to insert is. There are three options you can select images from
- Your local device
- Stock images
- Online Images
Options For Inserting An Image
- After you have inserted the image to PowerPoint, the next thing to do is add the caption. Microsoft has a feature that allows you to add captions in Microsoft Word but unfortunately, this feature isn’t available in Microsft PowerPoint. As such, we would have to insert the caption to the image manually. To do this, we would add a text box below the image to serve as a caption.
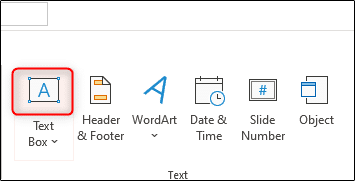
- To do this, go to the Insert tab and then click the top half of “Text Box” in the “Text Box. This allows you to draw a horizontal text box wherever you choose on the slide.
Text Box Option In Powerpoint - Drag your cursor across wherever you want the text box to appear.
- Once you have drawn the text box, type in, or paste whatever you want the caption to be. After you have filled the box with text, resize it to your taste and to fit the image.
- You may also want to add the image and the text together, especially if you plan to move the photo around when the slide is playing.
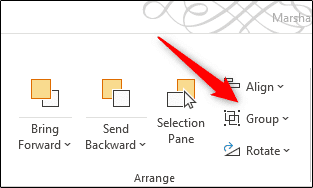
- To do this, simply hold “Ctrl” or “Cmd” if you are on a Mac and then click both the photo and the text you inserted to the slide. Once you have selected both of them, go to the “Picture Format” tab and then select the “Group” button under the “Arrange” group. Now click “Group” from the drop-down menu that comes up on the screen.
Group Option Group Option In Group Drop Down Menu
From now on, whenever you select the image or the text, they will both appear as one item. That’s all! With these quick and easy steps, you can add captions to images in Microsoft PowerPoint. If you’ve got any questions, feel free to leave them in the comments below.
