“Hosts file” basically translates domain names or NetBIOS names into IP addresses. It is used for multiple purposes. These include blocking spyware and controlling the access to websites as well as network traffic. Based on what you want, you can edit the Hosts file of your Mac to remain in complete control.
Before you proceed, there are a few things you need to keep in mind. For example, you need to have the IP address of the device you to send your Mac to, or the domain names you want to keep your computer away from. Thanks to the Terminal app, working on Hosts file is very easy and an experience which has no hassles at all.
How to Edit Hosts File on Mac
How to Edit Hosts File Using Terminal on Mac
To edits Hosts file on your Mac using Terminal, follow the steps below.
Step #1. First off, open the Finder app on your Mac and then click on Applications from the sidebar. Next, you need to double click on Utilities and then double click on Terminal too.
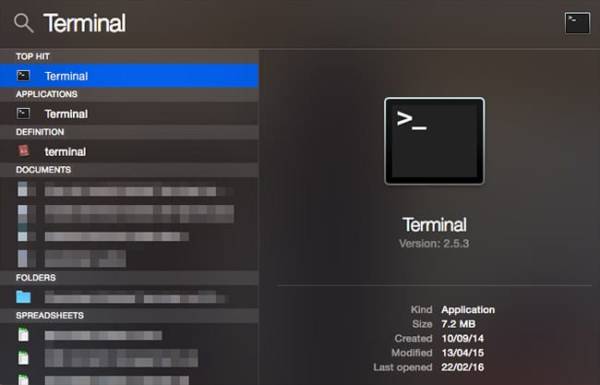
Or you can simply search Terminal in the Spotlight on your Mac.
Launch Terminal on Mac from Spotlight Search.
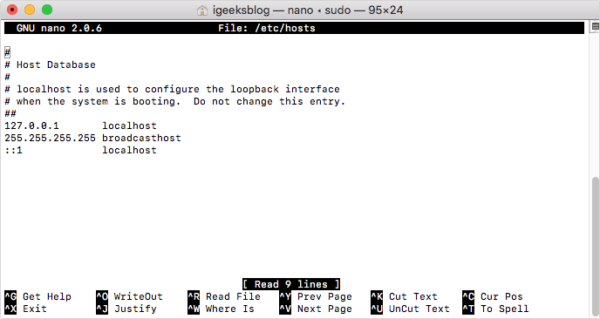
Step #2. Next, you need to type in the command – sudo nano /etc/hosts and then click on return.
Step #3. Now, type in the administrator password and then hit return.
Enter System Password on Mac
Step #4. Nano text editor will come up on your screen now. Next, to add a new device or domain, simply move the cursor by using the arrow keys and then position it after the text in the window.
While mapping an IP address on your local network to a domain, enter IP address and then hit return.
Step #5. Next up, you need to type in the domain name.
If you want to keep your Mac away from a certain site, you should make sure to use “127.0.0.1.”
127.0.0.1 will default to the local machine even if it has been assigned to a different IP address by its router.
Step #6. Next up, you have to press and hold down the control and O keys to save the file.
When it has been saved, use control and X to exit.
In the command line, type in sudo killall -HUP mDNSResponder and then hit return.
This will remove the DNS cache of your computer.
That is pretty much it!
Have your say:
So now you know how to make the best use of the Hosts to keep malicious spyware at bay. If you have any feedback or comments, make sure to share them with us in the comments section below. We would love to hear from you.


Thank you for this article! It’s helpful.