Gone are the days when smartphone cameras don’t add a lot of post-processing to every image you snapped using your smartphone. In recent times, every picture you snap with your smartphone can be made better; you can hide important details, etc. All these can be made possible using Snapseed on Android and iOS.
With Snapseed, “Lightroom” or “Photoshop” is useless, because you can enhance laptop, fix issues and improve the looks of images using Snapseed App. So in this article, we will emphasize more on how to use Snapseeed on your iPhone. Before we begin, lets first consider the meaning of Snapseed.
Ever since Snapseed was acquired by Google it has only gotten better since then. Snapseed is known to be a free photo editing app for Android and iOS, it appears to be one of the best photo editing app on the iPhone. Although Snapseed’s UI can be a bit intimidating at first, do not relent, spend a couple of minutes with the app you’ll soon master its gesture-based interface. The app typically organized in a simple manner. Click on the photo, then click on the tools button to project more various editing tools to you
Tune The Image
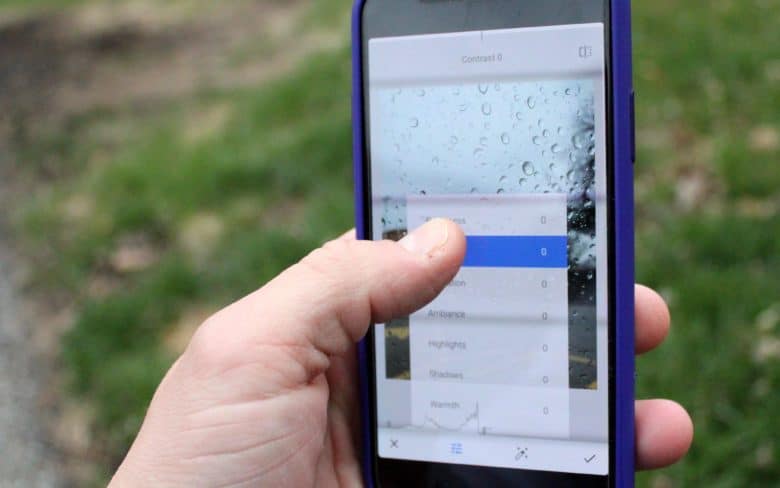
Load your image, and once the image is loaded, you will see three buttons at the bottom- Looks, Tools, and Export. You can switch between available filters or make your own using the Look option. But since we are concentrated on editing, click on the Tool button and then select Tune image. There are basic image editing features like Brightness and Contrast on Tune image. Brightness is already selected so the only thing you will do is just to swipe right to increase and left to decrease it. In case you want to switch to another tool, just swipe up and click the tool button in the bottom bar. Click on the image to see a clear difference between the original image and the edited one.
There are various tools available for usage in the Tune image Section and they include:
- Brightness
- Contrast
- Saturation
- Ambiance
- Highlight
- Shadow
- Warmth
BRIGHTNESS: This tool can be used to add light to a darker shot, or tone down a shot that was overexposed.
CONTRAST: This tool is used to ascertain the difference between the darkest and the lightest part of an image.
SATURATION: If you want your image to pop, use saturation tool because increasing the saturation makes the color more vibrant.
AMBIANCE: This tool helps you to adjust Saturation and contrast at the same time
HIGHLIGHT: It helps you to edit the intensity of the brightest areas of the image. In that regards, whenever an image is overexposed or over bright, what you will do is to reduce the Highlight.
SHADOW: Shadow and Highlight are related and share the same functions but the shadow is for the darkest point of an image.
WARMTH: This adds either a warm orange or a cool blue tint on your image, using this app you can turn a cool blue sky into a bright orange sky.


