
How to record a call on your Android device using a third-party app. You can record calls on your Android phone using a third-party app, as long as the other person has authorized you.
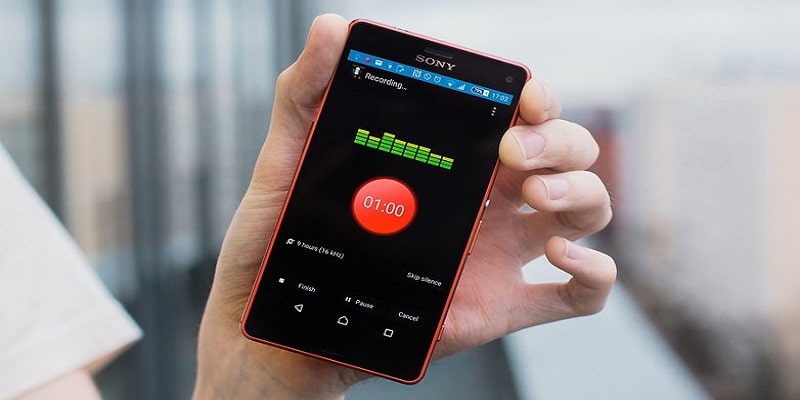
Do you plan to record phone calls on your Android device? Android phones do not come with a built-in voice recorder, but there are other ways to go about this. An external recorder can be used but it’s better you go for an app that records straight from your mobile device.
You can make use of Google Voice, even if that service restricts you to recording just incoming phone calls. Lots of 3rd-party applications will let you record all phone calls, both incoming be outgoing if you are aware of the right steps to take.If you use Google Voice to route calls to your Android phone, you can set up incoming call recording but you can’t record outgoing calls.
Recording a phone call can present legal and ethical issues if you do not inform all parties involved that it is being recorded.
Before anything else, let’s touch on whether it is legal to record a phone call, especially if you are not permitted by the other party? The response to that depends on the country you are reading this from. The USA allows phone recording as long as one person in the conversation is fine with it. Some countries, however, need the two parties to agree to it. To know where you stand legally, just ensure the other person permits you to record the call.
However, the rules may vary by state, so it’s important to be informed. So once you have studied the laws and the person on the other line has agreed to be registered, for ethical or legal reasons, here’s how to record a call on your Android.
How to record incoming calls on an Android with Google Voice
- Open Google Voice on your PC or Mac computer and click on the gear icon, then hit “Calls” in the left menu.
- Scroll to “Incoming Call Options” and turn it on.
- When an incoming call that you want to record starts, press “4” on the phone to start recording and again to stop recording.
You Might Also Want To Read – 5 Best Call Recorder Apps for Android
How to record calls on an Android with Call Recorder
- Go to the Google Play Store on your Android device and download the Call Recorder – Call Recorder app.
- Open the app, grant it permission to access your calls, contacts, etc., then go to “SETTINGS” in the top right corner.
- The app will record all calls by default, so customize your settings as you wish.
Record calls on Android with Automatic Call Recorder
Automatic Call Recorder is a simple yet effective recording app. Before registering anything, it’s best to configure the app settings in the Settings menu. Here, you can enable or disable the option to automatically record every incoming and outgoing call. You can also choose to record only certain contacts and ignore others.
Remember to choose an audio format for your recordings. After registration, files can be sent to a service such as Dropbox or Google Drive, if set up. There is also an option to activate recording if you shake the phone.
If you leave automatic recording enabled by default, simply make or receive a call and the recording begins. After finishing the call, open the Automatic Call Recorder to view the recording.
From the options screen, you can save the call as an audio file on your phone, add call notes, delete the recording or share it via email, social media, and other services. The free version of Automatic Call Recorder contains advertisements.
It’s a good idea to turn off “Call Recording” at the top of the app, only turning it on when you want to proactively record a call, rather than leaving recording as the default.
Alright, let’s break down some applications for recording your Android phone conversations.
1. Google Voice
With this app, you select a dedicated phone no through which incoming calls are routed to your smartphone. After setting up your phone number and your Google Voice account, click the app’s hamburger icon () seen in the upper-left corner. Click Settings. Activate Incoming Call Options to turn on call recording. Once more, the restriction here is that only incoming calls can be recorded.
After picking a call, press number 4 on your dial to record the convo. A message will be visible to you, telling you your call is being recorded, so ensure you were permitted by the person beforehand. To end the recording, press 4 on the dial again. The recording gets saved in your inbox and you get to listen to it or have it downloaded on your PC.
2. Tape A Call
This app was developed by TelTech Systems and it records your incoming and outgoing calls, no matter how long they are. You will then be able to listen to these recordings on your mobile device, get to upload them to a cloud storage service, and have them shared through email or social media. But what is involved in achieving recording is quite complicated until you really know how it is done.
To record an outgoing call, launch the TapeACall app and click Record. The phone number for the special recording line becomes visible on the screen. Click Call to reach out to the person using the number and start the recording. Click Add Call to call who you intend to speak to. When the call is picked, click Merge to begin a 3-way call with the other party and the recording line.
For a call you receive, press Record to begin the recording. Once more, the application will ask you to dial the recording line. Call the line and click Merge to merge the phone calls.
The application depends on 3-way calling which is supported by major carriers. Tape A Call’s free version will only allow you to listen to the first one minute of your recording. The complete version gets rid of such restrictions.
3. Call Recorder
This app is from Green Apple Studio and it is very easy to use plus it automatically records your phone calls. Its home screen provides four different categories for you to store your recordings. These categories are All, Outgoing, Incoming and Important. Click Settings. Then you can activate or deactivate the app to automatically records both incoming and outgoing calls. Some phone numbers can be removed from the recording. Inform the app to request a PIN when you launch it, and then change the file type for audio recording.
On recording an outgoing call, just reach out to the other person on phone the usual way. For a call you receive, do nothing, as long as you have set the application to automatically record. When the call is wrapped up, launch Call Recorder. Under the All section, an entry for your calls is visible. This is where you will be able to select precise recordings for playback. You are also allowed to pause, fast forward, or go back. Calls will then be categorized as important, deleted, or can be shared through email or on social media.
On the home screen, click the three-dot icon () to get rid of a call, share the call, check out details on it, include it in the excluded section, or even dial the number. The free version is filled with adverts. To avoid all that, pay for it
4. Smart Call Recorder
This is an app from Neavo. This application also automatically records incoming and outgoing calls. To begin, open the app. Click the hamburger icon () and hit Settings. This is where you can activate or deactivate a switch that will enable or disable recording, ensure you display notifications of a call recording and choose a recording source like a speaker mic or a normal one.
When you pick or make a call, the application will automatically begin the recording. When the call is finished, launch the app. The call will be seen under Incoming or Outgoing. Click on the recording to play it, get rid of it, activate call recording or not, plus share it. Click Play recording and you will be able to listen to the entire thing. Click Share recording and you will be able to share the audio file through email or social media. This app is free.
