By reading this article you will learn how to connect smart bulbs to Amazon Echo. How to connect Amazon Echo to smart lamps? How to add, connect and control smart lamps with Amazon Echo, read on.
If you are the proud owner of an Amazon Alexa smart speaker, you have a super smart home controller at your disposal. But if you are baffled about how to connect the smart bulb to Amazon Echo, we tell you right away that it is very easy.
Smart speakers are gateway devices; are the key to easy control of the smart home. Research has shown that Amazon Alexa users’ favorite device is smart bulbs, followed by hubs, thermostats, and smart home cameras.
How to connect smart bulb to Amazon Echo
Before you start trying to connect lights with Alexa, there are a few things you need to do:
- Make sure that the smart bulb, switch, or hub you want to connect to is compatible with Alexa.
- Use the manufacturer’s instructions to configure the smart device before connecting the lights to Amazon Echo, including assigning a name to each device. Use easy-to-understand names, such as “Hallway”, “Living room switch” or “Bedroom lamp”, as this will help you connect to Amazon Echo much easier.
- Connect the smart lamp to the same wireless network that Amazon Echo is currently active on.
- Download the Alexa app to your mobile device, if you haven’t already done so.
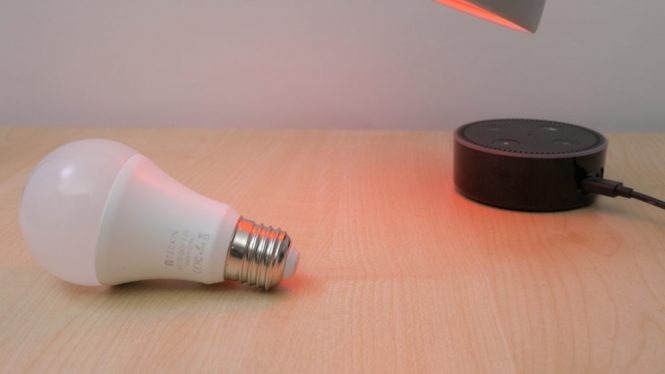
How to connect a smart light bulb to Amazon Echo
To connect a smart bulb to Amazon Echo, you must first install the bulb, according to the manufacturer’s instructions. Usually, this simply means screwing the smart bulb into a working outlet, but be sure to refer to the instructions if there is a hub other than Amazon Echo.
- Open the Amazon Alexa app on your mobile device.
- Tap the Menu button, which looks like three horizontal lines, in the upper left corner of the Home screen.
- Select Smart Home from the menu.
- Make sure the Devices tab is selected and then tap Add device. Alexa will search for all compatible devices and present a list of detected devices.
- Scroll down to find the smart light you want to connect. It will appear as a light bulb icon with the name assigned during the initial setup.
- Touch the name of the bulb to complete the configuration.
How to add devices to Alexa
Unless you’re using Amazon Echo Plus, you’ll need to install Alexa’s skills for the devices you want Alexa to see. This is not a complicated process, but you will need the login information for each of the smart device ecosystems you intend to add.
This is because an Alexa ability effectively links your Amazon account to that of Lifx, Philips Hue, Hive, Nest, or whatever other services you are using. The easiest way to install the Alexa skill is to go to the app, open the side menu and select Skills and games from the list, then search. The app will guide you through the process of adding login details.
After setting up your devices in their ecosystems, it’s time to connect them with Alexa. You can do it in two ways:
- Just say “Alexa discover my devices”
- Go to the Amazon Alexa app, tap Devices at the bottom right of the screen, then press the + button at the top right.
Alexa will scan your home network and use the preinstalled skills to find the devices. Whatever you have named in your app will be the default name when it is discovered in the Alexa app.
Rename your devices in the Alexa app
Alexa will be named after a device, which is found in its native app, but this can lead to clashes between devices, if, for example, you have two different manufacturers of smart bulbs, which by default are both “Bedroom lights”. The result can be chaotic.
However, you can name the devices in the Alexa app separately, so we recommend that you rename the devices and give them all the logical and easy-to-remember names. Also, avoid Alexa clashes between even random device types. Having a Sonos “living room” speaker and a “living room lamp” can mess with Alexa, so try to keep things separate.
To rename, follow these steps:
- Open the Alexa app.
- Touch the Devices tab at the bottom.
- Choose the type of product from this screen, which simplifies the search for the exact device.
- Touch a device and select the Settings gear wheel in the upper right corner.
- Touch Change name.
Create Alexa groups
From the Smart Home menu of the Amazon Alexa smartphone app, you can add any device in a single group, which can be controlled by voice.
Do it using these steps:
- Open the Alexa app.
- Touch Devices.
- Press the + button at the top right.
- Touch Add group.
- Choose Smart Lamp Group and give it a name you will remember. They could be for example “main lights” or “lights downstairs”
- Touch the desired devices from the list, then you’re done.
What Alexa commands can I use?
So you have lights, cameras, sockets, and more set up with Alexa and also scenes and groups. Here are some ideas to get started.
- Alexa, lights on.
- Alexa lights off.
- Alexa, dim lights at 50%.
- Set the light to blue. “
- Set the light to soft white.
- Make the light warmer/colder.
- Alexa set the temperature to 21.
- Alexa, it’s time to go to bed [to activate a scene].
What if Alexa can’t find your device?
If you’ve followed all these steps and Alexa doesn’t see your device, there are a few steps you can take. For brevity, here is your essential Alexa troubleshooting checklist:
- Verify that it is an Alexa-compatible product.
- Is it on and ready to be seen?
- Remove and reinstall the Alexa skill and sign in.
- Check that your phone, Alexa, and this device are all connected to the same Wi-Fi network.
- Turn off Alexa, the device, and see how to perform a hardware reset.
- Update your router settings.
