
Months back, Kali Linux 2020.3 was launched, and with this update, Win-KeX (Windows + Kali Desktop EXperience) was also introduced. Thanks to the unveiling of WSL2 and the 3rd quarter update of Kali Linux, it is now possible to run a consistent-session GUI of Kali on a Windows 10 PC.
In this tutorial, we will break down how you can use Kali Linux in the WSL2 environment with complete integration between system files, and you’ll realize how uncomplicated the process actually is. See How To Install Kali Linux GUI on Windows 10 (WSL 2):
How To Install Kali Linux GUI on Windows 10 (WSL 2)
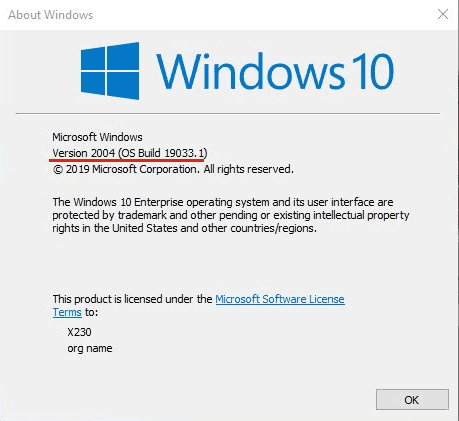
Before jumping straight to installation, we need to configure Windows 10. To make this happen, make sure you have Windows 10 version 2004 or higher installed on your computer.
Also, if there is an update available, install it. You can check the Windows version and build number by typing “winver” in the start search menu.
You Might Also Want To Read: How to install Android 12 Developer Preview
After that, you have to activate the “Windows Subsystem for Linux” or often abbreviated as WSL optional feature. The optional feature can be activated by running Powershell as an administrator and pasting this bracketed command, (dism.exe /online /enable-feature /featurename:Microsoft-Windows-Subsystem-Linux /all /norestart)
One more vital thing that you must activate before continuing is the “Virtual Machine Platform” optional feature. This can also be done by opening Powershell as administrator and pasting this bracketed command, (dism.exe /online /enable-feature /featurename:VirtualMachinePlatform /all /norestart)
After activating both features, you need to now restart your personal computer. Once restarted, access Powershell as administrator and paste this command in the bracket, (wsl–set-default-version 2)
If the command executes successfully on your computer, skip the next paragraph, but if you see the “WSL 2 requires an update to its kernel component. For information please visit
https://aka.ms/wsl2kernel” message, keep reading.
This message means that you need to manually download and install a little MSI file to install a Linux kernel on your PC for WSL 2.
The MSI file can easily be downloaded from the URL, https://aka.ms/wsl2kernel. Once MSI is installed, simply run the command wsl–set-default-version 2.
You Might Also Want To Read: How to Install the Connect App on Your Windows 10 PC
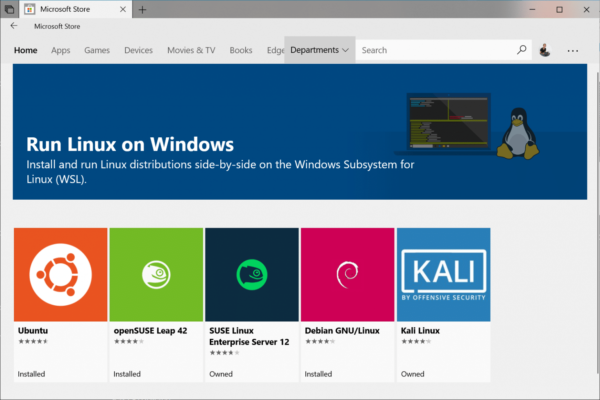
You now have to download Kali Linux from the Microsoft Store. As soon as it is downloaded, just launch it, and hold on for the program to decompress and store the necessary files on your system.
After that, set a username and password for the freshly created Linux distribution on your personal computer. To launch the Kali Linux GUI, run this bracketed command, (sudo apt update && sudo apt install kali-win-kex)
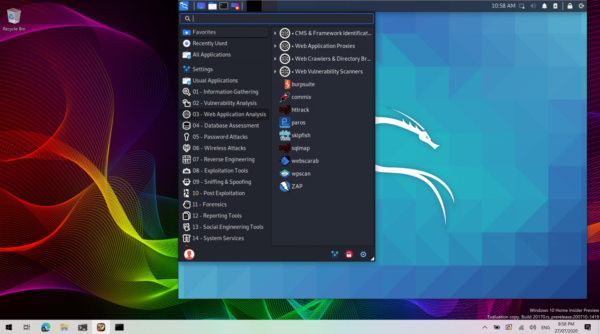
Depending on how fast your internet is and the specifications of your personal computer, the installation should take about fifteen to thirty minutes. As soon as the installation is done, type “kex” to run the Win-KeX interface.
You are done.
