Pixelmator is a very nice and useful photo editor app which available for both iOS and macOS devices. The app comes with numerous features and applications. One of its most common features which are very easy to use is the feature which lets you remove facial blemishes utilizing the retouch brush.
In this guide, I will be walking you through how to remove facial blemishes from your photos using the iOS version of the Pixelmator app. If you do not already own the Pixelmator app, you can install it from the App Store. The app has a price tag of $4.99, but it is totally worth it. The device that will be used in this tutorial is an iPad Pro 12.9″ along with the Apple Pencil. You can also use follow the steps on your iPhone or iPod. There aren’t many differences in the steps.
![]()
Finding the tool
From the image above, you can see that there are different retouching tools which are available for you to use. However, how do you find these tools?
From the photo above, you can see that there is a row of icons which is at the right side of the toolbar at the top. You can find all the tools within Pixelmator for iOS by tapping the Paintbrush icon. The Paintbrush icon can be found in the list of icons on the right side. From this list, you can then tap on the retouch option. A new menu will appear containing a grid of nine retouch tool options. Now, tap on the Repair tool which is the bandage icon.
After you have tapped on the retouch option, you can now retouch and also remove blemishes from your photos. Before you do this, you should select the size you want your repair to be. Simply tap the percentage icon at the top right corner of your screen to select a size. check the picture below for more details.
![]()
Editing your photo
Now that you have found the repair tool, you can now retouch found blemishes on your photos. You can do this by simply painting with your finger. However, make sure you so this very carefully, so you brush over vast swaths of areas with different textures. It is better if you zoom in on the photo so you can make better traces. If you are on an iPad, an Apple Pencil will help you make your drawings more precise.
As you edit and retouch your photos, keep an eye out for common blemishes such as smile lines, wrinkles, unwanted freckles, moles and stray hairs. Also, make your editing not too obvious to maintain a natural look on your photo. Over-editing your picture is mostly just as bad or even worse than the unedited one. Here is an example of an unedited and edited photo below.
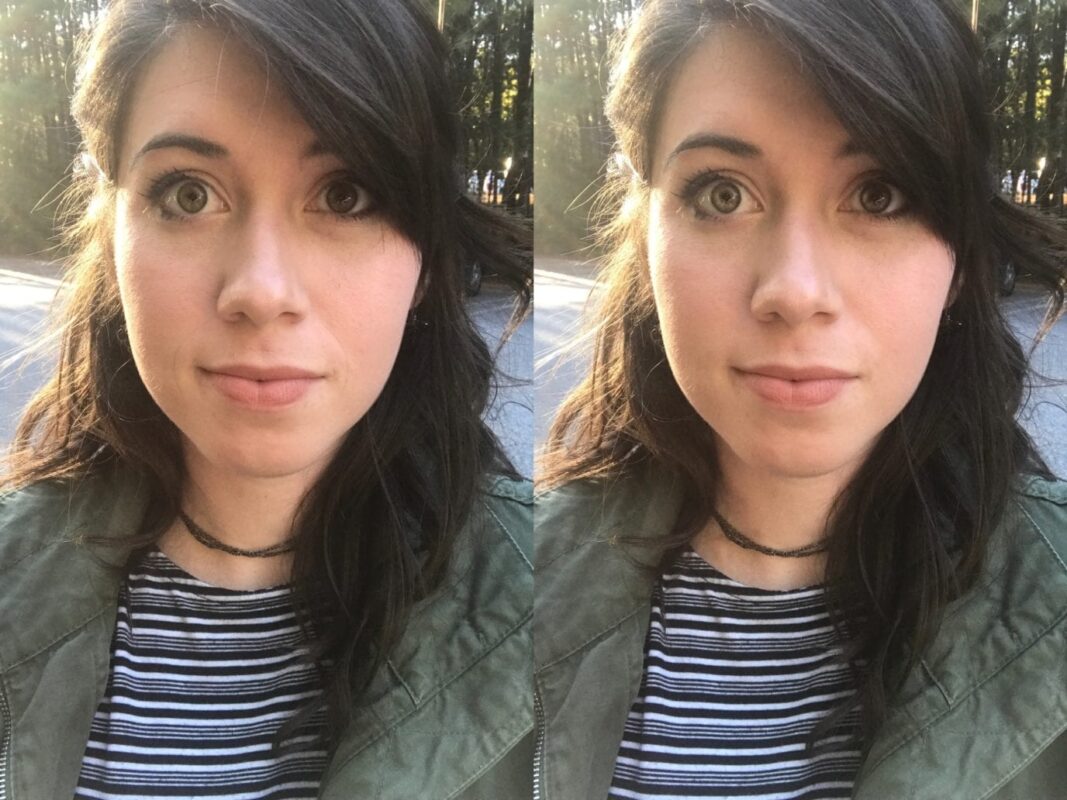
From the photo above, you can see that the changes made to the photo aren’t too noticeable, even though it is. The changes you make to your photos do not have to be jarring. In fact, when the changes you make to your photo are almost unnoticeable and still improve the photo, then that can be a strong testament to the quality of the initial photo. Also, make sure you try to keep the natural look as this is the best way to go when you are editing.
Wrapping Up
The retouching feature on the Pixelmator is just one of the many features of the Pixelmator app for iOS, and if you love to edit your photos on your iOS device, then I would strongly recommend the Pixelmator app for you. You, of course, get a lot for just $4.99.
Do you also use Pixelmator? Are you familiar with any other tricks on the Pixelmator app? Let us know in the comment box below. Thank you.
