
Ever since we began installing apps from the App Store, we have had just one complaint, and that is the App Store not letting you download apps that are over 200 MB using cellular data. This might turn out to be an issue if you wanted to download an app on the go and you are not able to do that due to the restriction.
Well, the new iOS 13 update has made this restriction optional which has made me love Apple even more.
If you follow the steps below, you could easily disable the download restriction and be able to install apps of over 200 MB via cellular networks from the App Store on your iPhone running iOS 13.
How to Download Apps Larger than 200MB Over Cellular Network on iPhone running iOS 13
Before you proceed with this guide, you need to make sure that you have the iOS 13 update installed on your iPhone.
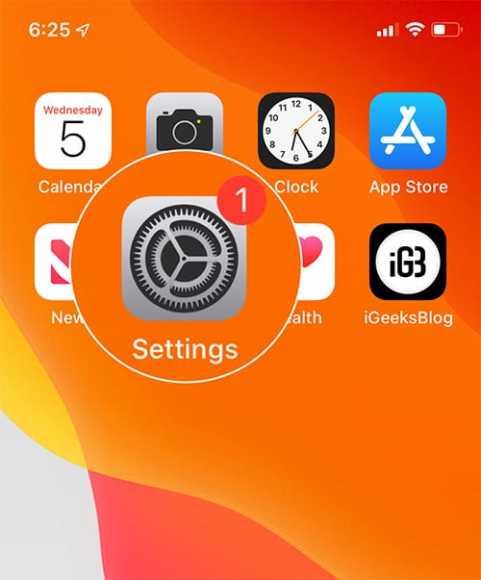
- Launch the Settings app on your iPhone running iOS 13.

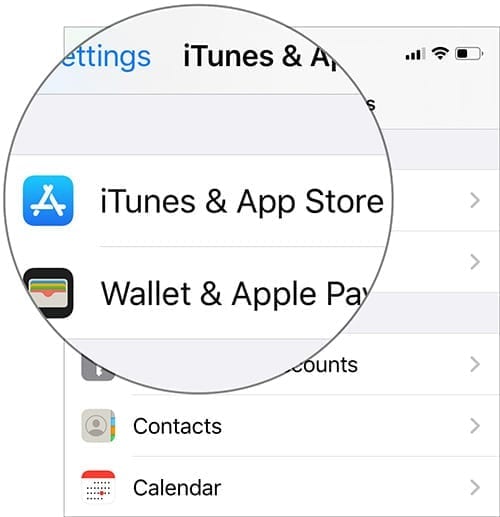
- Next up, scroll down the screen until you see the iTunes and App Store option. Tap on it.

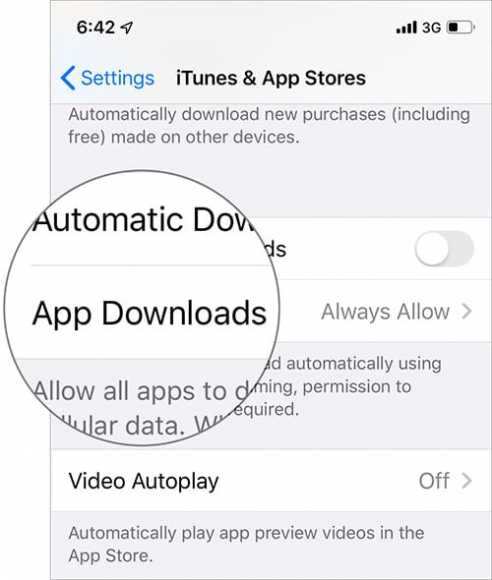
- Next, tap on the App Downloads option.

- You should see three options displayed on the screen.
- Always Allow- This option will allow you to download all apps using cellular data irrespective of the size.
- Ask if Over 200 MB- You will receive a notification asking you for permission if the app is over 200 MB.
- Ask First- This will make you receive a notification asking for permission to download apps even if it’s not up to 200 MB.

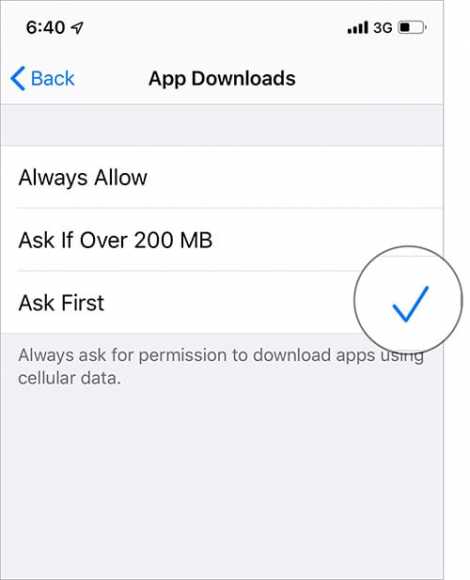
Select any option you want and that’s it!
If your iPhone is running iOS 12, you would need to implement a trick to be able to download apps of over 200 MB via cellular data.
How to Download Apps Larger Than 200MB without WiFi in iOS 12
- Launch the App Store on your iPhone.
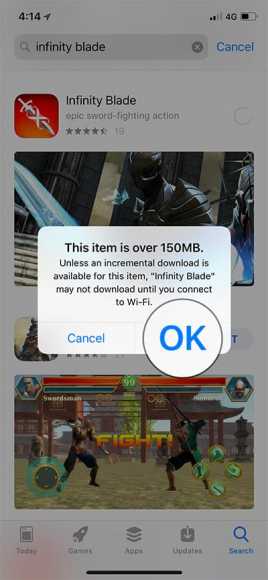
- Next, go to the page of the app you wish to download and then tap on the GET button.
- Now, you need to confirm using your Face ID, Touch ID or password.

- A notification should display on your screen saying, “Connect to a Wi-Fi network to download [App name]”. Not to worry, tap on OK.

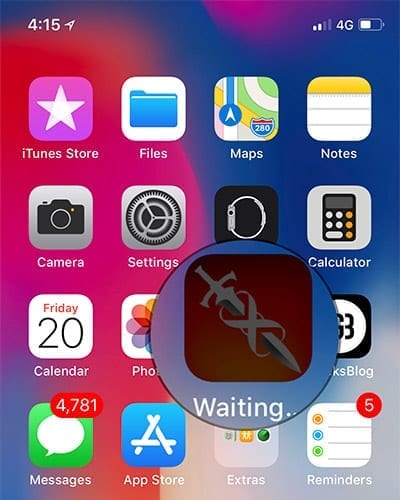
- Next, go to the Home screen of your iPhone.
- You should see the icon of the app until you connect to Wi-Fi.

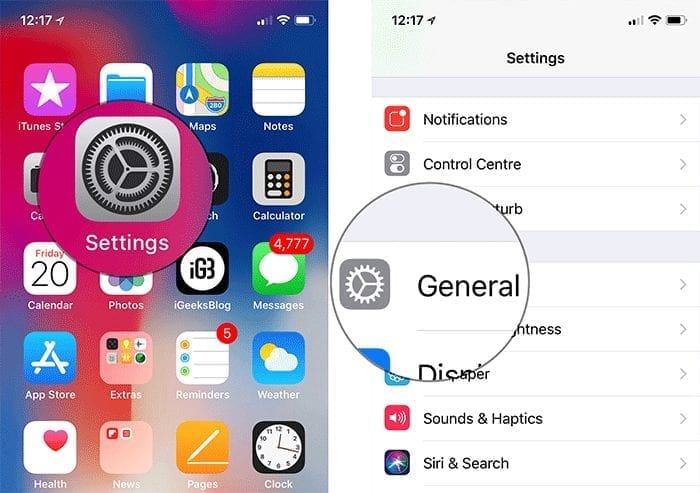
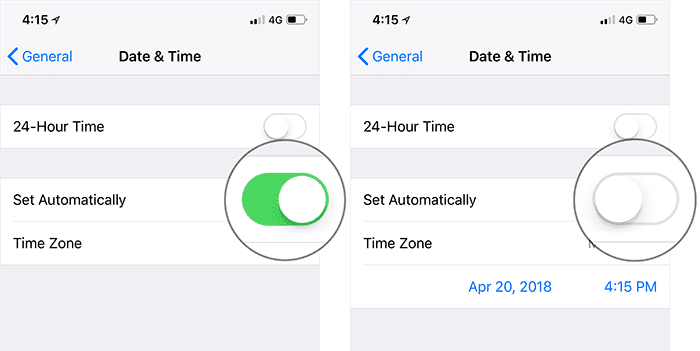
- Go to the Settings app and tap on the General option.

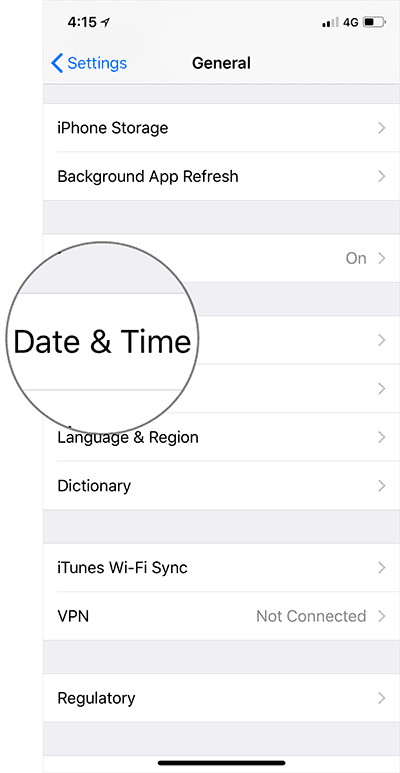
- Next, tap on Date & Time.

- Now, disable the Set Automatically option.

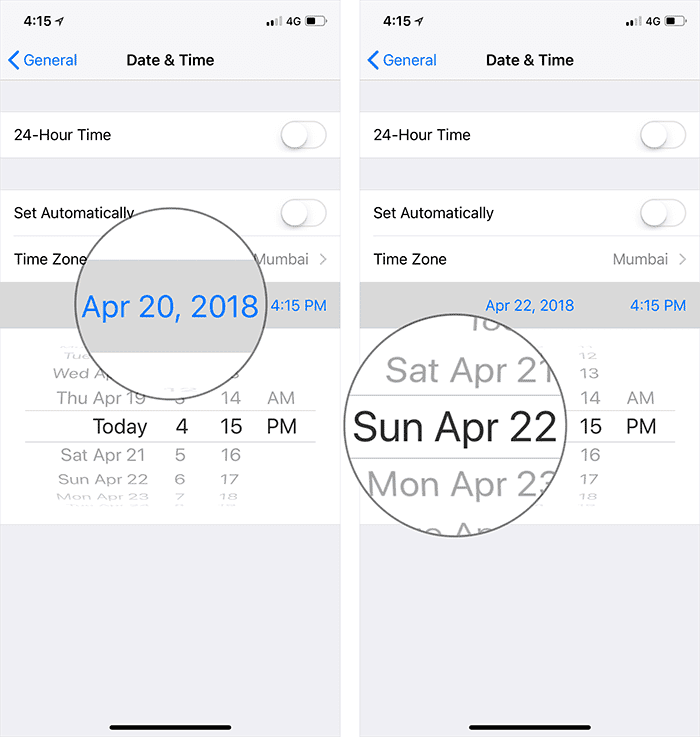
- Now, tap the Date and then move it 1-2 days forward.


That’s all. After a few moments, the app will start to download. Once it is done downloading, you can go ahead to launch it.
Make sure to edit your Date and Time back to normal by re-enabling the Set Automatically option.
