Do you know that just as you can take screenshots on your mobile devices; it is equally possible to do the same on your PC. For those of us who do not know, however, this tutorial guide is for you. If you are already familiar with this fact, don’t just disregard this guide, as you might learn a new thing or more.
In this tutorial, I shall be giving steps to both Windows and Mac OS users on how they can take Screenshots of their display.
How to do screenshot on Windows PC (For the Windows OS users)
There are a couple of ways that you can take a screenshot on Windows; we shall be looking at about four of these methods.
Method 1 – Using the Snipping Tool
The Snipping Tool is a program that comes with all versions of Windows starting from Windows Vista upwards – except the Starter and Basic Editions. To take a screenshot using the snipping tool, follow the steps below:
Step 1: Locate the Snipping Tool and launch it. On earlier versions of Windows before Windows 8, click the Start button>click All programs>click Accessories>click on Snipping Tool to open it.
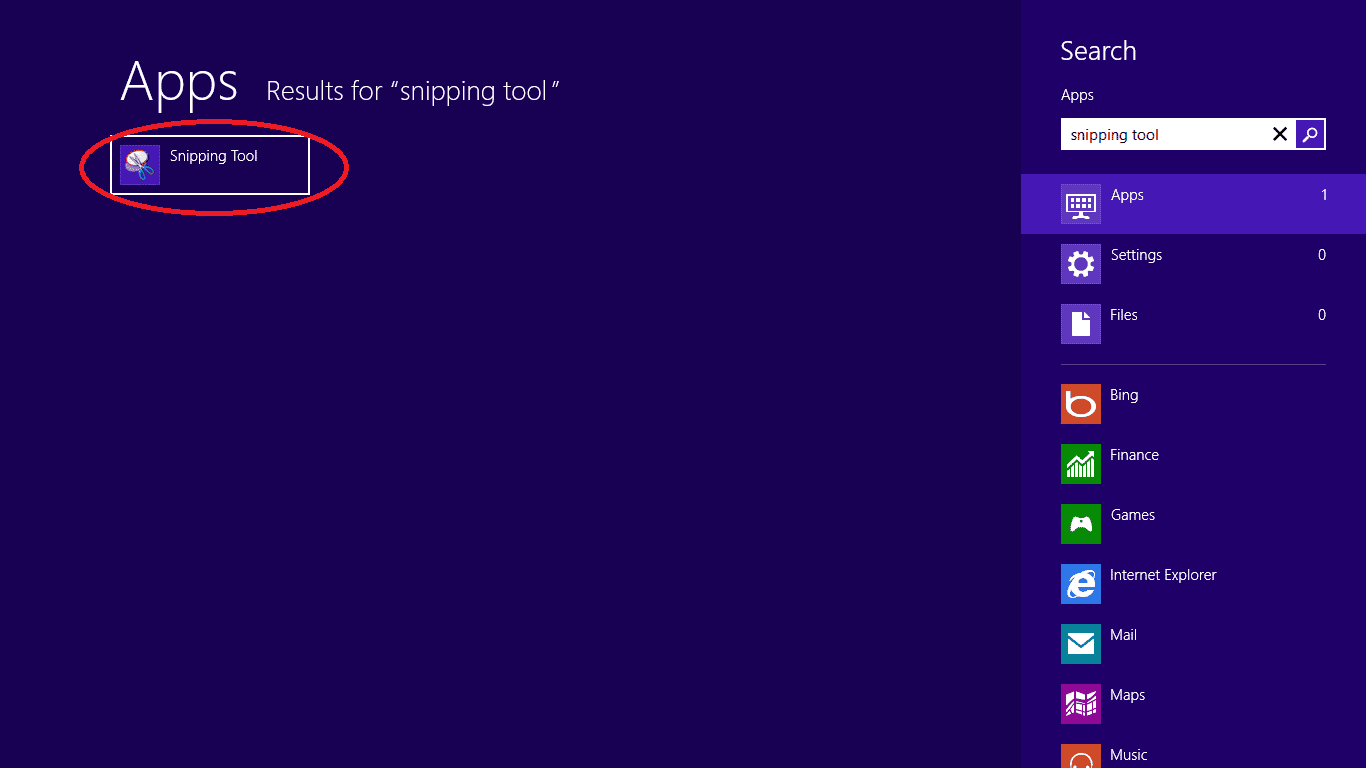
For Windows 8 and later versions, make a search on the Start screen for the tool and click on it in the list that appears.
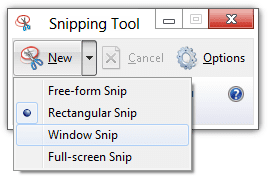
Step 2: Click the arrow next to the New button in the Menu bar of the Tool. You can select from the 4 options depending on the shape and area of the screen you wish to capture. The four options are:
- Freeform (to draw any shape with the mouse)
- Rectangular (to draw a rectangular shape around the area you wish to capture)
- Window (to screenshot a window)
- Full-screen (to snip the entire screen display except the Snipping Tool window)
Step 3: Drag the crosshair over the area you want to screenshot. Click the Save button (the floppy disk icon) to save your snip. You can also annotate your snips before saving them.
Method 2 – Using the PrtSc (Print Screen) button
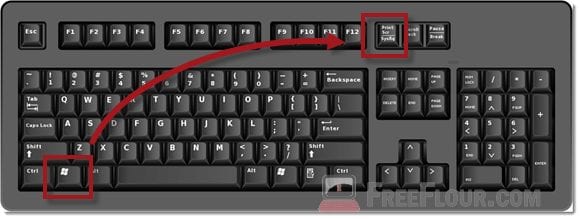
By using the PrtSc button alone or with a combination of other keys on a Windows PC you can also screenshot your display.
For Windows 8 and 10 PC, using a combination of the Windows key and PrtSc button should do the trick.
- Hold the Windows button and press the PrtSc button. Your screen should dim momentarily to indicate that a screenshot has been taken.
- You can locate the captured image by going to File Explorer>Pictures>Screenshots.
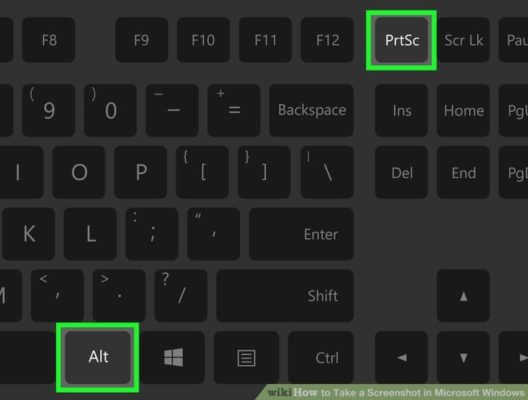
For Windows OS versions earlier than Windows 8 do the following:
- Press the PrtSc button or hold the Alt button and press the PrtSc button – for a single window screenshot.
- You would get no confirmation after the screenshot. To get the screenshot, open any program that supports the use of images such as Paint or Word.
- Press the paste button in the program or tap Ctrl + V shortcut to paste the image onto the program.
- Save the image by going to File menu>Save and then enter the desired name.
Conclusion
This tutorial is becoming awfully lengthy, I guess I’ll have to stop here for now; and continue in the next part.
MUST READ: How to take a screenshot on Mac Computer (Windows and Mac OS) – Part 2
If you have any questions and/or suggestions, please do not hesitate to use the comments box below.
Thanks
