Though I never forget to wish my friends and loved ones on their birthday or any special occasions, I do not take any chance and make sure that my heartfelt message gets to them at the perfect time.One of the simple tricks that I use to make sure that I do not miss an opportunity to show my love and regards is planning. Thanks to several new age email apps, scheduling emails on iPhone, iPad and Mac is as easy as pie and you too must take the full advantage of this smart way to continue to win praise from your loved one.
The stock Mail app for iOS and macOS may have really improved of late. However, there some user-friendly features it does not have like scheduling emails. There are three third-party email apps like Newton Mail, Microsoft Outlook and Spark, which I have found a step ahead of their peers. Any of these three email apps can be used to schedule messages.
How to Schedule Emails on iPhone, iPad, and Mac
How to Schedule Emails on iPhone, iPad, and Mac to Send it Later
How to Schedule Emails on iPhone or iPad
In this guide, I am going to show you how to schedule emails using Spark. I use Spark because it is a bit smarter and pretty easy to use.
Step #1. First off, you need to download Spark on your iPhone or iPad and then set it up. The app requires iOS 9 or later.
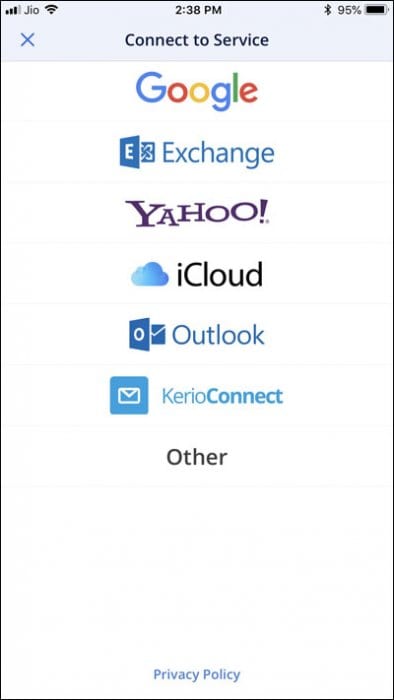
Spark supports many email apps like Google, Yahoo, Outlook and more. Just launch the app on your device and then log in to your existing email account.
Spark App supports various email apps like Google, Yahoo, Outlook
Step #2. Once you have set up Spark on your device, create a new email. To get started, tap on the tiny pen icon at the bottom of the screen. Next up, select the recipient and also enter a subject. Write the message.
Tap on tiny pen icon to create new email and then write the message in Spark App
Step #3. Next, you have to tap on the email scheduling icon at the top right corner of the keyboard.
Tap on email scheduling icon in Spark App
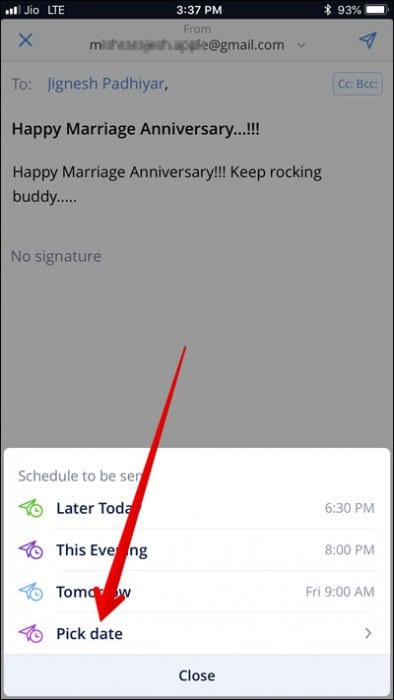
Step #4. Next, you can choose to use the pre-defined schedules or choose your own date.
Note – Spark allows you to schedule messages up to six months into the future.
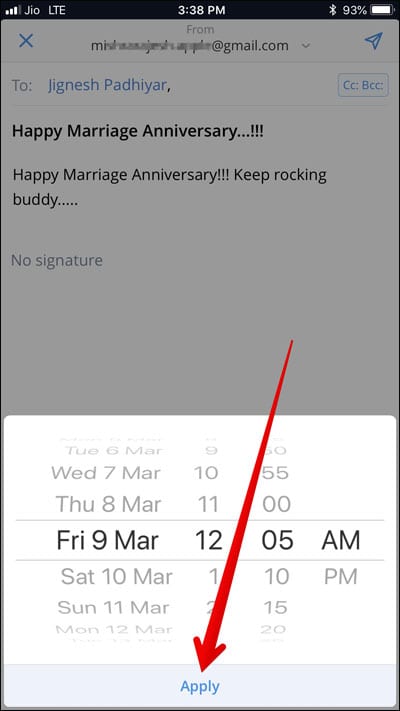
To select a time and date of your own choice, tap on “Pick Date.”
Tap on Pick date to choose your scheduling date and time in Spark App
Step #5. Now, you need to tap on Apply.
Step #6. When you are done, tap on the scheduling icon at the top right corner of the screen.
That is all! Your message will be automatically sent on the date and time you set.
The process involved in scheduling emails on iPhone or iPad is just as easy on Mac too. Continue reading to learn more.
How to Schedule Emails on Mac
Step #1. First off, you need to download Spark on your Mac and set it up using your existing email account.
Step #2. Next, you need to create a new email and then enter the recipient, subject and the message body.
Step #3. Next, click on the Schedule icon which is right next to the Send button.
Create new email, select recipient, subject and write a message, click on Schedule icon on Mac
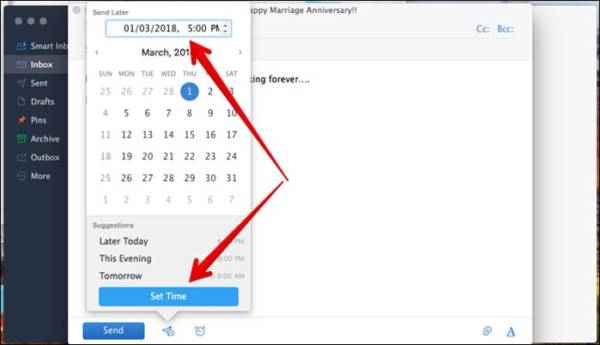
Next up, you can either select from the predefined dated and times or you can set a date and time of your own. Once you have set the scheduled time and date for the email, click on Set Time when ready.
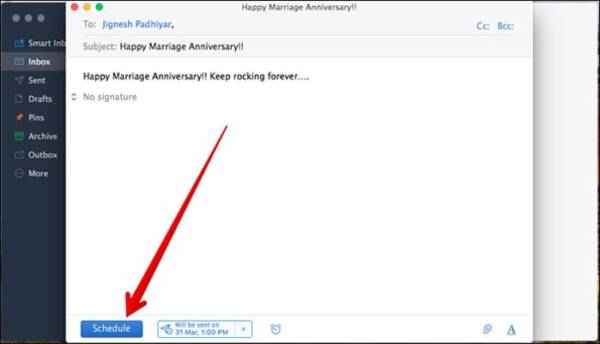
After you have scheduled the email, click on the blue schedule icon to save the email and schedule it.
That is all! The email will be automatically sent on the date and time you set.
Wrapping Up
So with these few and easy steps, you can schedule emails and never have to risk forgetting to wish your loved ones. Have any feedback? Make sure to share it in the comments.

Wow! This really great innovation! Thank you sir
My eMail provider allows me to do this natively while I’m logged in via a web browser, so if yours allows for that too, no need to fumble around on your local machine.
Another option is laters.net – works with any email application and there is a free option.